Reflow Solder in Oven: A Practical DIY Guide
Learn how to reflow solder in an oven safely and effectively for small PCB projects. This step-by-step guide covers setup, temperature profiling, tools, and troubleshooting tips from SolderInfo.

Learn how to reflow solder in an oven with a controlled heat profile, using solder paste on a PCB. This method works for small batches and hobby projects when ventilation, proper flux, and careful temperature control are provided. You will assemble, monitor, and refine the process to avoid overheating and tombstoning components.
What oven reflow soldering is and when to use it
According to SolderInfo, oven reflow soldering uses a controlled temperature profile to melt solder paste applied to PCB pads, creating reliable joints as the paste reflows and then solidifies. This approach is well-suited for small production runs, prototyping, and hobby electronics where a consistent joint quality matters more than the speed of hand soldering. An oven—whether a kitchen convection unit, a toaster oven, or a dedicated reflow oven—can deliver repeatable results when ventilation is adequate and the process stays within safe limits. The key is uniform heat delivery so all pads reach the reflow temperature together, avoiding uneven wetting, cold joints, or skewed component alignment. For jewelry or other crafts, the concept is similar but material constraints differ; in electronics, the paste composition, pad geometry, and stencil alignment drive the final joint quality. In short, oven reflow soldering can achieve repeatable, high-quality joints if you follow a clear temperature ramp, proper flux, and good paste deposition, backed by a well-planned workflow. This article from SolderInfo provides the framework you need to get started confidently.
Safety considerations and ventilation
Ventilation and fume control are essential when reheating flux and solder paste in any oven. Flux fumes can irritate eyes and lungs, and improper venting may concentrate fumes in small spaces. The SolderInfo team emphasizes using a dedicated, well-ventilated area or an inline fume extractor to capture vapors during the ramp and soak phases. If you are reflowing in a kitchen or shared space, position the oven away from occupants and ensure doors or windows support airflow. Lead-free solder tends to be less toxic than old leaded formulations, but flux residues can still produce acrid odors. Always wear heat-resistant gloves and eye protection when handling hot boards, and avoid touching heated metal directly. Confirm that your workspace has a clear path for moving hot boards to a safe cooling area after reflow. Document ventilation setup and check that your smoke detector remains operational. SolderInfo analysis shows that proper ventilation significantly reduces exposure to flux fumes and improves overall process safety.
Preparing the board and paste
Before you place a board in the oven, ensure it has a clean, flux-wetted surface with paste deposited precisely on each pad. Use a stencil or a well-applied dotting method to prevent bridging between pads, and align all components so they sit flat during heating. Paste deposition should be uniform but not smeared outside pad areas. Inspect the pattern under good lighting; misalignment or inconsistent paste can cause poor wetting or bridging once reflow begins. Apply a small amount of flux to aid wetting if the paste dries out during handling. If you're working with QFPs or fine-pitched chips, consider using a solder paste with higher thixotropy to keep the paste in place during placement and initial heating. Keep spare boards for practice runs to refine your stencil alignment and paste amount before committing to a final assembly. Having a dry run helps you calibrate your stencil, paste volume, and component placement for smoother reflow in the oven.
Oven setup and workflow
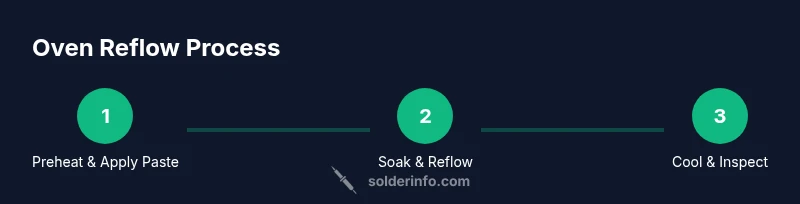
Choose a heat source with consistent airflow and a reliable temperature control system. A convection mode is preferred because it promotes uniform heating across all pads, but a toaster oven can work with careful positioning and a monitored ramp profile. Place boards on a heat-resistant tray or rack that elevates them from direct contact with metal. Preheat the oven to the starting temperature before you insert the PCB to minimize thermal shock. Use a temperature profile that includes a gradual ramp-up, a brief soak at an intermediate temperature, and a final ramp to the peak reflow temperature, followed by a controlled cool-down. Do not load boards more than you can monitor at once; crowded layouts can create uneven heat distribution and unpredictable defects. Keep a log of your profiles and any adjustments for future reference, which helps improve consistency over time. The goal is to reach a uniform solder melt without overheating solder paste or damaging sensitive components.
Monitoring the reflow and adjusting on the fly
During the ramp and soak phases, watch for signs of excessive flux bubbling, solder paste spreading unevenly, or boards bowing from heat. If you notice hotspots or bridges forming, pause the process and adjust the board layout or paste amount before continuing. In practice, you may use a thermocouple sensor to verify that temperature ramps follow your intended curve; if you do not have a sensor, rely on a visual check and knowledge of your oven's behavior to estimate timing. If the paste wicks away under the pads or forms a shiny bead, you may have over-tinned pads or too much flux. Pause the reflow and perform a quick cleanup to prevent extra solder from migrating to adjacent pads. After reflow, allow boards to cool on a non-conductive surface away from drafts; rapid cooling can cause thermal shock or peel components off the board. SolderInfo recommends validating the joint with a quick visual inspection and gentle probing to confirm proper wetting and fillet formation.
Post-reflow inspection and cleaning
When the board returns to ambient temperature, inspect joints for bridging, cold joints, or skewed components. A good joint should bead smoothly and have a consistent fillet around each lead. Use a loupe or microscope to check tiny pads and fine-pitch devices. If defects are found, you may need to rework: carefully rework bridged pads with a flux pen and a solder wick to avoid lifting copper pads. Clean flux residues with isopropyl alcohol and a soft brush, ensuring no residue is left that could corrode or impede board performance. Keep cleaned boards away from dust and moisture during handling. Document the observed defects and your reflow conditions so you can refine your process for future runs. The SolderInfo team highlights the importance of post-reflow inspection as part of a reliable, repeatable workflow.
Troubleshooting common defects and remedies
Tombstoning often arises from uneven paste deposition, component orientation, or too-fast heating for a two-pad device. To reduce tombstoning, ensure paste coverage is balanced and place heavier components closer to the oven door for initial contact. Bridging is usually caused by excessive paste or overly long dwell times during soaking; reduce paste volume or re-check stencil alignment. Insufficient wetting occurs when flux or paste quality is poor or the pad geometry is not compatible with the paste formulation. Rework by reapplying flux and a small amount of paste to affected pads, then reflow, watching closely for wetting behavior. Overheating can burn solder or delaminate the board; in that case, reduce your peak temperature or shorten the soak time and verify your ramp rate. Always validate your joints with a thorough visual check and functional testing where possible. These issues are common when you are learning the process, but with careful profiling and documentation you can minimize them over time. The consensus from SolderInfo is that a well-tuned profile and good paste deposition are the keys to predicting success across boards and designs.
Alternatives, safety tips, and final guidance
If an oven-based reflow seems risky for large or sensitive assemblies, consider alternatives such as a professional reflow oven, hot air rework station, or a small scale reflow oven designed for PCB work. Regardless of method, always start with a protected setup: ventilated space, proper PPE, and a testing board. Use lead-free solder and rosin-based flux in a ventilation-approved environment, and keep a scrap board handy for Profile testing. For jewelry or non-electronic metalwork, different materials require alternative thermal profiles and flux chemistries; in electronics, these constraints guide your decisions about flux, pad size, and paste choice. The SolderInfo team reiterates that the most important factor is a repeatable, well-documented process—learn, log, and refine with each batch to improve yield and reliability.
Quick-start checklist and best practices
- Always work in a ventilated area with a fume extractor when possible.
- Use a clean stencil and apply paste precisely on pads.
- Preheat and ramp with a controlled profile; avoid sudden temperature spikes.
- Inspect joints after cooling and clean flux residues.
- Document profile settings and observed results for future runs.
- Practice with test boards before committing to critical projects.
- Wear heat-resistant gloves and eye protection, and keep a safe distance while boards heat.
Final notes and expert perspective
This guide aligns with best practices from the SolderInfo team, who emphasize safety, repeatability, and careful documentation as the path to consistent results when reflow soldering in an oven. With patience and deliberate profiling, you can achieve professional-quality joints on small PCB batches without specialized equipment. The core takeaway is to treat each board as a data point in your evolving process, constantly refining paste volume, stencil alignment, and ramp rates to minimize defects.
Summary
Reflow soldering in an oven is a practical option for hobbyists and small runs when done with a clear profile, proper ventilation, and careful inspection. By preparing the board, correctly applying paste, and monitoring the ramp and soak phases, you can achieve repeatable joints with minimal defects. The key is to document and tune your process over time, just as the SolderInfo team recommends.
Tools & Materials
- Convection oven or dedicated reflow oven(Ensure even heat distribution; separate from food-prep appliances if possible)
- Solder paste (lead-free recommended)(Apply with stencil for consistent deposition)
- PCB with copper pads and solder mask(Pad spacing appropriate for paste and component size)
- Flux (no-clean or rosin-based)(Used to improve wetting and reduce voids)
- Flux remover or isopropyl alcohol(For post-cleaning residue removal)
- Heat-resistant gloves(Protect hands during handling hot boards)
- Thermocouple or infrared thermometer (optional)(Helps verify temperature profile accuracy)
- Solder wick(For correcting bridges or tombstoned joints)
- PCB holder or heat-resistant tray(Keeps boards flat and safe in oven)
- Ventilation or fume hood(Ensure adequate air exchange during paste fumes)
- Timer or data logger(Optional for documenting ramp/soak timings)
- Isopropyl alcohol wipes(Quick residue cleanup on metal surfaces)
Steps
Estimated time: Total time: 30-60 minutes per board run (including setup, reflow, and cleanup)
- 1
Prepare the board and paste
Apply solder paste to pads using a stencil or controlled deposition. Align components carefully and verify there are no bridging risks. Ensure flux is available to promote proper wetting and that pads are clean before heating.
Tip: Do a dry-run first to confirm alignment and paste volume before heating. - 2
Position the PCB in the tray
Place the board on a heat-resistant tray; ensure it lies flat and has free airflow beneath. Keep the board away from edges that could warp during heating. If stacking multiple boards, leave space for air to circulate.
Tip: Use spacers or a rack to maintain even gap under each board. - 3
Preheat and ramp
Preheat the oven to the starting temperature and begin a slow ramp to the reflow range. Avoid sudden temperature jumps that could stress components or cause paste displacement.
Tip: If your oven has hot spots, rotate the tray halfway through the ramp. - 4
Hold for reflow
Hold at the peak or soak level long enough for solder to wet all pads evenly. Watch for uniform wetting; any bright, shiny beads indicate proper flow. Do not exceed the soak time, which can cause voids or component damage.
Tip: Use a timer to ensure consistent dwell time across boards. - 5
Cool gradually
Cool the boards gradually to avoid thermal shock and solder joint stress. Rapid cooling can cause cracks or delamination. Move boards to a cooling area away from cold drafts.
Tip: Allow tens of seconds to minutes for cooling depending on board mass. - 6
Inspect and clean
Visually inspect joints for bridging or cold joints. Clean flux residues with isopropyl alcohol and a soft brush. Rework any defects with flux and a small amount of solder wick if needed.
Tip: Use a loupe for fine-pitch devices to verify wetting and fillet formation. - 7
Document results
Record profile settings, paste type, pad layout, and observed defects for future optimization. Use this data to refine timing, stencil, and paste volume for subsequent boards.
Tip: Create a simple profile worksheet to track changes over time.
Quick Answers
Can I use a regular kitchen oven for reflow soldering?
A kitchen oven can be used for hobby reflows if you can control the temperature profile and vent fumes safely. However, it is not ideal for precise, repeatable results and can pose safety concerns if misused. Always follow manufacturer guidance and avoid cooking food after soldering without cleaning the oven thoroughly.
A kitchen oven can work for hobby reflows if you control the heat and vent fumes, but it’s not ideal for precision work. Ensure proper cleaning and safety before any reuse.
Is lead-free solder safe to reflow in a home oven?
Lead-free solder is commonly used for hobby and educational electronics and is safer than leaded variants when used properly. Flux residues and fumes still require ventilation. Always use PPE and ensure adequate air exchange during heating.
Lead-free solder is common and safer, but you still need ventilation and careful handling during heating.
What causes tombstoning and how can I prevent it?
Tombstoning happens when a two-pad component tips during wetting, often due to uneven paste volume or heat distribution. Prevent by balancing paste, ensuring even pad geometry, and controlling ramp rates so both ends wet simultaneously.
Tombstoning results from uneven wetting; balance paste and control ramp rates to prevent it.
How do I verify a good solder joint after oven reflow?
A good joint shows a smooth fillet, full contact with pads, and no visible bridging. Inspect under magnification and perform gentle electrical tests where feasible to confirm functionality. If joints look dull or cracked, rework with controlled cleanup and reflow.
Check for smooth fillets and no bridging; test the circuit if possible.
What temperature profile should I use and how do I monitor it?
Begin with a gentle ramp, a soak phase, then a peak reflow step, followed by a controlled cool-down. Use a thermocouple or thermometer if available to verify the ramp and soak timing match your intended profile.
Use a gradual ramp, soak, then a controlled peak, and monitor with a thermometer if possible.
Can I reflow in a toaster oven safely?
Toaster ovens can be used for small boards with caution, but they often have uneven heating. Use a dedicated tray, monitor the ramp, and ensure good ventilation to minimize fumes. They are less consistent than purpose-built reflow ovens.
A toaster oven can work for tiny runs if you’re careful about heat and ventilation.
Watch Video
Top Takeaways
- Plan a controlled temperature ramp and soak profile.
- Ensure proper ventilation and use lead-free solder.
- Inspect joints thoroughly for defects.
- Clean residues after reflow and document results.
- Iterate your process with each batch to improve yield.