ifixit solder: A Practical Guide for Electronics Soldering
Master electronics soldering with Ifixit solder. This comprehensive guide from SolderInfo covers tool selection, surface prep, flux choices, and step-by-step techniques for reliable joints across electronics, jewelry, and plumbing projects.

With Ifixit solder, you’ll learn to make clean joints on electronics projects using a basic setup: a temperature-controlled iron, rosin-core solder, flux, and safety gear. This guide shows how to choose the right solder, prepare surfaces, and execute reliable connections. By the end, you’ll be able to repair or assemble PCBs with confidence, minimizing cold joints and damage.
Why Ifixit Solder Matters for DIY Electronics
According to SolderInfo, reliable soldering starts with a clear plan, a safe workspace, and quality consumables. When you choose Ifixit solder and tools, you gain access to approachable guides, standardized steps, and parts that fit common electronics projects—without unnecessary complexity. This approach is particularly valuable for hobbyists, jewelers, and DIY technicians working on PCBs, small gadgets, or sensor modules. The SolderInfo team found that using a consistent workflow reduces rework and increases first-pass joint quality. In practice, ifixit solder aligns with expert guidelines on flux usage, heat management, and joint inspection, making it easier to reproduce successful results across many projects.
- Clear goals: define the joint type (lead vs lead-free) and component layout before you heat.
- Consistent tools: use a temperature-controlled iron, compatible tip, and rosin-core solder.
- Safety as a habit: ventilate, wear eye protection, and keep flammables away from the work area.
- Learning loop: document the successes and mistakes so you can refine your technique over time.
By understanding these principles, you’ll maximize the benefits of Ifixit solder and build a reliable baseline for future projects.
Core Principles of Good Solder Joints
A good solder joint is more than a blob of metal. It requires clean surfaces, adequate heat transfer, and proper wetting to form a strong, conductive connection. Wetting describes how molten solder flows across a pad or lead; poor wetting leads to cold joints or bridges. Tinning the iron tip helps improve heat transfer and reduces the time needed to reach the solder’s melting point. Solder flow should fill the joint smoothly with minimal excess, and the joint should not move during cooling.
From the perspective of SolderInfo, mastering the balance between heat and dwell time is critical. Too little heat will produce a dull, grainy joint; too much heat can lift pads or damage sensitive components. A steady hand and a plan for heat management—using a clean tip, applying flux judiciously, and pausing briefly after flow—yields reliable results. Remember that lead-free solder generally requires slightly more heat and longer dwell times than traditional tin-lead alloys, so adapt accordingly and never rush the process.
Finally, post-solder inspection matters. Use a magnifier to check for solder bridges, cold joints, and gaps. If you see a dull or grainy surface, you likely need to reflow with fresh flux and a controlled heat source. Consistent practice builds your ability to recognize telltale signs of suboptimal joints before they impact performance.
Tools and Materials You’ll Need for Ifixit Solder Projects
Preparing a well-equipped workspace is half the battle. The following list ensures you have what you need for most electronics soldering tasks using Ifixit tools and standard components. Keep in mind that high-quality flux and a clean, well-lit area dramatically improve your results. In this section, we outline essential items, optional support tools, and safety equipment. The goal is to minimize guesswork and maximize repeatability, whether you’re repairing a broken connector or assembling a small circuit board.
- Soldering iron (temperature-controlled) – essential for consistent heat and safe work. A 40-60W range is typical for electronics, and a fine-tip conical or chisel tip is ideal for small pads.
- Solder – rosin-core solder is preferred for electronics. Lead-free solder reduces hazards and eases compliance, but be prepared for slightly higher heat requirements.
- Flux – rosin-based or no-clean flux helps with wetting and cleanup. Flux residues can be left if you are using no-clean formulations, but always verify cleanliness requirements for sensitive assemblies.
- Desoldering tools – wick or a desoldering pump can help correct mistakes without damaging pads.
- Flux brush or applicator – used to apply flux precisely where needed.
- Isopropyl alcohol (IPA) or flux remover – for cleaning off residues after soldering if necessary.
- Safety gear – safety glasses and a fume extractor or a well-ventilated area. A heat-resistant mat is recommended to protect your workspace.
- Tip cleaner or brass sponge – to keep the iron tip clean and ready for efficient heat transfer.
- Helping hands or third-hand tool – useful for positioning tiny components while you work.
- Magnifier or loupe – for detailed inspection of fine joints and pads. Optional, but highly recommended for beginners and micro-soldering.
- Cleaning cloth or lint-free wipes – to wipe down surfaces before and after work.
- Storage for used tips and components – organization saves time and reduces mistakes.
Having these items ready helps you maintain a smooth workflow and reduces the temptation to overheat parts or skip essential prep. Remember to store lead-free solder and flux away from heat sources and to ventilate the workspace adequately, especially when flux fumes are involved. In practice, the right toolkit is a direct predictor of joint quality and learning speed.
Solder Types, Flux, and Wires: Choosing the Right Materials
Selecting the right materials is foundational to a successful soldering job. Ifixit solder products are designed for approachable, repeatable results, but you still need to understand the options. Leaded solder typically melts at a lower temperature and can be easier for beginners, producing fluid joints with less effort. Lead-free solder is more common in modern electronics due to regulations; it requires slightly higher heat and tends to be a bit stiffer, which helps with joint stability once you’re comfortable. The flux type you choose affects wetting and residue management; rosin-core flux is common for electronics, while water-soluble flux needs more thorough cleaning but can improve wetting in stubborn joints.
- Flux types: Rosin-based flux for general electronics; no-clean flux to minimize cleanup; water-soluble flux can be effective for heavy oxidation but requires thorough washing.
- Solder composition: Tin-lead alloys for ease of flow vs. lead-free alloys for safety and compliance. Either type can produce reliable joints when used with correct technique.
- Wire diameter: Thinner wires (e.g., around 0.6–0.8 mm) deliver precise control for small components; thicker wires are more forgiving on larger pads but can be harder to route in dense boards.
- Spool quality and storage: Use fresh solder and rotate stock to prevent oxidation. Cool, dry storage reduces brittle joints and tin whiskers.
Understanding these options helps you tailor your approach to the project’s needs. The SolderInfo guidance emphasizes starting with rosin-core lead-free solder for most electronics work, maintaining careful flux usage, and ensuring a clean, static-free work area to maximize wetting and joint reliability. When you experiment with different formulations, document outcomes to build a personal reference for future projects.
- Practical tip: always verify joint flatness and absence of bridging with a magnifier after cooling. Poor wetting often shows as a dull surface with a slight grainy texture or a visible gap between pad and lead.
Surface Preparation and Tinning Techniques
Surface preparation is the quiet workhorse of good soldering. Clean surfaces accept solder more readily and create stronger, more reliable joints. Remove oxidation from pads and leads with isopropyl alcohol and a nib of scotch-brite or a lint-free wipe. If a pad is heavily aged, you may need a very light abrasion to restore brightness. After cleaning, place a tiny amount of flux on the surface to improve wetting and prevent re-oxidation during heat. Tinning the pad and the tip is a crucial step that pay dividends in heat transfer efficiency.
Tin the tip by applying a small amount of solder and letting it form a smooth, shiny coating. Be careful not to flood the tip; the goal is to maintain a tight, consistent contact with the copper surface. For pads or component leads, apply a thin film of solder to prevent the joint from cooling too quickly and to promote even flow once heat is applied. If you find a pad is not accepting solder well, re-clean the surface and re-apply flux before attempting again. When reworking, keep the iron’s heat focused on the joint and avoid dragging the tip across the board as this can lift copper or damage traces.
Overall, consistent tinning and surface prep set the stage for clean joints. Practice on scrap boards to refine your technique before working on critical components. The habit of pre-cleaning, pre-tinning, and mindful heat control significantly reduces common issues such as bridging and incomplete wetting. Regularly inspect pads for signs of lifted copper and re-coat as needed to maintain solderability over time.
Soldering Setup and Temperature Control with Ifixit Gear
Effective soldering demands consistent heat management. A temperature-controlled iron allows you to adjust heat to the specific needs of leaded or lead-free solder, reducing the risk of overheated components. Set the iron to a comfortable, steady temperature that melts solder quickly without scorching flux or damaging delicate parts. Use a small, appropriate tip for precision work on dense PCBs; a chisel or fine-point tip is typically a good choice for electronics work.
- Pre-tin the tip before every session to maintain heat transfer efficiency.
- Apply flux to the joint area first to improve wetting and to reduce the time the pad is exposed to heat.
- Position components, hold steady, and then apply solder to the joint rather than directly to the tip. This approach minimizes solder starvation and helps prevent bridges.
- Periodically clean the tip with a brass sponge or damp sponge to maintain surface cleanliness and heat transfer.
A consistent workspace is essential. Use good lighting, a magnifier, and a rule to pause if you see signs of overheating, such as scorching flux or lifted pads. Ifixit tools are designed for approachable projects, but the core skill remains steady heat management and clean technique. Regular practice with the same setup helps you recognize subtle changes that indicate a need to adjust heat or technique more quickly.
Troubleshooting Common Soldering Issues
Even experienced technicians encounter a few recurring issues. Anti-bridging strategies—like adding flux and ensuring proper pad cleanliness—reduce solder bridges. Cold joints often look dull and may crack under flex; reflow with fresh flux and heat until the joint looks smooth and shiny. A joint with insufficient solder flow can indicate inadequate heat transfer or dirty surfaces. In tight spaces, a joint may be incomplete if the component is moving during cooling, so stabilize it before finalizing the joint. Remember to inspect with a magnifier and compare against a reference joint.
Bridging typically occurs when too much solder is applied or the joint is heated for too long. Use flux, pause to reflow, and clean up excess solder with wick to correct this. If you notice a joint that has a hollow feel or breaks away when probed, rework it with a fresh flux and a controlled reflow. Additionally, flux residues can be corrosive on some boards; if you see unusual corrosion or discoloration around joints, clean the area and inspect the trace integrity before powering the circuit.
Safety note: never inhale flux fumes in a poorly ventilated space. If you rely on a fan, position it to pull fumes away from your face rather than blowing directly onto the joint. Maintaining an orderly work area can help you catch issues early and prevent mistakes from becoming permanent damage.
Practice, Maintenance, and Next Steps
Applied practice is the fastest path to mastery. Start with a few simple, low-risk projects—replacing a connector, repairing a sensor lead, or soldering a small wire-to-pad connection. Build muscle memory by repeating the same motions with a consistent setup: clean pads, pre-tin, flux, place, heat, and inspect. Once you’re comfortable, gradually increase difficulty by working on finer pitch components or more complex boards. Keep a notebook of technique variations and outcomes to guide future decisions.
Maintenance matters as much as technique. Regularly clean your iron tip, tin it after use, and store it in a dry environment away from contaminants. Keep flux containers capped and away from heat sources, and ensure your workspace is well-ventilated to manage fumes. Ifixit solder equipment benefits from routine checkups: replace worn tips, verify the iron’s temperature stability, and refresh flux residues to preserve performance over time. With deliberate practice and consistent maintenance, you’ll see a meaningful improvement in joint quality and project reliability.
Quick Start Plan and Next Steps
If you’re new to soldering, begin by gathering a basic, dependable toolkit and a few practice boards. Follow this guide step-by-step, watch a few reputable video demonstrations, and then perform your first controlled joint on scrap material. As you gain confidence, introduce additional materials and techniques—such as flux optimization, different wire gauges, and rework strategies—to expand your capability. The key is to practice regularly, note what works, and keep safety as a non-negotiable priority. By following these practices, you’ll be ready to tackle more ambitious projects with Ifixit solder in your toolkit.
Tools & Materials
- Soldering iron (temperature-controlled)(40-60W range; fine-tip for precision work)
- Solder (rosin-core, lead-free preferred)(Diameter ~0.6-0.8 mm; ensure lead-free if working on electronics)
- Flux(Rosin-based or no-clean flux; apply sparingly)
- Desoldering wick or pump(For removing excess solder during corrections)
- Flux brush(Precise flux application)
- Isopropyl alcohol (99%)(For cleaning surfaces before and after soldering)
- Safety gear (goggles, ventilation)(Eye protection and proper ventilation are essential)
- Brass sponge or wet sponge(Keep the tip clean and heated properly)
- Helping hands / stand(Helpful for tiny components)
- Magnifying glass or loupe(Aid in inspection of fine joints)
Steps
Estimated time: 30-60 minutes
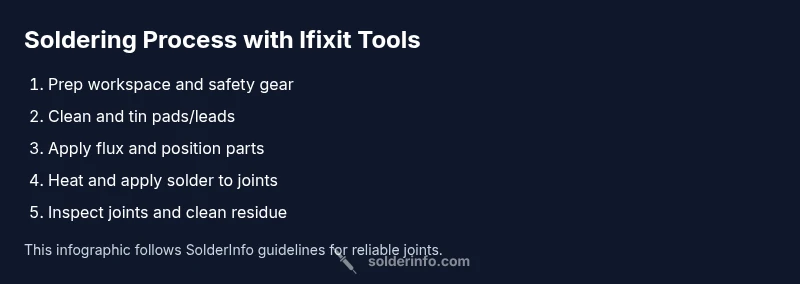
- 1
Set up a safe workspace
Prepare a clean, well-lit area with a heat-resistant mat and a fume source. Put on safety glasses and tie back hair or clothing to avoid contact with the hot iron. Arrange all tools within easy reach to minimize movement during the process.
Tip: Keep a dedicated scrap board for practice joints so you don’t risk valuable components. - 2
Inspect components and plan joints
Review the circuit board layout and identify pads, leads, and orientation. Decide which joints will be joined first and ensure there’s no mechanical stress on the components during soldering.
Tip: Polarity-sensitive parts should be planned first to avoid accidental reverse installation. - 3
Pre-tin the iron tip
Heat the iron and apply a small amount of solder to the tip to form a shiny, protective coating. Wipe off excess solder with the brass sponge to maintain heat transfer efficiency.
Tip: A properly tinned tip transfers heat more effectively and lasts longer than a dry tip. - 4
Pre-tin leads/pads
Apply a thin layer of solder to the component leads and pads to promote even flow when heat is applied. This helps reduce heat transfer time and prevents cold joints.
Tip: Be careful not to bridge adjacent pads while tinning. - 5
Apply flux and position parts
Apply a small amount of flux to the joint to improve wetting. Position the component and align leads with pads, then stabilize before applying heat.
Tip: Flux releases vapor that cleans and helps solder flow; too much flux can puddle and create residues. - 6
Heat and apply solder to joint
Touch the tip to the joint and allow the joint to heat, then apply solder to the joint, not the tip, until you see a smooth, shiny fillet form.
Tip: Remove heat as soon as the solder flows and pad is adequately coated to avoid overheating. - 7
Inspect and rework if necessary
Use a magnifier to verify the joint is shiny and filleted without bridges. If needed, reflow with more flux and adjust heat. Clean residues after cooling if required.
Tip: If you see a dull area, reflow to improve wetting; don’t press the iron after cooling.
Quick Answers
What is Ifixit solder?
ifixit solder refers to soldering tasks and workflows that align with Ifixit tools and guides. In this guide, we describe general approaches to using Ifixit-compatible gear for reliable joints in electronics, jewelry, and plumbing projects.
ifixit solder refers to using Ifixit gear and guides for reliable electronic joints. This section explains the basics and practical steps.
Do I need flux with Ifixit solder?
Flux improves wetting and helps solder flow into joints. Use rosin-based or no-clean flux for electronics, and apply only a small amount to avoid residues that may complicate cleaning.
Flux helps the solder flow smoothly and protects the joint during heating. Use a small amount for best results.
How can I prevent cold joints?
Ensure surfaces are clean and properly pre-tinned, apply flux, and heat the joint evenly until solder flows. Avoid moving parts during cooling and use correct tip size to maintain consistent heat transfer.
Keep surfaces clean, heat evenly, and avoid moving the part while the solder cools.
Is lead-free solder safe for electronics?
Lead-free solders are widely used for electronics due to safety and regulatory reasons. They require careful temperature control and cleaning, but with proper technique, they yield reliable joints.
Lead-free solders are safe for electronics when used with proper heat control and good ventilation.
What safety equipment should I wear when soldering?
Wear safety glasses, work in a ventilated area, and use a fume extractor or fan. Avoid loose clothing and keep flammables away from the hot iron.
Protect your eyes, vent fumes, and stay safe around the hot iron.
How should I clean and maintain my soldering iron tip?
Clean the tip regularly with a brass sponge, re-tin after use, and store it in a dry, safe place. This extends tip life and improves heat transfer.
Clean and tin the tip after use to keep it performing well.
Watch Video
Top Takeaways
- Choose appropriate solder and flux before starting.
- Tin the iron tip for better heat transfer.
- Apply flux to improve wetting and cleanliness.
- Inspect joints with a magnifier and rework if needed.
- Maintain and store your soldering tools properly.