How to Solder onto a PCB: A Complete Step-by-Step Guide
Master the art of soldering onto a pcb with confidence. This SolderInfo guide covers prep, technique, testing, and troubleshooting for reliable PCB soldering results.

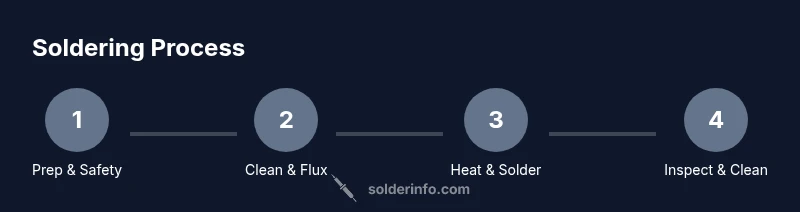
From this guide you will learn how to solder onto a pcb, including prep, technique, and inspection. You'll need a clean workstation, a good soldering iron, flux, and safety gear. Follow the steps to avoid cold joints, bridges, and overheating, then test connections with a multimeter and inspect under a magnifier.
Why soldering onto a pcb matters
Soldering onto a pcb establishes the electrical pathways that let circuits function. A sound joint provides reliable conduction, low resistance, and mechanical stability, which matters for everything from a simple LED to a complex microcontroller board. Poor soldering can cause intermittent connections, open circuits, and unpredictable behavior that frustrates hobbyists and professionals alike. In manufacturing, consistent joints influence product reliability, quality control, and customer satisfaction. In this guide we emphasize clean surfaces, controlled heat, and appropriate flux to maximize wetting and minimize oxidation.
A key concept when learning how to solder onto a pcb is wetting — the ability of molten solder to flow and cling to both pad and lead. Good wetting reduces the chance of cold joints and solder bridges. Pad geometry also matters: large pads can wick heat differently than fine-pitch pads, so adjust your technique accordingly. Finally, always work in a well-ventilated area and use eye protection; fumes and hot splashes can be hazardous. Soldering quality improves with deliberate practice and a structured approach, not with brute force.
Essential tools and materials
Before you begin, gather a focused set of tools and materials designed for PCB work. A temperature-controlled soldering iron with a sharp, medium-tipped nozzle helps you hit tiny pads without overheating nearby traces. Choose rosin-core solder (lead-free preferred) for electronics, plus flux for challenging joints. Keep desoldering wick and a desoldering pump handy for corrections. Have isopropyl alcohol, lint-free wipes, a magnifier or loupe, and safety glasses. An ESD-safe mat and wrist strap protect sensitive components. Finally, a clean, well-ventilated space with a fume extractor or fan makes the process safer and more comfortable.
Preparing the work area and safety
Set up in a well-ventilated area. Place the PCB on an anti-static mat and wear an ESD wrist strap to prevent damage to components. Keep a heat-resistant mat under your board and always wear safety glasses to guard against splashes. Ensure your tools are organized: tip cleaner, flux, sponge, and a small pair of tweezers should be within reach. If you are using liquids, keep containers closed and away from your heat source. Good lighting and a stable vise or board holder reduce slips and improve joint accuracy.
Choosing solder and flux
For most electronics work, lead-free rosin-core solder in thin gauges (0.6–0.8 mm) provides reliable joints with manageable heat. Rosin flux lowers surface tension and improves wetting, which helps form sound joints on fine-pitch components. If you encounter difficult pads or corroded surfaces, apply a flux pen directly to the pad and rework with fresh solder. For very clean boards or no-clean flux, you may skip extra flux on straightforward joints, but flux is often your best ally for consistency and reliability.
Preparing the PCB and components
Inspect the PCB pads for oxidation or damaged copper. If needed, clean pads with isopropyl alcohol and a lint-free wipe. For through-hole parts, pre-insert leads and trim excess length so they protrude slightly beyond the pad area. For surface-mount devices, align components using a pair of fine-tipped tweezers. If pads seem recessed or irregular, apply a tiny dab of flux to improve wetting and position components with care before heating. A calm, deliberate setup prevents misalignment and bridges.
The correct soldering technique
Heat the joint with the tip of the iron so the pad and lead reach the soldering temperature quickly, then apply solder to the joint, not the iron. The goal is to create a small, shiny, cone-shaped fillet and ensure the solder fully wets both surfaces. Remove the heat and let the joint solidify before moving the board. Use the right amount of solder—enough to fill the joint but not so much that it drips or bridges to neighboring pads. Practice on scrap boards to dial in your feel before tackling critical boards.
Common mistakes and how to avoid them
Common mistakes include cold joints, overheating, and solder bridges. To avoid cold joints, ensure the heat is applied evenly and long enough for the solder to flow, then inspect the joint for a smooth, shiny finish. Prevent bridging by adding flux, using a fine-tipped iron, and guiding the lead away from adjacent pads. Don’t reuse old, contaminated flux or overheat sensitive components. Keep a clean tip and wipe away excess solder between joints to maintain precision.
Inspections and testing after soldering
Visually inspect each joint with a loupe or magnifier for a smooth, concave fillet and full solder coverage. Use a multimeter to check for continuity along the trace and ensure there are no shorts between adjacent pads. If you detect a short, rework the joint by applying a small amount of flux and re-heating the pad and lead. A quick functional test with the powered circuit confirms everything is performing as intended. Document any suspicious joints for later revisiting.
Cleaning and finishing touches
After soldering, remove flux residues with isopropyl alcohol and clean pads thoroughly. Dry the board with lint-free wipes and inspect again; flux residue can attract dust and moisture, leading to corrosion over time. If you plan to store the PCB, seal it in an anti-static bag and label it with the revision. A properly cleaned board not only looks professional but also reduces the risk of corrosion and intermittent faults.
Troubleshooting common issues
If you encounter solder bridges, stop and rework the nearby joints with fresh flux and a clean wick. For lifted pads or torn traces, do not force the joint—repair with appropriate wire jumpers or re-tin the pad. If joints appear dull or grainy, reflow with a small amount of flux and a steady heat source. For persistent intermittent connections, consider scrubbing the pads and re-soldering with a cooler iron setting and shorter contact time.
Tools & Materials
- Soldering iron (adjustable temperature)(Choose a station with a fine tip for PCB work)
- Solder (rosin-core, lead-free preferred)(Accuracy matters; avoid acid-core solder for electronics)
- Flux (rosin flux or flux pen)(Improves wetting and joint reliability)
- Solder wick (braid)(For removing excess solder or correcting bridges)
- Desoldering pump(Alternative to wick for larger corrections)
- Isopropyl alcohol (70–90%)(Used for cleaning flux residues)
- Lint-free wipes(Clean pads and joint surfaces without leaving fibers)
- Tweezers and small pliers(Placement and holding of tiny components)
- Magnifying glass / loupe(Helpful for tiny pads and fine pitch devices)
- ESD-safe mat and wrist strap(Prevent static damage to sensitive parts)
- Safety glasses(Eye protection against splashes)
- Heat-resistant work surface(Protects bench and prevents fires)
- Ventilation or fume extractor(Reduces inhalation of solder fumes)
Steps
Estimated time: 60-90 minutes
- 1
Set up workspace and safety gear
Clear the bench, position the PCB, connect a ventilation solution if available, and put on safety glasses plus an ESD wrist strap. This ensures you work in a controlled environment and protect sensitive components.
Tip: Keep the iron unplugged when not in use and always secure the board before heating. - 2
Inspect PCB and components
Check for damaged pads, missing vias, or bent pins. Verify the component orientation and ensure pads are clean and free of oxidation before proceeding.
Tip: If a pad looks damaged, repair before soldering to prevent intermittent connections. - 3
Secure PCB in a holder
Clamp the board firmly so it cannot shift while you work. This reduces the risk of accidental bridges and ensures precise joints.
Tip: A stable setup is as important as steady hands. - 4
Tin the soldering iron tip
Clean the tip on a wet sponge, then apply a small amount of solder to form a shiny protective coating. A tinned tip transfers heat more efficiently to the joint.
Tip: Keep the tip clean and avoid starving it of solder during the process. - 5
Position the component leads
Place leads into their pads, ensuring correct orientation. Use a small amount of flux to help wetting and alignment.
Tip: Double-check polarity and orientation before heating. - 6
Heat the joint and apply solder
Touch the joint with the iron so the pad and lead heat evenly, then touch solder to the joint, not the iron. Remove heat once the joint wets and forms a shiny fillet.
Tip: Avoid wicking solder up the lead and avoid touching adjacent pads. - 7
Inspect the joint after soldering
Look for a smooth, concave fillet that fully wets both surfaces. If dull or cracked, reheat with a tiny amount of flux and add more solder carefully.
Tip: A clean joint is a reliable joint—don’t rush the cooling phase. - 8
Remove flux and clean
Wipe away excess flux with isopropyl alcohol and a lint-free cloth. Dry the area thoroughly to prevent corrosion.
Tip: Ensure no alcohol sits on the board during final testing. - 9
Test continuity and inspect bridges
Use a multimeter to verify continuity along traces and check for shorts between adjacent pads. Resolve any shorts before powering the circuit.
Tip: Test power rails separately to avoid damaging other components. - 10
Document results and store tools
Record any notable joints or issues for future reference. Return tools to their racks and store the board in a safe, anti-static environment.
Tip: Good documentation speeds debugging for future boards.
Quick Answers
What is the best solder for PCB work?
For most electronics, use lead-free rosin-core solder. This provides reliable joints with manageable heat and reduces health risks. Avoid acid-core solders for PCB work.
For PCBs, use lead-free rosin-core solder for clean, reliable joints and safer handling.
How can I prevent cold joints?
Ensure the joint is heated evenly and the lead and pad are properly wetted before applying solder. Do not move components during solidification.
Heat the joint evenly and don’t move components until the solder has set.
Is flux necessary for every joint?
Flux reduces oxidation and helps solder flow. Use flux for challenging pads or fine-pitch joints; for simple, clean pads, you may rely on rosin-core solder.
Flux helps joints wet properly; use it when joints are tricky or delicate.
How do I fix a bridged joint?
Apply a small amount of flux, reheat the bridge, and use solder wick to draw off excess solder. After correcting, re-inspect the adjacent pads for contamination.
Flux, reheat, and wick away excess solder to remove bridges.
Can I reuse a PCB after soldering?
Yes, you can reuse boards if pads are intact and there’s no residue. Clean the surface thoroughly and inspect for any lifted copper before reusing.
Pads should be intact and clean; inspect before reusing.
What should I test after soldering?
Inspect joints visually, then use a multimeter to check continuity and shorts. A functional test with a powered circuit confirms reliability before deployment.
Check all joints with a magnifier and a multimeter, then test the circuit.
Watch Video
Top Takeaways
- Prepare tools and safety gear before starting.
- Flux improves wetting and joint reliability.
- Heat control is essential to avoid damage and bridges.
- Inspect joints visually and with a multimeter for reliability.