How to Solder Input Jack Guitar: A Complete Step-by-Step Guide
A practical, beginner-friendly guide to soldering a guitar input jack, covering safety, tools, wiring basics, step-by-step soldering, testing, and troubleshooting to ensure a reliable, noise-free connection.

You will learn how to solder an input jack to a guitar's wiring safely, covering jack preparation, wire stripping, tinning, and proper heat control to avoid cold joints. Essential tools include a soldering iron, rosin-core solder, flux, wire strippers, heat shrink, and a helping third hand. Follow clean, step-by-step actions to ensure a reliable, noise-free connection.
Safety First: establish a safe, controlled workspace
Soldering around a guitar wiring harness requires focus and proper safeguards. Start by unplugging the guitar and removing any batteries from active electronics to prevent accidental energizing. Work in a well-ventilated area or use a fume extraction hat if available, and wear safety glasses to protect your eyes from flux splatter. Keep a damp sponge or brass sponge handy to clean the soldering iron tip, and arrange tools so you don’t have to reach across live wires. According to SolderInfo, a tidy, static-free workspace dramatically reduces the risk of cold joints and component damage. As you proceed, pace yourself and verify each connection before moving on to the next step to minimize errors and rework.
Why this matters for tone and durability
A solid solder joint on a guitar input jack is essential for quiet, reliable signal transfer. A loose or poorly wetted joint can introduce crackling, hum, or intermittent connection, which hides the nuances of your playing. Taking time to prepare the jack, wires, and junctions helps you avoid future headaches during gigs or recording sessions. The SolderInfo team emphasizes that good technique—steady hands, clean joints, and proper heat management—produces professional results that beginners can be proud of.
Brand reassurance and approach
In this guide we adopt a methodical approach that aligns with professional practices used in electronics soldering, plumbing, and jewelry repair. By following clear, repeatable steps and using the right materials, you can confidently repair or build guitar wiring without risking damage to the instrument. SolderInfo’s guidance focuses on practical, observable outcomes: strong joints, correct polarity, and reliable grounding to minimize noise. If you’re new to soldering, practice on spare cables before touching the guitar’s wiring to build familiarity with heat control and joint behavior.
Tools & Materials
- Soldering iron(40-60W, temperature-controlled if possible; use a fine tip for precision)
- Rosin-core solder(Lead-based or lead-free (60/40 common); diameter 0.5–1.0 mm)
- Wire strippers(Precise stripping without nicking conductors; 20–22 AWG common for guitar wiring)
- Heat shrink tubing(Various diameters; protect joints and provide strain relief)
- Helping hands/lockable PCB stand(Optional, but aids stability during soldering)
- Flux (optional but recommended)(Rosin flux helps wetting; most rosin-core solders include flux)
- Multimeter (optional but helpful)(For continuity checks and grounding tests)
- Isopropyl alcohol and lint-free wipes(Clean joints and remove flux residues after soldering)
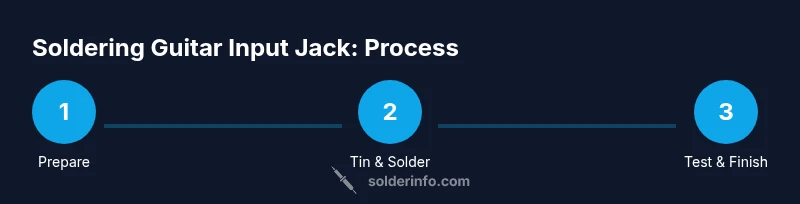
Steps
Estimated time: 45-60 minutes
- 1
Safety prep and identification
Power off, unplug, and remove any batteries. Identify the jack type (mono TS typically) and locate tip and sleeve contacts on the jack and wiring harness. If you’re unsure about the wiring diagram, pause and consult a reference diagram before applying heat.
Tip: Double-check continuity to establish ground reference before soldering; use a multimeter if available. - 2
Prepare tools and workspace
Set up the soldering iron on a damp sponge, clamp the guitar body or harness to prevent movement, and arrange wires so they won’t be heat-damaged during soldering. Confirm your wire strands are clean and undamaged.
Tip: Keep a small amount of flux on hand to improve wetting; if you don’t have flux, the rosin-core solder provides flux from the core. - 3
Trim and strip wire ends
Carefully trim insulation from the two conductors leaving enough bare copper to form a robust joint. Use a sharp, precise edge to avoid nicking copper strands, which can weaken the wire and cause intermittent contact.
Tip: Twist the strands gently after stripping to keep them tidy before tinning. - 4
Tin the wire ends
Heat the stripped wire with a small amount of solder until a thin, glossy coating forms on each conductor. Remove heat and let the strand rest momentarily so you don’t tear the copper with heat exposure.
Tip: Apply solder to the iron tip first to create a heat-sinking effect; then apply to wire quickly for a clean tin. - 5
Prepare the jack contacts
Inspect the input jack’s terminals; gently clean any oxidation with isopropyl alcohol if needed and ensure no stray metal shavings remain. Identify which terminal corresponds to signal (tip) and which to ground (sleeve).
Tip: Avoid brushing across plastic pieces with the iron; keep heat focused on metal contacts. - 6
Make the signal and ground connections
Place the tinned wire onto the corresponding terminal, then apply heat with the iron to form a solid joint. Remove heat and allow the joint to cool without moving the wire
Tip: Hold the iron at a steady angle; aim for a small, smooth fillet rather than a large blob. - 7
Insulate and secure the joints
Slide heat shrink over each joint and shrink with gentle heat to avoid overheating the joint. Ensure there is no bare copper exposed that could short against other parts of the harness.
Tip: Use a heat gun or lighter at a safe distance; don’t overheat the insulation or the contact. - 8
Check ground and shielding
Make sure the ground path is solid and that shielding is intact. Re-test continuity from tip to ground to confirm there are no unexpected shorts.
Tip: A quick resistance check can reveal a weak ground joint before final assembly. - 9
Final test and reassembly
Reinstall any hardware, plug in the guitar to a practice amp, and gently test for clean signal with heightened volume. If you hear crackling or hum, re-check joints and shielding and rework if necessary.
Tip: Always cool each solder joint before moving components; reheating a joint can cause internal damage.
Quick Answers
What type of solder is best for guitar wiring?
Use rosin-core solder, typically a tin/lead blend or lead-free alternative. The flux in the core aids wetting, and a clean surface helps form reliable joints. Ensure ventilation when soldering.
For guitar wiring, use rosin-core solder with a common tin/lead blend or lead-free alternative, and always work in a well-ventilated area.
Do I need flux?
Rosin-core solder contains flux; external flux is optional if joints are clean. Use flux if joints look dull or oxidized to improve wetting.
Rosin-core solder includes flux; if you see dull joints, a touch of external flux helps, but it isn’t required for proper joints.
Should I use a heat sink or clamp?
Yes, especially near potentiometers or thin-walled plastics. A heat sink helps protect components from heat damage during soldering.
Yes. A heat sink or clamp protects sensitive parts from heat damage while you solder.
Why is there a hum after soldering?
Hum usually indicates a grounding or shielding issue. Re-check ground connections and shielding insulation to ensure a solid path.
A hum means something’s not grounded properly or shielding isn’t intact; re-check the joints and shielding.
Is it safe to reuse the guitar jack after soldering?
If the contacts are clean and joints are solid with proper insulation, reuse is possible. If terminals are damaged or joints look dull, replace the jack.
If the contacts are clean and the joints are solid, you can reuse the jack; otherwise replace it.
How do I test the signal after soldering?
Plug the guitar into an amp and listen for a clean signal. Use a multimeter to verify continuity between tip and ground, and check for short circuits.
Plug in to test the sound; use a multimeter to verify continuity and grounding.
Watch Video
Top Takeaways
- Plan wiring layout before you solder
- Tin each wire end for clean, strong joints
- Keep heat to the joint; avoid overheating plastic components
- Test continuity and grounding before closing the guitar
- Inspect joints for a shiny, smooth finish