How to Solder a Wire to a Connector
Learn to solder a wire to a connector safely and reliably with step by step guidance, material tips, and common pitfalls to avoid.

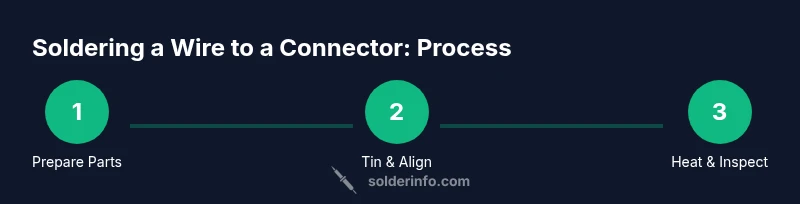
You can solder a wire to a connector by preparing the wire and connector, tinning the conductor, inserting into the connector, applying controlled heat to form a solid joint, and verifying continuity and insulation. This step-by-step guide covers tools, technique, safety, and testing to ensure reliable electrical connections for hobbyists and professionals alike.
Why soldering a wire to a connector matters
Reliable electrical connections between a wire and a connector are foundational for many DIY electronics, automotive wiring, and jewelry projects. A good soldered joint provides both electrical continuity and mechanical strength, resisting vibration, bending, and temperature changes. When done correctly, the joint forms a single metal fillet that wets both the conductor and the connector pad without excess solder bridging adjacent terminals.
According to SolderInfo, the quality of the joint starts long before heat is applied: choose the right connector, prepare the wire, and maintain a clean, well-supported workspace. Preparation reduces oxidation and promotes consistent wetting, which makes the solder flow predictably and reduces the risk of cold joints. The goal is a joint that is shiny, smooth, and forms a clean fillet at the interface. In contrast, overheating, insufficient tinning, or misalignment can produce weak joints that crack, corrode, or fail under vibration. This block explains how to set up for success, from material choices to workspace ergonomics, so you can solder a wire to a connector with confidence.
Choosing the right materials: wires, connectors, flux, and solder
Choosing the right materials is as important as mastering technique. For wires, stranded conductors are typically easier to tin and manipulate in small terminals, while solid core can be used for rigid connections; ensure insulation is removed only from the bare length that will be inserted. Connectors vary from crimp housings with metal terminals to simple PCB or blade-style terminals. When you plan to solder, pick a connector that has a clean, accessible metal pad or a terminal post designed for soldering. Flux helps metal surfaces wet properly and reduces oxidation; use rosin-core flux or no-clean flux suitable for electronics. For solder, use lead-free tin-silver-copper (Sn-Ag-Cu) or tin-lead only if allowed by safety or project standards; lead-free is common today and safer for many environments. Use a small amount of flux on the joint, and apply flux sparingly between the wire and the terminal to reduce oxidation during heating. Finally, consider using heat-shrink tubing or a zip tie for strain relief once the joint is tested and insulated.
Safety and workspace setup
Safety and proper workspace setup reduce risk and improve results. Soldering involves hot surfaces and fumes, so work in a well-ventilated area and wear eye protection. Keep flammable materials away from the workbench and unplug equipment when making adjustments. Use a heat-resistant mat and a helping hand or clamp to steady the connector while you work. Avoid touching the iron tip, and always place the iron on its stand when not in use. If you must solder near PCBs or delicate components, shield nearby parts to prevent heat damage. In jewelry or electronics with sensitive components, consider using a temperature-controlled station to avoid overheating the solder joint or insulation. After the joint cools, use alcohol to wipe away flux residue; this reduces corrosion risk and improves visibility during inspection. Finally, dispose of used flux and metal waste safely according to local guidelines. By prioritizing safety, you protect yourself and your project, and you create consistent results that technicians rely on.
Preparation steps: cleaning, tinning, alignment
Start by cleaning the contact surfaces with isopropyl alcohol and a lint-free cloth to remove oils that impede solder wetting. For the wire, trim insulation cleanly and twist strands tight; if using stranded wire, tin the exposed length with a small amount of solder, forming a shiny coated strand. Inspect connector terminals; use a magnifier if needed to check for oxidation or burrs, and remove burrs with a fine file or abrasive pad. Apply a thin layer of flux to the terminal or pad to improve wetting; avoid applying flux to places that won't be soldered. Position the wire so that the bare conductor sits correctly in the terminal without stray strands. Before applying heat, confirm alignment under a gentle light; any misalignment will cause a poor joint or a short. Finally, take a deep breath and prepare to heat carefully, keeping the tip in constant contact with the soldering area until the joint is fully liquid and the fillet forms.
The role of flux and solder types
Flux is the invisible helper that keeps metal surfaces clean and ready to bond. For electronics, choose rosin-based fluxes or no-clean fluxes that leave minimal residue. Flux does not fix a bad joint, but it improves wetting, reduces oxidation, and helps solder flow toward the joint. There are two main families of solder for electronics: lead-free and traditional leaded alloys. Lead-free solders (such as Sn-Ag-Cu) are common in modern electronics and are preferred for environmental and safety reasons, though they require slightly higher temperatures. Leaded solders (Sn-Pb) have lower melting points and can be easier to work with, but may be restricted in some applications. Regardless of the alloy, apply a thin, even coat of flux to the joint, and avoid using excessive solder that can bridge adjacent terminals. Always clean flux residue after cooling to reduce corrosion and avoid leaving conductive debris.
Common mistakes and how to avoid them
Cold joints: If the joint cools before solder has properly wetted the surfaces, it will feel dull and may crack. Ensure both surfaces are clean and that heat is applied evenly until the solder flows and forms a smooth fillet. Overheating: Excess heat can damage insulation, connectors, or PCB pads; use a temperature-controlled iron and remove heat as soon as the joint wets. Insufficient tinning: Tin the wire and terminal first so the solder has something to wet; this prevents dull, sluggish joints. Poor alignment: Misaligned wires can cause short circuits or mechanical failure; double-check seating before applying solder. Incomplete insulation: Always seal the joint with heat-shrink tubing or electrical tape to protect against moisture and movement. If you notice solder bridges, pause, rework with fresh flux, and reflow with steady heat.
Tools & Materials
- Soldering iron(60-80W recommendations; use temperature control for lead-free solder)
- Solder (lead-free rosin-core)(Diameter 0.8-1.0 mm; Sn-Ag-Cu is common)
- Flux(Rosin-core or no-clean flux suitable for electronics)
- Solder wick (desoldering braid)(Optional for cleaning mistakes)
- Wire stripper(Fine-stripping for 22-24 AWG wires)
- Stranded copper wire 22-24 AWG(Flexible for small connectors)
- Connector housing with solder-friendly terminals(Choose terminals designed for soldering)
- Heat-shrink tubing(For strain relief and insulation)
- Helping hands or small vise(Keeps parts stable during soldering)
- Isopropyl alcohol 70%+(For cleaning surfaces and flux residue)
Steps
Estimated time: 45-60 minutes
- 1
Gather and secure components
Power down the equipment and collect the wire, connector, flux, solder, and tools. Secure the assembly in a helping hand or small vise so it cannot move during soldering.
Tip: Keep cables tidy and clear of the hot tip to prevent accidents. - 2
Strip and tin the wire
Use a precision stripper to expose 6-8 mm of copper. Twist strands, apply a light coat of flux, and tin the exposed length with a thin layer of solder.
Tip: Tin evenly and avoid scorching the insulation; tinning helps wetting later. - 3
Prepare the connector landing
Clean the terminal surface with isopropyl alcohol. Apply a small amount of flux to the landing area to improve wetting and remove oxidation.
Tip: If the terminal is oxidized, lightly abrade with a fine pad before fluxing. - 4
Insert and align the wire
Insert the tinned wire into the connector terminal and align so the bare wire sits fully inside the metal seat without stray strands.
Tip: Double-check seating from multiple angles to avoid shorts. - 5
Apply heat and solder the joint
Touch the joint with the heated iron and feed solder until a shiny fillet forms. Do not dwell on one spot to avoid overheating insulation.
Tip: Use a steady, light touch and stop feeding solder when the joint wets properly. - 6
Inspect, test, and insulate
Inspect the fillet for a smooth, uniform shape. Test continuity with a multimeter and slide heat-shrink over the joint, shrinking to secure strain relief.
Tip: Ensure no exposed copper is visible after insulation.
Quick Answers
What kind of solder should I use for electronics?
For electronics, use lead-free rosin-core solder (Sn-Ag-Cu) or leaded solder only if allowed by safety standards. Lead-free options are common and safer for most environments.
Use lead-free rosin-core solder for electronics; leaded solder is optional if allowed by safety standards.
Should I tin the connector before soldering?
Yes, tin both the wire and the terminal to improve wetting and reduce the amount of heat needed to form a solid joint.
Tin both parts to help wetting and make the joint easier to form.
How do I prevent cold solder joints?
Keep surfaces clean, apply flux, and maintain heat until the solder flows and forms a smooth fillet. Don’t rush the process.
Ensure cleanliness, use flux, and heat until the solder flows.
Can I solder a wire directly to a PCB pin instead of using a connector?
Yes, if the pin is designed for soldering and you can provide proper strain relief. Be mindful of heat and avoid damaging nearby components.
You can, but protect nearby parts and ensure proper strain relief.
What safety equipment do I need?
Wear eye protection and work in a ventilated area. Keep a clean, organized workspace and be mindful of hot tools.
Wear eye protection and ensure good ventilation.
Watch Video
Top Takeaways
- Prepare all materials before starting.
- Tin wires and terminals for clean flow.
- Align and seat the conductor properly.
- Apply controlled heat and form a shiny fillet.
- Inspect, test, and insulate for durability.