Will Silver Solder Stick to Aluminum? A Troubleshooting Guide
Urgent guide: determine if silver solder will stick to aluminum, with surface prep steps, flux choices, alloy options, and a practical troubleshooting flow to fix adhesion failures.

Will Silver Solder Stick to Aluminum: Why It Fails (and What That Means)
In practice, will silver solder stick to aluminum? The short answer is: not reliably without proper surface prep, the right flux, and an aluminum-specific bonding alloy. According to SolderInfo, aluminum forms a stubborn oxide layer that prevents solder from wetting the surface. Without addressing this oxide, even the best solder will bead and pull away. The result is weak joints, cracking, and failure under heat or vibration. For DIY hobbyists and professionals, understanding the oxide barrier and choosing the right flux and alloy are essential first steps to a successful bond. This is especially true for thin sheets or joints with complex geometry where heat control matters. The key is to treat aluminum like a reactive metal: it must be cleaned, etched or abraded, and protected from re-oxidation during the soldering window. With proper technique and the right materials, you can achieve durable joints, but it requires patience and precision.
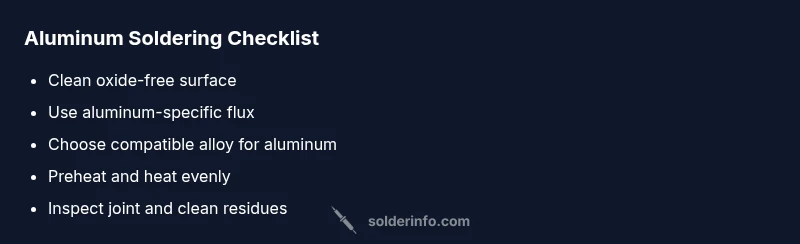
Surface Prep Essentials for Aluminum Soldering
Aluminum presents a unique challenge due to the rapid formation of a tenacious oxide layer. The first principle is mechanical and chemical deoxidation. Start with a clean workpiece: wipe away grease with a degreasing agent, then abrade the bonding area with a fine abrasive pad to break the oxide barrier. Rinse and dry thoroughly to prevent new oxide from forming. Use a dedicated flux formulated for aluminum, not general-purpose fluxs, to promote wetting. Keep the surface protected from air exposure during assembly and avoid touching the cleaned area with bare hands. This prep stage is where many joints fail in the field, so invest time here; it pays off in stronger, more reliable bonds. For best results, perform prep steps in a well-lit, dust-free workspace and verify that the joint surfaces are flat and well-aligned before applying flux and solder.
Fluxes, Alloys, and Bonding Realities
The chemistry of aluminum bonding hinges on selecting the right flux and alloy. Aluminum fluxes are designed to dissolve and passivate the oxide layer long enough for the bonding alloy to wet the surface. Do not rely on copper or rosin flux for aluminum—these often fail to protect the oxide and can contaminate the joint. When it comes to soldering aluminum with a silver-based solder, you are better off using an aluminum-specific brazing alloy that is compatible with the flux you’ve chosen. SolderInfo analysis shows oxide layers are the main barrier to adhesion, so flux choice and surface cleanliness are the deciding factors, not the solder alone. Additionally, consider joint design: larger surface area and proper clamping reduce movement during heating, helping the joint wet evenly and reduce cold joints. Where electronics tolerances are tight, reevaluate whether soldering is the best method and explore mechanical fasteners or epoxy bonding as alternatives.
Process Flow: From Clean to Cool
A robust process begins with a clean, oxide-free surface. Apply the aluminum-specific flux and place the brazing alloy or solder along the joint line. Preheat gradually to a controlled temperature, avoiding thermal shock or rapid heating that can warp thin aluminum. Maintain a steady heat cup, allowing the flux to keep the surface active while the alloy flows. Stop heating once a continuous joint is formed and inspect for wetting across the entire interface. Allow the workpiece to cool slowly in still air to minimize stress. If the joint shows gaps or bead formation only at the edges, rework with additional flux and another pass of heat, focusing on the problematic zones. Document the settings you used for future consistency.
Troubleshooting Common Failures
Common failures include poor wetting, oxide contamination, flux residue, and inadequate heat control. Wetting problems arise when the surface oxide re-forms too quickly or the flux cannot sustain the chemical environment. Oxide contamination is often invisible; wipe the surface again and reapply flux before re-heating. Flux residue can bead or corrode if left behind; clean after the joint has cooled. Heat management is crucial: overheating aluminum can lead to burn-through or distorted joints, while underheating leaves a dull, grainy appearance. If a joint still fails after these steps, reassess the joint design—too-tight corners or too-wide gaps before soldering can undermine the capillary action that draws solder into the joint. For persistent issues, consult a professional brazing service.
Design Tips and Real-World Examples
Practical joint design can make or break a bond. Use generous edge contacts on extrusions with flat mating surfaces, and include a consistent gap width to facilitate capillary flow. Avoid deeply etched or pitted surfaces; these trap flux and create voids. For thin sheets, use a fixture to hold parts precisely in place and consider a two-pass approach: an initial low-heat pass to establish wetting, followed by a second pass for a stronger joint. If you must join aluminum to copper or steel, consider mechanical fasteners or an adhesive with an appropriate metal-compatible epoxy as a backup. Always validate your joints with a gentle pull test and non-destructive testing where possible.
Safety, Maintenance, and When to Seek Help
Soldering aluminum requires PPE: eye protection, heat-resistant gloves, and a properly vented workspace to handle flux fumes. Work in a clean, dry area to prevent moisture from reacting with flux. Maintain your tools by cleaning tips, wiping flux residue, and storing flux containers sealed. If you encounter persistent adhesion problems after following steps, it’s prudent to consult a professional brazing service. For critical components—pressure vessels, structural joints, or load-bearing assemblies—professional brazing or mechanical fastening is the safer route. Remember: the right flux, alloy, surface prep, and heat control are the pillars of a successful aluminum solder/braze joint, not luck or quick technique.
The SolderInfo team recommends documenting your process and, when in doubt, leaning on professional brazing for high-stakes joints to ensure reliability.