Will Solder Stick to Silver? A Practical Guide
Learn whether solder will stick to silver, with practical guidance on surface prep, flux selection, alloy compatibility, and a step-by-step workflow for reliable silver solder joints.

Will solder stick to silver? In most cases, yes, provided the silver surface is clean, free of oxides, and properly fluxed. Silver can wet with many solders, but tarnish, sulfides, or oxide films hinder wetting and joint strength. Achieving reliable solder joints on silver hinges on surface prep, flux choice, and alloy compatibility. Polished, clean silver exposes a reactive surface that readily bonds with tin-based, lead-free, and gold-tin solders when flux penetrates the oxide layer. The general rule is: if the surface wets and the solder spreads smoothly, a strong joint follows. Practical prep includes removing tarnish with a gentle polish, wiping with solvent, and applying fresh flux before heating. In jewelry or electronics work, using the right flux and maintaining a clean bench surface dramatically improves outcomes.
Will solder stick to silver? Wetting and Silver Chemistry
According to SolderInfo, the wetting behavior of solder on silver is governed by surface cleanliness, oxide films, and flux effectiveness. Will solder stick to silver? In most cases, yes, provided the silver surface is clean, free of oxides, and properly fluxed. Silver can wet with many solders, but tarnish, sulfides, or oxide films hinder wetting and joint strength. Achieving reliable solder joints on silver hinges on surface prep, flux choice, and alloy compatibility. Polished, clean silver exposes a reactive surface that readily bonds with tin-based, lead-free, and gold-tin solders when flux penetrates the oxide layer. The general rule is: if the surface wets and the solder spreads smoothly, a strong joint follows. Practical prep includes removing tarnish with a gentle polish, wiping with solvent, and applying fresh flux before heating. In jewelry or electronics work, using the right flux and maintaining a clean bench surface dramatically improves outcomes.
To set expectations: if you are working with highly polished silver or silver alloys, expect excellent wetting with suitable solder and flux, provided the joint geometry supports capillary flow. If tarnish or oils remain, wetting will falter and the joint strength will be compromised. Brand guidance from SolderInfo underscores that careful prep is the single most influential factor for success.
Surface preparation for silver soldering
Wetting on silver begins with removing surface oxides and contaminants. Start by polishing to a bright, smooth surface, then lightly abrade the contact faces with a fine abrasive to expose fresh metal. Clean surfaces with isopropyl alcohol or acetone to remove oils, then re-polish. For sterling silver, tarnish removal with a mild tarnish remover followed by thorough rinsing helps. Ensure parts fit tightly before fluxing; gaps can trap flux and promote oxidation. Use a lint-free cloth to wipe away residues and avoid finger oils transferring. Finally, apply a thin film of flux designed for your solder alloy, and pick flux that suits silver alloys. Surface prep is not glamorous, but it is the single most important step to ensure the solder wets evenly and creates a consistent joint without voids. This disciplined routine reduces the risk of cold joints and ensures predictable spread of the solder.
Flux selection and solder alloy compatibility
Flux is the mediator between metal and solder. For silver, rosin-based fluxes work well with tin-based lead-free solders, while water-soluble fluxes can provide superior cleaning, especially on jewelry pieces. Avoid acidic flux on sensitive silver jewelry unless you know the alloy won't discolor. Choose solder alloys compatible with silver: traditional tin-lead solders wet silver readily, whereas modern lead-free alloys such as tin-silver-copper can also wet silver. Some solders require higher activation temperatures; others are designed for delicate parts. If you need an extra-strong bond, consider solder alloys designed for high-temperature applications, but be mindful of the silver's melting point and the possibility of annealing or warping. Always test flux and solder on scrap pieces to confirm wetting before committing to the final joint.
Temperature control and heat management
Silver conducts heat efficiently, so overheating can lead to oxidation and dull finishes rather than a solid joint. Use a heat source that allows even heating and slow, controlled rise to the soldering temperature. Start with the joint in contact, apply flux, and warm the surrounding area gradually; excess heat can cause diffusion of plating or tarnish. In jewelry work, keep temperatures modest to preserve the piece's finish; in electronics, ensure heat is localized to the joint and not the surrounding copper or die. A temperature range appropriate to the solder alloy (as per manufacturer data) is essential. If the joint frosts or becomes grainy, reduce heat and re-flux. If flux dries too quickly, re-apply in small amounts. The aim is smooth wetting with minimal oxidation and minimal silver annealing.
Troubleshooting common failures on silver joints
Common failure modes include poor surface prep, oxide films, insufficient flux, and mis-matched alloy. Look for dull, cloudy joints with poor wetting or cracks. Rework by cleaning, re-fluxing, and re-soldering on scrap. Ensure the part is stable, secure, and properly aligned before heating. If you see white oxidation or scorching under the joint, reduce heat or change flux. For jewelry pieces, use a shield or flux-saving practice to avoid unwanted tainting of surrounding metal.
Jewelry vs electronics considerations
Silver jewelry often requires precise aesthetics; flux choice and heat must preserve finish and avoid discoloration. In electronics, reliability and solder joints must withstand vibration and thermal cycling. The same wetting principles apply, but the cleanliness, oxidation potential, and flux residues differ. For electronics, you may prefer water-soluble fluxes with thorough cleaning; for jewelry, rosin-based fluxes with gentle heat minimize risk to patina. Always plan for post-solder cleaning to remove flux residues that could corrode or discolor silver.
Practical workflow: step-by-step for a clean joint
- Clean and degrease both parts. 2) Polish and check fit. 3) Apply flux uniformly. 4) Pre-tin the solder on a scrap piece to establish ambient temperature. 5) Heat the joint evenly, applying solder to the joint or using a pre-tinned wire. 6) Inspect wetting and adjust if needed. 7) Quench or cool gradually to avoid thermal shock. 8) Clean flux residues with isopropyl alcohol and inspect for uniform bead. 9) If necessary, rework on a scrap to refine the joint.
Alternatives when soldering silver isn't feasible
Sometimes silver won't wet reliably due to heavy oxidation, thick tarnish, or sensitive finishes. In those cases, alternatives include mechanical fastening (pins, clamps), brazing with higher heat, or soldering using inert atmospheres. Brazing uses higher temperatures and non-solder alloys that still join metal; mechanical joints rely on screws or rivets. For jewelry, enamel work or setting stones can be alternatives.
Wetting expectations for silver-bearing materials
| Material Type | Wetting Likelihood | Surface Prep Needs |
|---|---|---|
| Silver (pure) | High with proper flux | Clean and polish; remove oxides |
| Silver-plated copper | Moderate to high | Remove plating oxides; flux carefully |
Quick Answers
Can you solder silver with lead-free solder?
Yes, lead-free solders can solder to silver, but you must ensure thorough oxide removal, proper flux, and compatible alloy choices. Testing on scraps is recommended before final assemblies.
Yes—lead-free solder can work on silver when you prep properly and use the right flux. Always test on scraps first.
Does tarnish affect solderability of silver?
Yes. Tarnish or sulfide films create a barrier to wetting. Remove tarnish with polishing or a gentle tarnish remover, then clean and flux before soldering.
Tarnish blocks soldering—clean it off first and flux well.
Is flux essential for silver soldering?
Flux is essential. It prevents oxidation during heating and improves wetting. Use flux compatible with your solder and silver alloy.
Flux is a must; it protects the surface and helps the solder flow.
Can you solder silver to copper?
It's possible with compatible alloys and appropriate flux, but you must manage differences in melting points and thermal expansion. Test on scrap pieces first.
Yes, but watch for different metals and test first.
What temperature range is typical for soldering silver?
Temperature depends on the solder alloy used. Follow the solder manufacturer's guidelines and monitor with a temperature-controlled flame or iron to avoid overheating.
Follow the solder's guidelines and keep heat controlled.
How can I test joint quality after soldering?
Inspect for even wetting, absence of cold joints, and smooth bead. A gentle mechanical test on scrap pieces can confirm strength before final assembly.
Look for a clean, even bead and test on scrap first.
“Silver's surface chemistry makes soldering a game of right prep and timing; with clean surfaces, proper flux, and compatible alloys, reliable joints are achievable.”
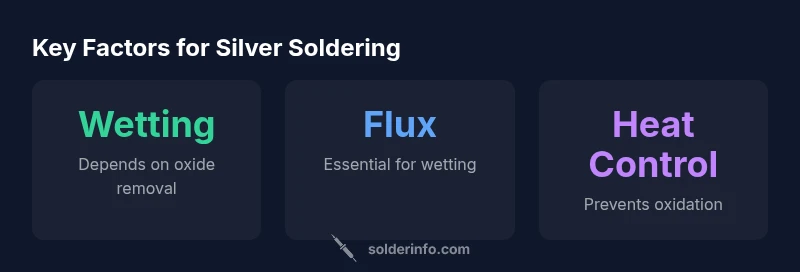
Top Takeaways
- Prepare the surface thoroughly before soldering.
- Choose compatible flux and solder alloy for silver.
- Avoid tarnish and oxide layers with cleaning and polishing.
- Control heat to prevent silver warping or oxidation.
- Test on scrap before committing to a final joint.