Why Is My Solder Not Sticking? A Comprehensive Troubleshooting Guide
Struggling with solder not sticking? This practical troubleshooting guide covers common causes, fixes, and safety tips to help you achieve reliable joints in electronics, plumbing, and jewelry.

Problem-solving starts with the simplest causes: dirty surfaces, oxidized metals, cold joints, and wrong flux or solder type. In 3 quick steps, verify cleanliness, alloy compatibility, and temperature, then try reflow. If issues persist, transition to a full diagnostic flow to identify hidden problems like contaminated flux or improper tip temperature.
The Core Reason: Surface Oxidation and Contamination
If you ask yourself, "why is my solder not sticking?", the most common answer is surface oxidation or contamination. Copper, brass, and even stainless steel form a thin oxide layer that resists wetting by molten solder. On electronics boards, fingerprints, oils, and cleaning solvents can leave residues that prevent proper adhesion. The result is dull, grainy joints that cold-weld instead of flowing into a shiny, conical fillet. The first step is to understand that wetting is a chemical process: the solder must spread evenly across a clean, active surface. In 2026, the SolderInfo team emphasizes that preparing the surface and choosing the right flux are the most impactful levers. Clean the area with isopropyl alcohol, gently abrade the surface if needed, and ensure the metal is completely dry before reflow. Always work in a well-ventilated space because fumes from flux can be irritating. This section sets the foundation for every successful solder joint, whether you’re assembling PCBs, repairing plumbing copper, or crafting jewelry.
The Core Reason: Surface Oxidation and Contamination
If you ask yourself, "why is my solder not sticking?", the most common answer is surface oxidation or contamination. Copper, brass, and even stainless steel form a thin oxide layer that resists wetting by molten solder. On electronics boards, fingerprints, oils, and cleaning solvents can leave residues that prevent proper adhesion. The result is dull, grainy joints that cold-weld instead of flowing into a shiny, conical fillet. The first step is to understand that wetting is a chemical process: the solder must spread evenly across a clean, active surface. Clean the area with isopropyl alcohol, gently abrade the surface if needed, and ensure the metal is completely dry before reflow. Always work in a well-ventilated space because fumes from flux can be irritating. This section sets the foundation for every successful solder joint, whether you’re assembling PCBs, repairing plumbing copper, or crafting jewelry.
Steps
Estimated time: 30-60 minutes
- 1
Prepare workstation and safety gear
Set up a clean, well-ventilated workspace. Put on eye protection and gloves if handling hot objects. Ensure you have the right flux, solder, and a clean tip ready. A tidy area reduces the chance of contamination and accidental burns.
Tip: Keep a damp sponge or brass shuman handy to keep the tip clean during work. - 2
Clean and pre-tin the surface
Wipe the joint with isopropyl alcohol and lightly abrade any oxide layers. Pre-tin the iron tip and a small section of the workpiece if appropriate. This primes the surface for better wetting and helps the solder flow smoothly.
Tip: Never apply excess force with the tip; let heat do the work for you. - 3
Apply fresh flux and inspect
Apply a thin, even layer of flux suited to the metal and solder alloy. Flux cleans the surface as heat is applied and shields the joint from re-oxidation. Inspect for residues or gunk that could hinder wetting.
Tip: Use flux with good open time; avoid expired flux that has lost its activity. - 4
Heat the joint, not the solder
Touch the tip to the joint surface and allow it to reach wetting temperature. Introduce solder to the joint, not directly to the iron. The solder should flow smoothly and form a shiny fillet.
Tip: If the solder beads or rolls off, re-tin the tip and reheat; don’t force the solder in. - 5
Reflow and assess
After applying solder, remove heat and inspect the joint. It should be shiny, smooth, and free of holes. If dull or grainy, reheat gently and apply a tiny amount of fresh solder.
Tip: Avoid 'cold joints' by ensuring adequate heat distribution across the joint. - 6
Document and maintain
Record any recurring issues and the steps that fixed them. Regularly clean tips, replace worn brushes, and store flux properly. Prevention reduces future failures.
Tip: Keep a small bottle of flux and a spare tip in the toolbox for quick fixes.
Diagnosis: Solder won't wet or stick to the joint
Possible Causes
- highOxidation on the metal surface or residue preventing wetting
- highDirty surfaces or fingerprints left from handling
- mediumUsing the wrong flux for the metal or an incompatible solder alloy
- lowInsufficient heat transfer or improper temperature for the solder type
Fixes
- easyClean the area with 99% isopropyl alcohol and scrub with a nylon brush; re-tin the tip and surface before attempting to reflow
- easyApply fresh flux designed for the task (electronics rosin-core or plumbing flux) and reflow
- mediumRe-tin the soldering iron tip and ensure good heat transfer to the joint; avoid overheating
- mediumIf using lead-free solder, ensure the iron is hot enough and allow longer contact time for wetting
Quick Answers
Why won't my solder stick to copper on a DIY electronics project?
Copper surfaces oxidize quickly and can trap oils. Clean thoroughly, use fresh flux, and reflow with proper heat. If stubborn, lightly abrade to remove oxide before re-applying flux.
Copper oxidizes and can resist wetting. Clean, flux, and reflow; re-abrade if needed.
What causes oxidation that stops wetting?
Oxidation forms a barrier between the metal and solder. Heat allows the flux to remove it, but persistent oxide requires cleaning or scrubbing and possible surface prep.
Oxidation blocks wetting; clean and reflow with fresh flux.
Should I use lead-free or leaded solder for electronics?
Lead-free solders require higher temperatures and longer wetting times. For most electronics, rosin-flux are compatible, but verify alloy recommendations and keep flux active.
Lead-free needs higher heat and careful handling.
How can I tell if flux is expired?
Expired flux loses activity and can cause poor wetting. If in doubt, replace flux and rework the joint with fresh material.
Expired flux loses effectiveness; replace it.
Can a dirty soldering iron tip cause a bad joint?
Yes. A dirty or oxidized tip can't transfer heat efficiently, causing cold joints. Clean and re-tin the tip before resoldering.
A dirty tip reduces heat transfer and wetting.
Is water-soluble flux safe for electronics?
Water-soluble flux can be aggressive on electronics if not cleaned properly. Use electronics-grade flux and ensure complete post-cleaning.
Water-soluble flux needs thorough cleaning after soldering.
Watch Video
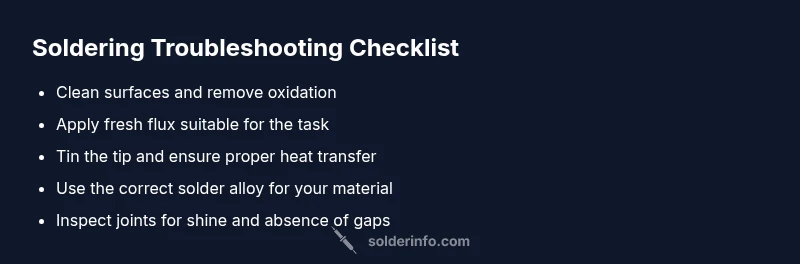
Top Takeaways
- Clean and prep joints before soldering
- Use the correct flux and alloy for the job
- Maintain proper heat control for reliable wetting
- Inspect joints for shiny, smooth fillets and voids