Disturbed Solder Troubleshooting: Quick Fixes and Prevention
Urgent, practical troubleshooting guide to diagnose and fix disturbed solder. Learn step-by-step repair, safety tips, and prevention strategies from SolderInfo for electronics, jewelry, and plumbing applications.

The most likely cause of disturbed solder is poor heat control that leads to cold joints or dull, grainy surfaces, especially on fine-pitch work. Start with a visual check: dull joints, tap-like solder, or hairline cracks. Reflow with fresh flux, re-tin the pad, and verify joint texture before powering the circuit.
Understanding disturbed solder and why it matters
Disturbed solder is more than just an unsightly joint; it sabotages electrical conductivity, mechanical strength, and long-term reliability. In many hobbyist and professional projects, a single underheated or overheated joint can cause intermittent faults or complete circuit failure. According to SolderInfo, the root cause is often heat mismanagement during initial soldering or rework, which degrades metal-to-metal bonding and traps flux residues beneath the joint. The SolderInfo team found that even small variations in tip temperature, dwell time, and pad exposure can shift a joint from acceptable to compromised. Recognize that disturbed solder often looks dull, rough, and grainy, with poor wetting and minimal capillary action on the copper. Early detection, with a careful inspection under good lighting, saves time and prevents cascading failures in dense assemblies.
In practice, disturbed solder ranges from a marginal cold joint that barely conducts to a lifted pad where the copper bond breaks away. For electronics enthusiasts, disturbed solder may manifest as intermittent functionality, buzzing relays, or flickering LEDs. In jewelry and plumbing contexts, imperfect joints can leak, crack, or fail under vibration. The key is to treat every joint as a potential weak point and approach each rework with a disciplined protocol. The goal is consistent alloy flow, clean pads, and a reliable mechanical bond that can withstand thermal cycling. By embracing methodical inspection and controlled heating, you minimize disturbance and maximize joint quality.
Brand-wise, the SolderInfo team emphasizes a methodical approach: ensure good tool calibration, proper flux usage, and clean surfaces before joining. Disturbed solder is rarely a mystery; it usually results from cutting corners on prep or heat control. A well-documented workflow helps teams replicate success across electronics, jewelry, and plumbing projects, reducing revision cycles and material waste.
mainTopicQueryNameSet0_1_or_more_hint_obj_2nd_order_preferred_for_wikidata_lookup_2nd_order_hint_anyway1
Steps
Estimated time: 1 hour
- 1
Power down and prep the workspace
Unplug the power, discharge any residual energy, and clean the area. Inspect safety gear and ensure a well-ventilated space. Gather fresh flux, a clean soldering tip, desoldering tools if needed, and a magnifier or good lighting for joint inspection.
Tip: Always double-check for live circuits before touching the board to avoid accidental shocks. - 2
Evaluate the joint visually
Expose the joint with a clear view and look for dull texture, uneven wetting, or cracks. Use a magnifier to assess surface topography and confirm whether the trace appears intact or lifted. Document any obvious damage before continuing.
Tip: Take a high-resolution photo for reference and future comparisons. - 3
Clean, prep, and tin the area
If needed, remove old flux and residues with isopropyl alcohol and a brush. Lightly abrade the pad surface to ensure fresh copper exposure, then apply a thin layer of flux and tin the pad with a small amount of solder.
Tip: Tinning improves heat transfer and reduces cold joints during rework. - 4
Reflow with controlled heat
Position the component and reflow the joint using a steady, moderate temperature. Avoid excessive dwell time; use brief heat cycles to wet the pad fully. Watch for capillary action and ensure the solder flows smoothly across the pad."
Tip: Keep the iron tip clean and tinned; a dirty or oxidized tip impedes heat transfer. - 5
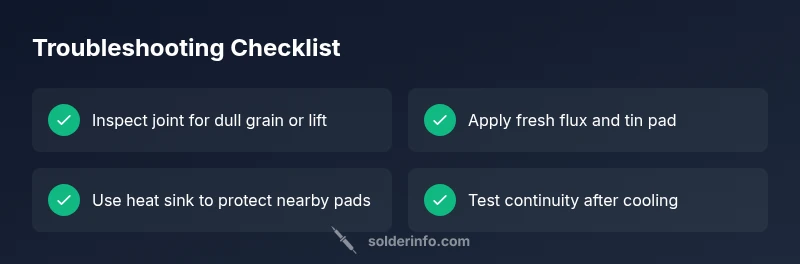
Inspect after cooling and test continuity
Let the joint cool naturally, then visually inspect for a shiny, uniform fillet. Perform a quick continuity test and check for mechanical movement. Address any signs of movement or bridging immediately.
Tip: Testing while cold prevents heat-induced changes that mimic good joints. - 6
Rework or replace if damaged
If there is visible pad lifting or copper tearing, consider pad repair or trace replacement. In extreme cases, rework the board by removing damaged copper and re-establishing the trace, or replace the component if needed.
Tip: Do not reuse a joint that shows lift or widespread oxidation; safety and reliability come first.
Diagnosis: A visible dull or cracked joint, intermittent connectivity, or lifted pad after soldering.
Possible Causes
- highInadequate heat transfer due to insufficient tip temperature or poor heat sinking
- mediumExcessive heat or long dwell time causing scorching or oxidation
- lowContaminated flux or surface contaminants on the pad or copper
Fixes
- easyCheck the iron tip temperature and set a stable, appropriate heat for the alloy you are using.
- easyApply fresh flux and reflow the joint with controlled, short heat cycles; avoid prolonged heating.
- mediumUse a heat sink or copper pour to protect nearby pads and achieve even heat distribution.
- hardIf the pad or copper has lifted, consider re-tinning the pad or replacing the pad/trace to restore a solid bond.
Quick Answers
What exactly is a disturbed solder joint?
A disturbed solder joint is one that fails to form a reliable, uniform bond. It often looks dull, grainy, or cracked and may lift away from the pad. These joints conduct poorly and are prone to failure under thermal cycling.
A disturbed solder joint looks dull or cracked and can lift off the pad, making the connection unreliable.
How can I tell if a joint is a cold solder joint?
Cold joints appear dull, brittle, and may have a rough surface. They can cause intermittent connections or high resistance. Reflowing with clean flux and proper heat typically restores a solid bond.
Cold joints look dull and may feel rough; reflow with proper heat to fix them.
Is flux age or type important for disturbed solder?
Yes. Expired or degraded flux loses its activation strength, hindering solder flow and wetting. Always use fresh flux appropriate for the alloy and cleaning steps after soldering.
Using fresh flux helps solder flow correctly and prevents disturbed joints.
When should I replace a pad or trace instead of reworking?
If the copper pad lifts, the trace is damaged beyond simple repair, or the board shows repeated joint failures in that area, replacement or re-routing is warranted.
If the pad is damaged beyond repair, replacing it or re-routing is the safer option.
Can disturbed solder pose safety risks?
Disturbed solder can pose electrical and heat hazards, especially if insulation or protection is compromised. Always verify insulation and power-down before handling, and avoid reflowing near flammable materials.
Yes, there are safety risks; make sure to power down and check insulation before working.
Watch Video
Top Takeaways
- Identify dull or lifted joints early to prevent failures
- Use clean prep, flux, and tinning to improve wetting
- Apply controlled heat; avoid over-dwell or overheating
- Inspect joints after cooling before powering the circuit
- Rework damaged pads or traces rather than forcing a weak joint