Corroded Solder Joint Troubleshooting: Quick Fixes and Prevention
Urgent guide to diagnosing and fixing a corroded solder joint. Learn quick checks, safe cleaning, rework steps, and prevention tips across electronics, plumbing, and jewelry soldering.

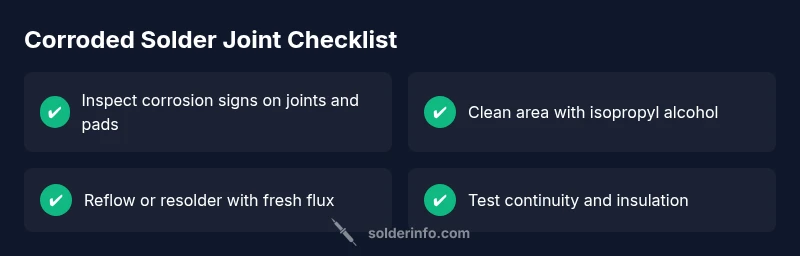
Begin with the simplest checks: look for visible corrosion on joints, lifted pads, or dull, cracked solder. Clean the area with isopropyl alcohol and a soft brush, then reflow or re-solder with fresh flux. If corrosion has damaged pads or traces, replace the affected component or PCB section instead of risking a failure.
What is a corroded solder joint?
A corroded solder joint means the metallic connection between a component lead and a PCB pad has degraded due to oxidation, moisture, environmental contaminants, or flux residues. Over time, corrosion creates raised impedance, intermittent connections, and mechanical weakness. According to SolderInfo, corrosion often starts at the edge of the pad where flux residues trap moisture, then spreads along the fillet as solder crystals form oxide layers. In electronics, a corroded joint can cause intermittent failures, flickering LEDs, or complete open circuits. In plumbing and jewelry contexts, corrosion can also impair conductivity or mechanical integrity. Recognize visual cues: dull or crumbly solder, green or white bloom on copper, flaking coating, or a cracked fillet. These signs indicate that the joint has to be cleaned, repaired, or replaced to restore reliability.
Why corrosion happens in joints and environments
Corrosion in solder joints is driven by moisture, temperature cycling, and environmental contaminants. Flux residues left after soldering can trap moisture, acids, and ionic species that accelerate oxide formation. Humid storage, exposure to salty air, or acidic cleaners worsen the problem. Lead-free solders tend to form oxides more readily under aggressive conditions, which increases the risk of a compromised joint if cleaning steps are skipped. Regular maintenance and proper storage reduce risk, while careful rework with fresh flux can restore conductivity when corrosion is limited to the fillet. SolderInfo analysis shows that moisture and residue exposure are major contributors to deterioration, especially on older boards.
Safety-first: preparing to troubleshoot corroded joints
Power must be disconnected and capacitors discharged before touching any board. Wear eye protection and use a fume hood or well-ventilated space when heating joints. Gather PPE: safety glasses, nitrile gloves, and a 99% isopropyl alcohol solution. Clean the workspace to prevent contaminants from spreading. If you are unsure about contaminant sources or suspect heavy contamination, consider bench testing with spare boards to avoid risking essential equipment.
Visual inspection and testing indicators
Look for color changes on the solder fillet, lifted pads, or damaged copper traces. A dull, grainy appearance or green/blue oxidation indicates corrosion. Use a multimeter to test continuity across the joint and measure resistance under normal operating voltage. Any intermittent readings, high resistance, or open circuits point to subtle corrosion or pad damage. Also inspect the flux residue: a thick, sticky film can harbor moisture; if present, plan a thorough cleaning and possible rework.
Cleaning, rework, and prevention strategies
Begin with a careful cleaning to remove corrosion products: brush with a soft nylon brush under gentle alcohol flow, then re-evaluate the joint. Reflow or re-solder with fresh flux and clean solder—avoid reheating beyond the soldering window to prevent pad lifting. If pads or traces are compromised, you may need to repair or replace them. After repair, cure with a light conformal coating or sealant if the device operates in a humid or corrosive environment to prevent future issues.
Steps
Estimated time: Total time: 30-60 minutes
- 1
Inspect with magnification
Power off the device and inspect the joints under good light or a magnifier. Look for corrosion halos, pad lift, or cracked fillets. Note all affected joints and any nearby traces that look compromised.
Tip: Mark suspicious joints with low-tack tape to stay organized during rework. - 2
Prepare the workspace
Clear the area, connect a fume extractor, and ensure you have fresh flux and properly rated solder. Place a quiet, heat-tolerant jig to hold components in place during rework.
Tip: Keep a spare PCB under the board to avoid heat damage to other components. - 3
Clean and dry the joint
Apply isopropyl alcohol and a soft brush to remove corrosion products and flux residues. Dry with a lint-free wipe and recheck the joint for residual contamination.
Tip: Do not scrub too aggressively; you risk lifting pads. - 4
Reflow or re-solder
Apply fresh flux, heat the joint with a controlled soldering iron or hot air, and create a clean fillet. Avoid overheating the pad to prevent further damage.
Tip: Watch for a smooth, shiny fillet and avoid cold joints by maintaining even heat. - 5
Test electrical continuity
Let the joint cool and test continuity with a multimeter. Confirm resistance is within expected range and there are no intermittent readings.
Tip: Test at the board operating voltage if safe to do so. - 6
Protect and reassemble
Apply a light conformal coating or sealant after testing if the environment is humid. Reassemble and run functional tests to verify reliability.
Tip: Document the repair for future maintenance and inspection.
Diagnosis: Visible corrosion on solder joints or intermittent connections
Possible Causes
- highFlux residues not cleaned after soldering
- highMoisture ingress or humid environment causing oxide buildup
- mediumSalt exposure or corrosive atmosphere
- lowPhysical stress or pad lifting due to board flex
- lowLead-free solder oxidation or tin whiskers in aging boards
Fixes
- easyClean area with isopropyl alcohol, brush gently, inspect pads
- mediumReflow joints with fresh flux and proper temperature profile
- hardRepair/replace damaged pads or traces and re-tin
- easyApply conformal coating or sealant to prevent moisture ingress
- hardIf corrosion is extensive, replace the component or board section
Quick Answers
What causes corroded solder joints?
Corrosion is caused by moisture, flux residues, and environmental contaminants; over time it leads to oxidation and poor connections.
Corrosion in solder joints is caused by moisture and residue; it degrades connections over time.
Can corroded joints be repaired, or do I need to replace components?
Many corroded joints can be repaired if pads and traces are intact. If copper pads are lifted or traces are damaged beyond repair, replacing the component or board section is recommended.
You can often repair corroded joints if pads are intact; otherwise replacement may be needed.
What safety precautions should I take when cleaning corroded joints?
Power off, discharge capacitors, wear eye protection, use a fume hood or good ventilation, and handle solvents like isopropyl alcohol safely.
Always power down and use ventilation when cleaning corrosion.
Is lead-free solder more susceptible to corrosion?
Lead-free solder can oxidize and form oxides more readily under aggressive conditions; ensure proper cleaning and protective measures remain important.
Lead-free solders can oxidize faster if you don’t clean and protect joints.
How can I prevent corrosion on future solder joints?
Clean flux residues thoroughly, store boards in low-humidity environments, use conformal coatings for exposure, and avoid using corrosive cleaners near electronics.
Clean residues, keep humidity down, and protect joints with coating when needed.
What are the signs that a repaired joint may fail again?
Look for a dull fillet, new discoloration, or intermittent readings under test. Reflow or pad repair should be considered if any sign recurs.
If the joint dulls or tests show unstable readings, recheck or rework.
Watch Video
Top Takeaways
- Inspect early to prevent failures
- Clean thoroughly before rework to avoid residue
- Use fresh flux and solder for reliable joints
- Check pads and traces for damage after repair
- Protect joints from moisture to prevent future corrosion