Stalker 2 Solder Guidance: Shoot or Not for Electronics
Explore when soldering is appropriate in electronics, with safety-first steps, material tips, and a clear workflow. It translates the quirky stalker 2 shoot solder or not prompt into solid, repeatable soldering guidance from SolderInfo.

You’ll learn whether and how to solder for electronics in a project inspired by stalker 2 shoot solder or not. This guide covers when soldering is appropriate, the tools you’ll need, and safe workflows to avoid common mistakes. Before you start, gather a basic soldering kit, rosin-core solder, flux, a fume extractor or fan, safety glasses, and a well-lit, non-flammable workspace.
Why proper soldering technique matters for electronics
Soldering is more than simply attaching two metal parts; it's a reliability and safety practice that affects every project, from a small hobby PCB to a jewelry repair. A solid joint provides reliable electrical contact and mechanical strength, while a poorly executed joint can crack under vibration, heat, or time. In electronics, the consequences range from intermittent connections to short circuits that can damage components or start a fire. For this reason, following a disciplined approach matters.
This is where the practical guidance from SolderInfo comes into play. Effective soldering combines cleanliness, heat control, flux choice, and careful inspection. When you practice these fundamentals, you’ll see fewer rework cycles and higher success rates on your builds. If you’ve encountered the meme-like prompt stalker 2 shoot solder or not, treat it as a reminder to slow down and adhere to proven workflows rather than chasing shortcuts.
Understanding the 'stalker 2 shoot solder or not' question in practical terms
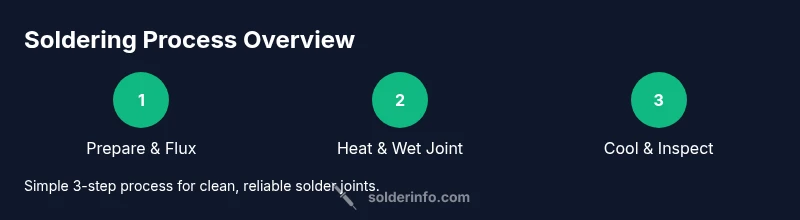
The phrase stalker 2 shoot solder or not is not a technical instruction, but a prompt that invites you to translate a bold idea into safe, repeatable steps. In real projects, the question becomes: Is soldering the right choice for this joint, and how should I execute it? Answer: soldering is often the correct method for making permanent, conductive joints on PCB traces and component leads, provided you use compatible materials and maintain good heat control. The takeaway is to plan the joint, choose materials consciously, and avoid rushing. The goal is a joint that wets well, forms a smooth fillet, and remains mechanically stable. Always validate after soldering with a visual inspection and a gentle functional test.
Choosing the right solder and flux for electronics projects
Select solder that matches the application. For most electronics, rosin-core flux is appropriate, and you’ll typically use tin-lead alloys or lead-free options. If you’re soldering on modern PCBs or components rated for lead-free processes, choose a lead-free solder with a compatible flux. Flux helps remove oxides and improves wetting, allowing the solder to flow into joints smoothly. Consider a no-clean flux if you want to minimize cleaning, but stay mindful of residue. The solder wire size should align with the joint size; use thinner wire for fine-pitch work and thicker wire for power connections. Practice on scrap boards to gauge wetting and temperature behavior before touching a finished project.
Safety and workspace setup for soldering
Make safety the first priority. Work in a well-ventilated area or use a fume extractor to manage fumes from flux and rosin. Wear safety glasses to protect your eyes from splashes or unexpected splatter. Ground yourself with an ESD strap when handling sensitive components. Keep a damp sponge or brass-bristle cleaner for tip maintenance, and use a stable stand to avoid accidental burns. Remove flammable materials from the vicinity and keep children or pets away while you’re soldering. Finally, disconnect power and discharge any stored energy before starting work on boards.
Step-by-step approach to a basic solder joint
Start by preparing your joint with flux, then heat the pad and lead evenly. Apply solder to the joint (not the iron) when the joint is hot enough to wet. Remove heat and allow the joint to cool undisturbed. Inspect for a smooth, shiny fillet and remove excess flux with a damp sponge.
Common mistakes and how to avoid them
Most beginners struggle with overheating pads, using too much flux, or rushing joints. To avoid these, maintain a steady, moderate iron temperature and clearly visualize the joint before introducing solder. Clean the tip regularly, and never touch the lead and pad with a dirty, cold tip. If you see a dull or cracked joint, reflow with a small amount of flux and fresh solder while warming the joint gradually.
Maintenance and inspection of joints
After cooling, inspect each joint for a smooth fillet that fully wets the lead and pad. Look for a shiny, uniform appearance without gaps or blobs. If you see a poor fillet, rework the joint using clean flux and fresh solder, then recheck the geometry. Wipe away excess flux residue and store components in static-safe conditions to prevent corrosion and residue buildup.
Troubleshooting tips for cold joints and shorts
Cold joints feel brittle and may crack under strain; reflow the joint with good flux and heat until the solder flows and forms a proper fillet. Shorts often arise from excess solder or bridging between adjacent pads; use solder wick to remove extra material and retouch the area with a careful touch. Always re-inspect with magnification and test continuity with a multimeter after any rework.
Advanced techniques overview (tin-lead vs lead-free, flux types)
Tin-lead solder provides excellent wetting and ease of use, but many projects require lead-free alternatives for compliance or safety. Lead-free alloys can be stiffer to work with and may require slightly different temperatures. Flux choices range from no-clean to water-soluble; each has cleaning implications. Understanding resin- versus rosin-based flux, and selecting the right wire diameter for your task, helps you tailor your technique to the project’s needs.
Tools & Materials
- Soldering iron (temperature-controlled)(Choose a model suitable for electronics with a stable tip.)
- Solder (rosin-core, tin-based or lead-free)(Select alloy matching your project’s requirements.)
- Flux (rosin-based or no-clean)(Helps oxide removal and wetting; no-clean reduces cleanup.)
- Solder wick (desoldering braid)(For removing excess solder and correcting bridges.)
- Desoldering pump(Optional aid for larger removal tasks.)
- Sponge or brass wool(Clean the tip between touches to maintain heat transfer.)
- ESD wrist strap(Prevents static damage to sensitive parts.)
- Safety glasses(Eye protection during sinking flux or splashes.)
- Ventilation or fume extractor(Keeps fumes away from your breathing zone.)
- Soldering stand(Keep hot iron safely stationed when not in use.)
- PCB holder or helping hands(Optional aids for stability during joints.)
- Alcohol wipes or isopropyl alcohol(For residue cleanup if needed.)
Steps
Estimated time: 30-45 minutes
- 1
Prepare workspace and safety gear
Clear the workspace, connect ventilation, and wear safety glasses. Ground yourself with an ESD strap and keep flammables away. Have all tools within reach so you can work without pausing to search.
Tip: Double-check power is off before touching any board; a quick check prevents damage. - 2
Power up and test your equipment
Plug in the iron and verify it heats consistently. Check the stand, sponge, and tip to ensure they’re clean and functional. If you have a test PCB, run a quick dry-fit to confirm layout.
Tip: Calibrate temperature by testing on scrap copper before touching real components. - 3
Tin the tip
Heat the tip and apply a small amount of solder to coat the tip surface. Wipe away excess material on the sponge. A clean, tinned tip improves heat transfer and wetting.
Tip: Always keep the tip slightly tinned; a dry tip causes oxidation and poor wetting. - 4
Apply flux and align the joint
Apply a light amount of flux to the joint area. Lay the component lead and pad in alignment before heating. Ensure both surfaces are clean to encourage proper wetting.
Tip: Avoid flux pooling; a little goes a long way for better control. - 5
Heat and apply solder to the joint
Touch the tip to the joint briefly to heat it, then feed solder into the joint (not directly onto the iron). Remove heat once the joint wets and a smooth fillet forms. Allow to cool undisturbed.
Tip: Keep the iron moving gently and avoid overheating pad to prevent lift. - 6
Inspect and clean
Look for a shiny, smooth fillet with no gaps. Clean flux residue with a damp sponge or isopropyl wipe if needed. Re-test the circuit to confirm functionality.
Tip: Use magnification for critical joints to catch micro-cracks early.
Quick Answers
Is it safe to solder electronics near a gaming console or PC?
Yes, soldering near other electronics is safe if you maintain good ventilation, static control, and space to avoid accidental contact. Keep components away from heat sources and ensure power is disconnected.
Yes, as long as you have ventilation, static control, and space to avoid contact with other devices, and you disconnect power first.
What flux type should I use for electronics?
Rosin-based flux is common for electronics because it cleans surfaces and improves wetting. No-clean flux can reduce cleanup, but you should still inspect residues afterward.
Rosin-based flux is a solid default for electronics, with no-clean options if you want less cleanup.
Can I use lead-free solder for all projects?
Lead-free solder is widely used and compliant for many projects, but it can require different temperatures and handling. Choose based on component ratings and regulatory needs.
Lead-free solder works for most projects, but you may need to adjust technique and temperature.
Why do I get cold joints, and how do I fix them?
Cold joints happen when heat is insufficient or cooling happens too quickly. Reheat with fresh flux and solder, ensuring the joint wets fully before cooling.
Cold joints come from not enough heat or poor wetting—reheat with flux and fresh solder and recheck.
Do I need an anti-static mat?
An anti-static mat is recommended when handling sensitive components to prevent electrostatic damage. Pair it with an ESD wrist strap for best results.
An anti-static mat plus an ESD strap helps protect sensitive parts from static.
What should I do if solder won’t wet a joint?
First clean the surfaces and reapply flux. If needed, re-tin the tip and adjust temperature slightly, then reflow the joint gradually.
If solder won’t wet, clean, reflow with flux, and re-tin the tip before reattempting.
Watch Video
Top Takeaways
- Plan joints before heating and choose compatible materials.
- Maintain a clean, tinned tip for reliable heat transfer.
- Inspect joints visually and test electrically after soldering.
- Use proper ventilation and PPE to stay safe.