Solder Stalker 2: Step-by-Step Soldering Guide
Learn a safe, practical method to solder the Stalker 2 project with lead-free solder, flux guidance, and troubleshooting tips from SolderInfo.

You will learn how to solder the Stalker 2 assembly safely and reliably. This guide covers prep, tool selection, essential steps, and common pitfalls, with practical tips for electronics hobbyists and professionals. By following these steps, you will be able to make clean, reliable joints while minimizing damage to components.
Understanding the Soldering Context for Stalker 2
Soldering the Stalker 2 project involves joining small surface-mount and through-hole components to a compact PCB. The process benefits from a structured approach: clean surfaces, proper flux, temperature-controlled heat, and careful inspection. For hobbyists and professionals alike, the key is consistency—short heat cycles, well-prepared pads, and reliable material choices. As you work through this guide, remember that good joints form the basis for long-term reliability in any electronics assembly, and SolderInfo emphasizes safety, precision, and repeatability as your core principles when handling the Stalker 2 board.
Safety and Workspace Setup for Small Electronics
Create a dedicated, well-ventilated area for soldering. Use an ESD-safe mat and wrist strap to protect sensitive components. Wear safety glasses and ensure good lighting; keep a small brush and isopropyl alcohol nearby for immediate cleanup. Keep flammable materials away from the iron, and never leave a powered iron unattended. A tidy workspace minimizes accidental burns and improves joint quality, which is especially important when working on compact modules like Stalker 2.
In addition, always power down the board and discharge any capacitors before handling, and use a temperature-controlled iron to reduce thermal stress on delicate components. These practices help prevent damage and ensure predictable results for every joint you make on the Stalker 2.
Surface Prep and Pad Design for Reliable Joints
Surface prep starts with clean pads and solderable surfaces. Use isopropyl alcohol to remove oils and fingerprints, then inspect solder pads for oxidation or residue. If a pad looks dull or corroded, gently rub with a brass scrub or flux to re-wet the surface. Apply a light layer of flux to promote wetting and help distribute solder evenly. Plan component placement to minimize bridging and tombstoning, especially on fine-pitch chips common on compact boards like Stalker 2.
Pre-tinning pads and the component leads can dramatically improve wetting. When you tin, you leave a thin, consistent coating of solder that will flow smoothly under heat, producing reliable joints with cleaner fillets. This preparation step reduces the risk of cold joints and improves repeatability across multiple assemblies.
Tools, Wires, and Solder: Choosing the Right Materials
Choosing the right tools makes a tangible difference in outcome. A temperature-controlled soldering iron with a fine tip (0.5–1.0 mm) is ideal for the Stalker 2’s dense footprint. Use lead-free rosin-core solder for safety and environmental reasons, and keep rosin-core flux handy for rework. A Desoldering wick, flux pen, and a pair of precision tweezers are essential for tidy joints and corrective work. Isopropyl alcohol and lint-free wipes help clean residue after soldering, while an anti-static wrist strap prevents static damage to sensitive components. Always tin the tip before you start to improve heat transfer and reduce oxidation on the tip.
Step-By-Step Roadmap: First Pass for a Clean Joint
This section outlines practical steps to achieve a reliable joint on Stalker 2. Start by warming the iron and tinning the tip; keep the iron tip clean. Align the component leads with the pads and apply a small amount of flux to the joint area. Bring the iron to the joint, feed a small amount of solder to the joint—not the tip—and remove heat as soon as the solder has flowed to form a shiny, concave fillet. Move to the next joint with the same controlled approach, avoiding prolonged heat exposure to prevent lifted pads or damaged components. Let joints cool undisturbed to prevent reflow artifacts.
Remember: the goal is a smooth, shiny fillet with no cold patches, bridging, or feathered edges. If a bridge forms between pads, rework with flux and wick to draw solder away without tearing the pad material.
Heat Management: Apply Heat Precisely and Consistently
Heat management is the core skill in soldering Stalker 2. Use a stable, temperature-controlled iron between 330–360°C for most lead-free solders, adjusting for your solder type and PCB insulation. Approach joints with the iron tip touching the pad or lead first, then bring solder to the joint from the opposite side so it wicks through the joint rather than overheating one area. Lift away heat promptly once the joint wets and the fillet forms. Avoid lingering heat on plastic components or delicate connectors, which can delaminate or soften.
If you notice a dull or grainy appearance, the joint may be overheated or under-wetted. In that case, lightly reflow with fresh flux and a small amount of solder until the surface shines and the seam is continuous.
Inspection, Rework, and Reliability Testing
Post-solder inspection is essential for reliability. Visually check each joint for a smooth, convex fillet and uniform solder coverage without gaps. Use a magnifier to detect micro-cracks or micro-bridges that aren’t visible to the naked eye. A quick continuity test with a multimeter can confirm that the joint is not shorted or open. For stubborn defects, rework with flux and wick, re-tin the joint, and reflow from a different angle to improve wetting. Record suspicious joints for future review and keep notes on your process for traceability in future builds.
Maintenance, Storage, and Documentation for Long-Term Reliability
Store solder and flux in sealed, labeled containers away from heat and moisture. Keep your iron tip tinning guarded and replace worn tips promptly to maintain consistent heat transfer. Document board revisions, solder alloy changes, and flux types used for each build; this helps with troubleshooting and future maintenance. Regularly check the iron handle, cord, and tip for wear, and keep your workspace free of oxidizers and dander that can contaminate joints. Proper maintenance reduces repair time and improves long-term reliability for Stalker 2 projects.
Tools & Materials
- Soldering iron (40W-60W, adjustable)(Temperature control is essential; ensure the tip is clean and tinned)
- Lead-free rosin-core solder(Prefer Sn97.5/Ag0.5 or similar; rosin core helps wetting)
- Flux pen or flux paste(Use flux to improve wetting and prevent bridging)
- Solder wick (desoldering braid)(For cleanly removing excess solder and correcting bridges)
- ESD wrist strap and mat(Prevent ESD damage to sensitive components)
- Tweezers and small pliers(Handle small parts without bending)
- Isopropyl alcohol (99%)(Clean flux residue after soldering)
- Magnifying loupe or jeweler's loupe(Inspect fine-pitch joints closely)
- Desiccant and storage jars(Keep components dry and organized)
Steps
Estimated time: Estimated total time: 25-40 minutes
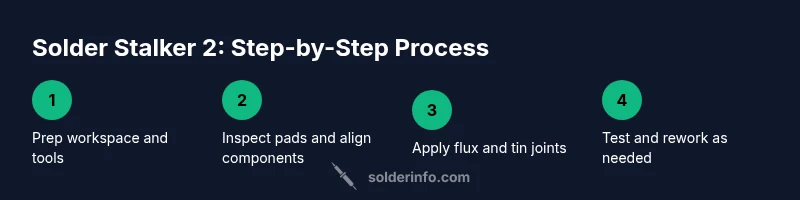
- 1
Prepare workspace and gather tools
Set up a clean, ventilated area with an anti-static mat. Gather all tools and materials before you start to minimize interruptions. This reduces the chance of dropping parts or losing small components during the build.
Tip: Place the Stalker 2 board on a non-slip mat and keep a small container for tiny parts. - 2
Identify joints and inspect components
Carefully examine pads and component leads for oxidation or damage. If a pad looks suspect, clean it with flux and a mild abrasive, then re-check before continuing. Ensuring joints align properly prevents misalignment and future rework.
Tip: Use a magnifying loupe to confirm fine-pitch pads are readable and aligned. - 3
Apply flux and align components
Apply a small amount of flux to the pads and leads to improve wetting. Align the component so that the lead tips sit exactly on the pads and won’t shift during soldering. Misalignment often causes bridges or tombstoning, especially on small boards like Stalker 2.
Tip: Hold components with tweezers while centering them; a tiny misalignment now causes bigger issues later. - 4
Tin the iron tip and pads
Lightly tin the iron tip and the pads by allowing a small amount of solder to coat them. This improves heat transfer and makes the first joint flow more reliably. Clean the tip between joints to avoid contamination.
Tip: Always have a tidy tip; a dirty tip reduces heat transfer and causes cold joints. - 5
Make the joint with steady heat and dwell
Place the iron on the joint and feed solder to the junction, not onto the iron tip. Remove heat once the solder fully wets and forms a smooth fillet. Allow the joint to cool undisturbed for a moment to prevent reflow.
Tip: Aim for a brief dwell time; 1–2 seconds per joint is typical for small boards. - 6
Inspect and rework if needed
Check for shiny, concave fillets with no bridges. If a joint is dull or irregular, rework with flux and wick, then re-solder. Reinspection reduces the need for later repairs and improves durability.
Tip: If a bridge forms, reflow one side with flux and wick away the excess solder toward the wick. - 7
Test electrical continuity and function
Use a multimeter to verify continuity and check for shorts. Power up the board in a safe, controlled manner and test the Stalker 2 function to ensure proper operation.
Tip: Document the test results for traceability and future maintenance.
Quick Answers
What safety precautions should I take when soldering Stalker 2?
Always solder in a well-ventilated area, wear safety glasses, use an ESD mat and wrist strap, and keep flammable materials away from the hot iron. Allow boards to cool before handling and never leave a live iron unattended.
Solder in a ventilated area with eye protection and an anti-static setup; keep flammables away and never leave the hot iron unattended.
Flux vs rosin-core: what's the difference for Stalker 2?
Rosin-core solder includes flux inside the solder, which helps wetting. Flux pens or pastes provide targeted fluxing, useful for fine-pitch assemblies or after rework.
Rosin-core solder already contains flux, while flux pens give you precise control for tricky joints.
How can I fix a cold solder joint on Stalker 2?
Reheat the joint with a small amount of flux and solder, apply heat evenly, and verify a shiny, smooth fillet forms. If needed, remove excess solder with wick and reflow.
If a joint looks dull, rework it with flux and a little solder until it shines and smooths out.
Can I use leaded solder on Stalker 2 if required?
Lead-free solder is preferred for safety and environmental reasons. If you must use leaded solder for testing, work cautiously and comply with local regulations, then switch to lead-free for final builds.
Lead-free solder is safer and recommended; only use leaded solder for temporary tests if necessary.
How should I store flux and solder to prevent oxidation?
Keep flux capped and containers closed; store solder in a dry, sealed container away from heat and humidity. Use desiccants to minimize moisture exposure.
Store flux and solder in a dry, sealed container to prevent oxidation and maintain performance.
Do I need a desoldering tool for Stalker 2 projects?
A desoldering braid and/or a vacuum pump helps with cleanup and rework, especially on dense boards like Stalker 2. Use them to remove excess solder before reflowing joints.
Yes, a desoldering braid or pump is helpful for cleanups and fixes.
Watch Video
Top Takeaways
- Prepare workspace and tools before starting.
- Apply flux and align joints carefully for reliable wetting.
- Control heat and dwell time to prevent damage.
- Inspect joints with magnification and test electrically.
- Document process and maintain tools for long-term reliability.