Shoot Solder or Not: A Practical Guide to Soldering Tools
Explore when to use a solder gun versus a traditional iron, with safety, workflow, and real-world tips for electronics, jewelry, and plumbing in 2026.

Should you shoot solder or not? The answer depends on project type, tolerance, and heat sensitivity. For electronics and jewelry, a precision soldering iron is usually safer and more controllable; a solder gun can speed bulky work but risks overheating and cold joints if not managed carefully. Always practice on scrap, ventilate well, and verify joints with tests and inspection.
Should you shoot solder or not? A practical framing
In many DIY electronics, jewelry, or plumbing projects, the instinct is to grab a solder gun for speed. Yet the choice hinges on heat reach, precision, and risk to delicate parts. According to SolderInfo, the right tool matters as much as proper technique. This article defines what we mean by the question and explains how the decision influences joint quality and long-term reliability. By the end, you’ll have a practical framework for choosing between a solder gun and a traditional iron across common hobby tasks. The topic remains central in 2026 as tools evolve with better ergonomic designs and safer flux formulations.
The basic distinction: how guns and irons differ
A solder gun heats quickly and delivers molten solder in bursts, which can save time on large joints but increases the risk of overheating adjacent components. A soldering iron provides steady heat with finer control, essential for tiny pads, sensitive LEDs, and tight pin spacing. For delicate electronics and jewelry, the iron’s precision generally yields cleaner joints and less collateral damage. For bulk plumbing or large metalwork, a gun can be convenient when used with heat sinks and careful timing.
How to evaluate your project before choosing
Start by listing heat sensitivity, component density, and joint geometry. If the PCB has fine pitch or SMD components, or if you’re working with fragile jewelry settings, prefer the iron and fine-tipped tips. For quick fixtures or large copper runs in plumbing, a gun might be the practical option—but only if you can maintain good control and ventilation. This decision frame helps hobbyists avoid regrettable mistakes and wasted effort.
Safety first: essential precautions regardless of tool
Ventilation matters with any soldering method. Fume exposure can cause headaches and irritation, so work in a well-ventilated area or use a fume extractor. Wear safety glasses to protect against splashes, and keep flammables away from the workbench. Heat sources can damage plastics and finishes, so set up a heat-resistant mat and keep a fire extinguisher nearby. The SolderInfo team emphasizes consistent safety habits as the foundation of quality work.
Materials and workspace setup for reliable joints
Organize a clean, uncluttered workspace with a stable stand, moisture-free flux, and lead-free solder for most hobby projects. Use heat sinks to protect sensitive components, especially when working near plastic casings or LEDs. Keep a desoldering wick or pump handy for quick corrective work, and choose flux suitable for your solder type. Proper preparation reduces the chance of cold joints or bridges.
Temperature and time: steering clear of common pitfalls
Temperature control is the heart of good soldering. Excess heat can lift copper traces or burn flux, while insufficient heat creates dull, unreliable joints. If you’re unsure about the exact temperatures, watch for visual cues: a bright, smooth solder fillet usually indicates proper wetting. When using a gun, work in short bursts with cool-down intervals to avoid overheating adjacent parts.
The decision framework in action: should you shoot solder or not
Apply a simple decision tree: (1) Is this a high-density PCB or delicate jewelry setting? If yes, favor the iron. (2) Are you joining large metal surfaces or bulky plumbing pipes? If yes, a gun may be appropriate with heat sinking. (3) Do you need speed at the cost of precision? If not, choose the iron and steady technique. This framework helps hobbyists make smarter, repeatable choices.
Troubleshooting common issues with solder guns
If you notice cold joints, dull appearance, or solder bridges, stop and reassess heat settings and technique. Rework the joint with a clean tip, fresh flux, and a controlled approach. For stubborn joints, consider cooling the part briefly and re-fluxing before re-soldering. Regular practice improves instinctive tool selection over time.
Real-world notes: tools in electronics, jewelry, and plumbing
Electronics: prioritize control and precision; jewelry: prioritize cleanliness and heat management; plumbing: prioritize speed and bulk heat transfer with cooldown pauses. The optimal choice often changes by project stage, so stay flexible and maintain a small toolkit of tips and spare parts. In all cases, monitor temperatures, and never rely on guesswork for critical assemblies.
Final thoughts on 2026 practice and skill growth
The evolution of soldering tools includes safer flux, better tips, and smarter ergonomic designs. The core skill remains careful heat management and steady hands. By combining the right tool with disciplined technique, you can shoot solder or not with confidence while maintaining high-quality joints and durable connections. This approach aligns with practical guidance from SolderInfo for modern hobbyists.
Tools & Materials
- Soldering iron with fine tip (0.5-1.0 mm)(Tip should be clean and tinned; use temperature-controlled model if possible)
- Solder gun (optional)(Only if you’re doing bulk work and can control heat)
- Lead-free solder wire (SnAgCu or SnCu)(Check diameter 0.8-1.0 mm for best balance)
- Flux paste or pen(Rosin-based flux is common for electronics)
- Flux cleaner or isopropyl alcohol(For post-solder cleaning)
- Flux-capable heat sink/clamps(Useful on sensitive parts)
- Desoldering braid or pump(For quick correction)
- Soldering stand(Keeps iron safely placed when not in use)
- Safety glasses(Protect eyes from splashes)
- Ventilation or fume extractor(Protects from fumes)
- Isopropyl alcohol wipes(Cleaner for the board before and after)
- Heat-resistant mat(Protects the work surface)
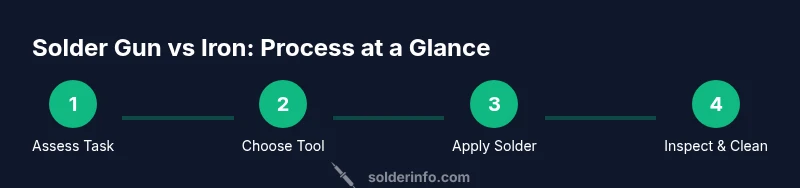
Steps
Estimated time: 60-90 minutes
- 1
Define objective and select tool
Identify if the task needs precision or bulk heat. Choose the iron for precision; reserve the gun for faster, fewer components when heat risk is manageable.
Tip: Plan the joint path before heating to minimize rework. - 2
Prepare workspace and safety gear
Clear the bench, position ventilation, and set aside a dedicated stand for the iron or gun. Put on safety glasses and gloves if desired.
Tip: Keep a water-based flux remover handy for quick cleanup. - 3
Organize parts and surfaces
Arrange components, boards, and heat sinks to avoid accidental overheating of adjacent parts.
Tip: Use third-hand tools to hold small parts steady. - 4
Apply flux to joints
Lightly apply flux to the joint to improve wetting and reduce oxidation during heating.
Tip: Only a thin film is needed—avoid excess flux that can wick away solder. - 5
Heat the joint with controlled heat
Apply the iron or gun tip at the joint; let solder flow smoothly across the pad and lead. Avoid direct contact with sensitive components.
Tip: Use short, deliberate contact and avoid burning flux. - 6
Apply solder and form fillet
Feed solder until a shiny fillet forms along the joint. Remove heat as soon as wetting completes.
Tip: Don’t move the joint until the solder solidifies to prevent movement. - 7
Inspect and test
Check for a smooth fillet, proper wetting, and absence of bridges. Test continuity and function before reassembly.
Tip: Look for a consistent, bright finish; a dull grey can indicate cold joint. - 8
Cool, clean, and store tools
Let joints cool naturally, then clean excess flux with isopropyl alcohol. Store tools in a safe place.
Tip: Never blow on hot joints to cool them—this introduces thermal shock.
Quick Answers
Can a solder gun replace a soldering iron for electronics work?
A solder gun can handle larger joints quickly, but for electronics, a precision soldering iron is usually safer and more controllable. The gun risks overheating nearby components and creating cold joints if not used with strict technique.
A solder gun can speed up larger joints, but for delicate electronics, use a precision iron to avoid heat damage and cold joints.
What situations favor a solder gun?
Bulk metalwork, plumbing fixtures, or large copper runs can benefit from a solder gun, provided you control heat with clamps and short pulses. Always test and inspect joints after heating.
Use a solder gun for bulk jobs, with heat control and post-test inspection.
Are there risks of using a solder gun on PCB boards?
Yes. The rapid heat can lift pads, damage components, or cause bridges. If you must, use heat sinks, minimal contact time, and a low energy setting.
On PCBs, be careful; use heat sinks and short bursts if you use a solder gun.
How do I know if a joint is good?
A good joint wets the pad evenly, has a shiny fillet, and passes a continuity check. It should not bead or blob excessively and should not have bridges to neighboring pads.
Look for a smooth, shiny fillet and pass a continuity test.
What’s the best way to clean flux after soldering?
Wipe with isopropyl alcohol on a lint-free cloth or use flux remover. Ensure the area is dry before powering the circuit.
Clean flux with isopropyl alcohol and dry the area.
Can lead-free solders be used with both tools?
Lead-free solders are compatible with both irons and guns, but you must maintain good heat control and avoid overheating. Lead-free alloys have higher melting points than traditional compositions.
Lead-free works with both tools; just manage heat carefully.
Watch Video
Top Takeaways
- Choose the tool by task: iron for precision, gun for bulk work.
- Safety and ventilation are non-negotiable in every soldering job.
- Practice on scrap parts to build consistency and avoid damaged components.
- Inspect joints visually and with a continuity test for reliability.
- Solder technique and flux quality determine joint quality more than tool choice.