Can You Use a Soldering Iron on Plastic? Safety and Techniques
Learn whether a soldering iron can be used on plastic, what plastics tolerate heat, safer alternatives, and best practices to avoid warping, fumes, or damage in electronics, jewelry, and plumbing projects.

Can you use a soldering iron on plastic? Yes, but only in very controlled cases and with strict precautions. The question 'can you use soldering iron on plastic' is addressed here: heat can melt, burn, or release fumes, so proceed carefully. Use a temperature-controlled iron at the lowest effective setting, shield the surrounding plastic, and test on scrap pieces before attempting any repair. In most cases, plastic welding or adhesives are safer alternatives.
Can You Use a Soldering Iron on Plastic? Safety and Limits
The brief answer is: you can, in theory, apply heat to some plastics for a bonding or reshaping effect, but it must be done with extreme caution. According to SolderInfo, heat-based joining on plastic carries real risks, including deformation, burning, and the release of potentially toxic fumes. Before attempting any repair, identify the plastic type and the joint’s heat sensitivity. Use a temperature-controlled iron on the lowest effective setting, protect surrounding areas with a heat shield, and work quickly to minimize exposure. If the material shows signs of damage or the joint isn’t tolerating heat, stop and switch to safer methods such as mechanical fastening, adhesive bonding designed for plastics, or specialized plastic welding equipment. Safety first governs every step of this process and should govern your decision to proceed.
How Plastic Types Respond to Heat
Plastics are not all alike when heat is involved. Thermoplastics (like ABS, PET, and polycarbonate) can soften or melt with applied heat, which makes bonding by direct iron contact risky. Chlorinated plastics (such as PVC) can release acrid fumes and degrade rapidly under heat, while some materials may scorch or discolor long before they form a solid bond. When you hear the question of whether you can solder plastic, the answer depends on the specific polymer, additives, and colorants present. For many plastics, traditional soldering is not suitable, and safer options like plastic welding, solvent bonding (where appropriate), or mechanical fastening should be considered. Remember to work in a well-ventilated area and keep heat away from any nearby electronics, wiring, or sensors.
Safety Considerations: Fumes, Melting, and Burn Hazards
Working with hot tools near plastic carries multiple hazards. Fumes from heated plastics can irritate the eyes, nose, and throat, and some plastics release toxic compounds when melted. Always ensure good ventilation, preferably with a fume extractor or outdoors, and wear safety goggles and a heat-resistant glove. Avoid direct skin contact with the hot iron and keep the tip away from already-assembled components. Start with the lowest effective heat and limit contact time to the smallest possible duration to minimize heat transfer. If you notice smoke or a strong chemical odor, stop immediately and reassess.
Safer Alternatives to Soldering on Plastic
There are several safer paths than soldering plastic directly. Plastic welding with a dedicated plastic welder or hot air tool can create strong, clean joints for compatible plastics. Solvent bonding is effective for some polymers (primarily those that are chemically compatible with the solvent), but it requires knowledge of the exact plastic type. Mechanical fastening (screws, rivets, or snap fits) avoids heat entirely and provides reliable repeats. For electronics enclosures, consider using insert-mots or brackets that can be attached with screws or adhesive designed for plastics. In jewelry or delicate plastic parts, prefabricated welding beads or resin-based bonding agents may offer safer options. Each method has trade-offs in strength, appearance, and ease of disassembly, which SolderInfo recommends evaluating before starting.
If You Must Use Heat: Step-by-Step Thinking and Techniques
If the project absolutely requires heat-based joining, plan thoroughly and proceed with small, controlled steps. Prepare a dedicated workspace with a heat shield and testing scrap, set the iron to a conservative low heat, and apply heat in brief pulses to the joint region only. Stop as soon as the plastic shows any sign of melting, withdraw heat, and allow the piece to cool naturally. Inspect the joint for uniform bonding, and if there is any warping or discoloration, revert to an alternative method. Practicing on scrap material helps refine your approach without risking the actual part.
Real-World Scenarios: Electronics Housings, Jewelry, and Plumbing
In electronics, plastic housings often require openings for switches or ports; inserting heat can deform walls and affect internal components. For jewelry or decorative plastics, the aesthetic tolerance is low, so heat control is critical to avoid scarring. In plumbing, solvent bonding and mechanical couplers outperform heat-based methods on many plastics. Across these contexts, the best practice from SolderInfo is to evaluate heat sensitivity first, choose an approach that minimizes heat exposure, and only proceed when you can test and verify reliability on representative samples.
Tools & Materials
- Temperature-controlled soldering iron(Prefer a low-to-mid wattage range; adjustable temperature is essential)
- Heat-resistant barrier (silicone mat or mica sheet)(Protects work surface and adjacent plastic areas)
- Heat sink or clamps(Keeps the joint area from transferring heat to the full piece)
- Pliers and small clamps(Secure parts without direct contact to hot surfaces)
- Scrap plastic pieces for test(Use the same material as the project when possible)
- Personal protective equipment (safety glasses, gloves, respirator or good ventilation)(Protect from heat and fumes)
- Ventilation or fume extractor (optional but recommended)(Helps remove fumes in enclosed spaces)
- Plastic welding rod or compatible filler (optional)(Only if you plan a weld; ensure compatibility with the plastic)
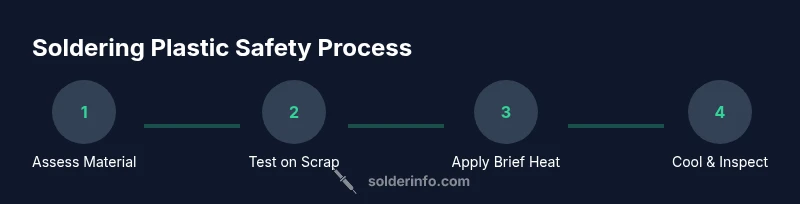
Steps
Estimated time: 20-45 minutes
- 1
Identify plastic type and heat sensitivity
Determine whether the plastic is thermoplastic or thermoset and assess its heat sensitivity. If unsure, do not proceed with heat-based bonding. Testing on a scrap piece from the same material helps predict behavior before touching the actual part.
Tip: Test on scrap material first; if it fuses or discolors, stop immediately. - 2
Secure and prepare the join area
Clean the surfaces to remove oils or contaminants and secure the parts with clamps or a vise. A clean, stable joint reduces the risk of misalignment and excessive heat transfer to surrounding areas.
Tip: Use a heat-resistant barrier between the clamp and plastic to prevent imprinting or damage. - 3
Set the iron to a conservative, low heat level
Choose the lowest effective temperature for the plastic type and tool geometry. This minimizes the chance of melting or burning adjacent areas while still allowing a brief bond.
Tip: Begin with the lowest setting and increase only if tested scrap behaves acceptably. - 4
Apply brief, focused heat to the joint only
Position the tip at a slight angle and apply heat to the joint for short pulses, avoiding prolonged contact with surrounding material. This concentrates heat where needed and minimizes collateral damage.
Tip: Keep the joint steady and use a shield to prevent heat bleed into the rest of the part. - 5
Create a shallow bond or weld
As soon as the plastic shows a shallow melt, bring the pieces into contact and maintain pressure until the bond forms. Do not flood the area with filler unless the material is designed to accept it.
Tip: If you see smoke, stop immediately; refine approach or switch to a non-heat method. - 6
Cool and inspect
Allow the joint to cool naturally without moving the parts. Inspect for uniform bonding, any deformation, or finish irregularities. If the joint is weak, consider alternative methods rather than forcing a stronger heat bond.
Tip: Do not flex or twist the joint while cooling; this can create micro-cracks. - 7
Reinforce with compatible filler or adhesive (if appropriate)
If a filler or adhesive is appropriate for the plastic, apply sparingly and ensure compatibility. Excess filler can cause stress concentrations and poor aesthetics.
Tip: Wipe away excess filler to avoid sticking to surrounding surfaces. - 8
Test the joint under light load
Gently test the repaired area with a light load to verify bonding. If it holds under modest stress, the method may be acceptable for the intended use.
Tip: Gradually increase load in a controlled manner; watch for micro-movements. - 9
Evaluate alternatives if heat fails
If the joint does not hold or causes noticeable damage, switch to safer methods such as mechanical fasteners, solvent bonding where appropriate, or dedicated plastic welding.
Tip: Always preserve original parts and review other joining options before re-attempting heat-based bonding.
Quick Answers
Is it safe to solder PVC or acrylic with a soldering iron?
Soldering PVC or acrylic can release toxic fumes and degrade the material. It is generally not recommended. Consider plastic welding or mechanical fastening instead, and ensure proper ventilation if heat is used.
PVC and acrylic can release harmful fumes when heated, so avoid soldering them directly. Look for safer plastic welding methods or mechanical fixes, and ventilate the area well.
What plastics are more tolerant of heat?
Some plastics tolerate brief heat better than others, but all can be damaged by heat if overexposed. Testing on scrap and selecting plastics designed for heat resistance reduces risk.
Many plastics struggle with heat; always test on scrap and use heat-tolerant materials when possible.
Can I repair an electronics enclosure by melting plastic?
Melting plastic on an electronics enclosure can warp walls and affect components. Prefer non-heat methods like adhesives or mechanical fasteners, or use a proper plastic weld method designed for housings.
Melting the enclosure risks damaging internal parts. Use safer methods or a proper plastic welding technique when appropriate.
What signs indicate heat damage to plastic?
Look for warping, discoloration, or softening and any acrid fumes. If any of these occur, stop and re-evaluate the approach to avoid further damage.
Watch for warping, color changes, or fumes; these are signs you’ve heated the plastic too much.
How close should I work to other components when heating plastic?
Keep the heated area isolated from sensitive parts and use heat shields to prevent heat transfer. Move slowly and test tolerance on scrap to avoid collateral damage.
Keep heat away from other parts and shields help keep heat where you want it.
Are there safe adhesive options for most plastics?
Yes, there are plastic-specific adhesives and solvent bonds for compatible plastics. Ensure the adhesive is compatible with the plastic type and follow product directions for surface prep and cure time.
There are adhesives designed for plastics, but they must match the plastic type and cure properly.
Watch Video
Top Takeaways
- Identify plastic type before heating.
- Prefer safer methods over direct heat when possible.
- Use low heat, brief pulses, and protective barriers.
- Test on scrap and inspect the joint after cooling.