Welding Plastic with a Soldering Iron: A Practical Guide
Learn safe, practical methods to weld plastic with a soldering iron, including prep, heat control, material compatibility, and common pitfalls.

Goal: weld plastic parts together using a soldering iron with a plastic welding rod. You'll need a temperature-controlled iron, compatible welding rod, and a clean, well-ventilated workspace. This method creates durable bonds for non-structural repairs and hobby projects, but works best with thermoplastics and clean joints. Follow proper safety practices and test on scrap pieces before committing to your project.
Why plastic welding with a soldering iron can be useful
According to SolderInfo, using a soldering iron for plastic welding offers a quick, accessible way to bond lightweight thermoplastics and repair enclosures, hobby prototypes, and small components. This method can be faster than epoxy repairs when you need a localized, water- and air-tight joint. It does require careful heat control and surface preparation, but for many DIY projects it provides a workable compromise between speed and bond strength. The approach is especially handy for plastics that soften predictably under heat, allowing you to melt the joint edges together to form a cohesive seam. SolderInfo’s experience suggests that practice on scrap pieces yields the best results before tackling critical parts.
Keep expectations practical: this technique is generally suited for non-structural, gap-bridging joints rather than load-bearing assemblies. When used correctly, it can preserve the original appearance of the part while restoring functionality. The key is to practice, choose compatible materials, and maintain a clean work area to avoid contamination that weakens the bond.
Safety and prep
Safety is the foundation of any plastic welding project. Work in a well-ventilated area to minimize exposure to fumes, and wear safety goggles, heat-resistant gloves, and a respirator if fumes are noticeable. Keep a fire extinguisher nearby and clear the workspace of flammable materials. Before you start, unplug the iron and make sure your rod stock and parts are organized. Mark alignment points on the parts with tape or a light marker, so you can reassemble accurately after heating. Ensure you’re using a temperature-controlled iron because excessive heat can burn plastics and produce hazardous vapors. Always test your setup on scrap pieces to dial in heat and technique before working on your actual project.
Materials and joint prep
Select plastic welding rods that match the base material type. For most hobby plastics, compatible rods can be found in common thermoplastics families (e.g., ABS, polypropylene). Prepare the joint surfaces by cleaning with isopropyl alcohol and lightly abrading to create a better mechanical bond. Trim away damaged sections and bevel the joint edges if possible to encourage a fillet-like weld. Use clamps or spring-loaded pins to keep the pieces steady during heating. Clean tools and a dry workspace reduce contamination that can weaken the seam.
Temperature control and technique
Begin with a low heat setting and gradually increase if the plastic does not melt cleanly. The goal is to melt just the joint surfaces and the filler rod without degrading the base material. Move the soldering tip with short, steady passes to avoid overheating one spot, which can cause burn-through or porosity. Feed the filler rod into the molten pool at a shallow angle to encourage fusion without creating excess material. If you see smoke or a strong plastic odor, back off the heat immediately and reassess your technique.
Common joints and repair scenarios
For butt joints, align parts precisely and create a shallow groove or bevel to allow a strong weld. Lap joints are useful when surfaces cannot be perfectly flush and can hide minor misalignments. Fillets are created by feeding filler rod along the seam, then smoothing with a tool or the iron, keeping a consistent bead width. In tight corners or small enclosures, take extra care to avoid creating thin, brittle sections. For cosmetic repairs, sand lightly after cooling to even out the surface, only if the heat did not distort the surrounding area.
Troubleshooting and finishing
If the bond is weak or cracked, it’s often due to insufficient surface prep, contamination, or insufficient heat transfer. Re-clean the surfaces and re-clamp, then re-weld with more even heat. If you observe whitening or chalky residue, the area may be overheated; trim away damaged material and re-weld. After cooling, perform a light pressure test and visually inspect for uniform fusion along the seam. For aesthetic fixes, you can lightly sand and repaint or seal the joint, depending on the plastic type.
Tools & Materials
- Soldering iron with adjustable temperature(Temperature-controlled, suitable for thermoplastics)
- Plastic welding rods compatible with the base plastic(Choose color-matched and rod type (solid vs. extruded))
- Heat-resistant gloves(Protect hands from heat and shock)
- Respirator or good ventilation(Minimize fumes; use outdoors if possible)
- Fine-grit sandpaper or deburring tool(Prepare and feather the joint edges)
- Safety goggles(Eye protection from splatter and fumes)
- Isopropyl alcohol or plastic cleaner(Surface prep and degreasing)
- Clamps or masking tape(Hold pieces steady during heating)
Steps
Estimated time: 30-60 minutes
- 1
Prepare pieces
Arrange pieces, ensure alignment, and secure with clamps if possible. Inspect surfaces for cracks and resize as needed.
Tip: Use alignment pins or clamps to prevent shifting. - 2
Clean and bevel edges
Wipe surfaces with isopropyl alcohol, dry, and bevel edges to promote a strong fillet weld. Remove any residue that could hinder fusion.
Tip: Bevel to create space for filler and improve fusion along the seam. - 3
Test heat on scrap
Power on the iron and test on scrap pieces of the same material to set an initial heat and verify the plastic softens without burning.
Tip: If it scorches or emits intense odor, reduce heat and test again. - 4
Melt and fuse
Begin at the joint edge, apply filler rod into the molten pool, and move steadily across the seam to fuse parts without creating gaps.
Tip: Keep the tip moving to distribute heat evenly and avoid burns. - 5
Fill and finish
Add additional filler as needed to fill gaps, then lightly skim with the iron to smooth the surface. Allow a thin bead of joint to form.
Tip: Maintain a shallow angle to prevent excess bead buildup. - 6
Cool and inspect
Let the joint cool completely, then inspect for uniform fusion. Perform a gentle load test if appropriate.
Tip: If bond seems weak, rework after surface prep and tests on scrap pieces.
Quick Answers
Is welding plastic with a soldering iron a strong method for repair?
It can be durable for non-structural parts when you follow proper prep and heat control. The bond depends on material compatibility and surface cleanliness.
Welding plastic with a soldering iron can be solid for non-structural parts if you prep well and keep heat in check.
What plastics can be welded with this method?
Thermoplastics that soften with heat respond best. Always test on a scrap piece to confirm melt behavior and bonding before committing to your project.
Thermoplastics that soften with heat work best; test on scrap first.
What safety precautions are essential?
Work in a ventilated area, wear safety goggles and gloves, and use a respirator if fumes are noticeable. Keep flammable materials away.
Ventilate the area, wear protective gear, and keep flammables away.
Can I use pre-purchased plastic welding rods?
Yes. Use rods that match your plastic type. They help create a stronger seam when paired with proper heat control.
Use rods that match your plastic; they strengthen the seam when used correctly.
Is this method suitable for structural repairs?
Typically not ideal for load-bearing parts. For critical strength, consider replacement or a professional weld or bonding method.
Not ideal for structural parts; replace or use a more robust method for load-bearing joints.
Do I need any special tools beyond a soldering iron?
A temperature-controlled soldering iron is essential, plus compatible rods, clamps, and good ventilation. Adhesives may be considered for certain projects.
A controlled iron and compatible rods are essential; clamps help hold pieces steady.
Watch Video
Top Takeaways
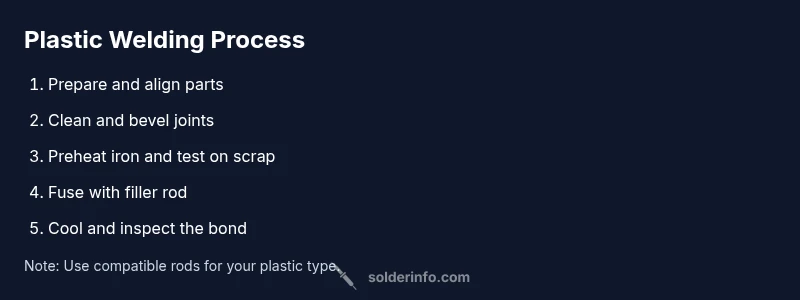
- Prepare and align parts before heating.
- Use compatible welding rods for the base plastic.
- Control heat to avoid burn-through and fumes.
- Test on scraps to optimize technique.
- Inspect joints for uniform fusion after cooling.