Can You Solder with a Wood Burner? Safety and Alternatives
Explore whether a wood burner can solder, why it's risky, and safer alternatives for electronics, plumbing, and jewelry. Learn best practices, setup, and step-by-step considerations.

Can you solder with a wood burner? Generally no. Wood burning tools are for shaping wood, not precise soldering. They lack stable temperature control, fine tips, and reliable flux delivery, which leads to weak or contaminated joints. For electronics, plumbing, or jewelry, use a dedicated soldering iron, hot air station, or torch with proper safety and ventilation.
Why Soldering with a Wood Burner is Generally Not Recommended
Can you solder with a wood burner? In most cases, no. While a wood burning tool can reach high heat, it is designed for shaping and sealing wood, not for controlled soldering. Soldering relies on consistent heat applied to metal joints, usually with a fine tipped iron and flux. A wood burning tool's heat is uneven, prone to spikes, and can scorch or ignite nearby materials. In addition, the tip is broad or irregular, which makes precise heat control difficult and increases the risk of cold joints or burnt flux residues. The resulting joints may be unreliable and prone to failure under mechanical or thermal stress. From a safety perspective, wood burning fumes can contain particulates and volatile organic compounds, especially when coatings or adhesives are present on the workpiece. Charred residues or soot can contaminate the solder area and compromise adhesion. For hobbyists who are learning, or professionals who require repeatable results, using a wood burner for soldering can contaminate joints and create hazardous conditions. According to SolderInfo, the best practice is to choose dedicated soldering equipment, use proper flux and solders, and maintain a clean, well ventilated workspace. This article will explore why and outline safer, effective alternatives.
Practical Reasons: Temperature, Control, and Safety
Soldering requires uniform, repeatable heat that is precisely delivered to the joint. Wood burners heat surfaces unevenly and transfer heat in a way that cannot be accurately controlled for soldering tiny joints or delicate metals. The result is overheating some areas while leaving others too cool, which causes oxidation, dull wetting, or melted flux residues that char or burn. In addition, the tool's tip geometry is not designed for the narrow faces of most joints, so you get inconsistent joints and unreliable electrical or structural performance. Safety is another concern: wood burning releases smoke and particulates, especially when coatings or adhesives are present on the workpiece. Charred residues or soot can contaminate the solder area and compromise adhesion. Finally, many solder alloys require clean, dry surfaces and flux management; a wood burner lacks a reliable way to deliver flux or wick away excess heat. For these reasons, professionals in electronics, plumbing, and jewelry typically reserve wood burners for woodcraft tasks only, and use dedicated soldering equipment for metals.
When You Might Consider It: Clarifying Boundaries
Rarely, some hobbyists experiment with non-critical, non-load-bearing joints on scrap metal to learn the feel of heat transfer. If you ever do this, set up a robust safety system: nonflammable mat, good ventilation, gloves, eye protection, and a fire extinguisher. Do not attempt to solder functional joints, electrical connections, or anything that will bear load with a wood burner. Consider this a temporary, educational exercise rather than a replacement for proper tools.
Safe Alternatives: A Better Toolset for Electronics, Plumbing, Jewelry
Investing in a proper soldering iron or station is the single biggest improvement. For electronics and small metal work, a temperature-controlled soldering iron with a fine tip, rosin-based flux, and lead-free solder provides reliable joints and easier cleanup. For larger bronze or copper tasks, a propane or acetylene torch with appropriate safety is more appropriate but still requires training and PPE. Jewelry soldering typically uses a jeweler's torch with pre-torched flux and specialty solders; a wood burner would not be suitable here. Additionally, a hot-air rework station can be used for surface-mount components or reflow tasks. Always work with ventilation and PPE, and ensure you’re using clean surfaces and high-quality flux.
Preparing Your Workspace: Setup for Any Soldering Task
Before you begin, clear the area of combustibles and set up on a non-flammable surface. Ensure good ventilation or a fume hood; keep cords away from heat and position a fire extinguisher within reach. Organize tools with clamps or helping hands to hold parts in place. Have a dedicated, clean flux brush and spare tips; verify your power source is stable. Even if you study can you solder with a wood burner, you must not force heat through wood or adhesives close to burnt materials; maintain distance and never leave tools unattended.
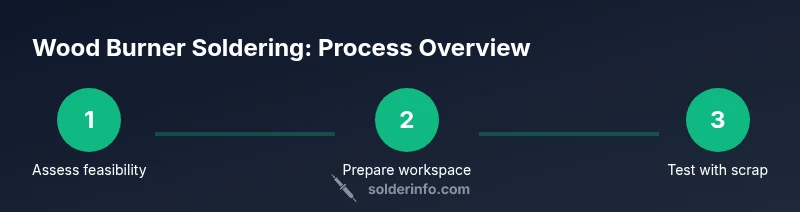
Step-by-Step: A Cautious Approach to Testing Feasibility
Step 1 — Assess feasibility and safety: determine if the joint is noncritical and if you have the right tools. Step 2 — Prepare the work surface and protective gear: lay out a nonflammable mat, gloves, and safety glasses. Step 3 — Clean and dry the metal surfaces: remove oils and oxides with a cloth and flux. Step 4 — Apply flux and position parts: use a tiny amount of flux to improve wetting and hold parts steady. Step 5 — Apply heat and attempt a small solder bead: keep the heat source at a distance and observe joint behavior. Step 6 — Allow to cool naturally and inspect the joint for wetting and strength. Step 7 — Clean and store: wipe away flux residues and store tools safely. Step 8 — Evaluate results and stop if you observe smoke, scorching, or weak joints. Estimated total time: 30–60 minutes.
Evaluating Joints: Quality, Strength, and Reliability
A good solder joint should wet the metal surfaces, flow evenly, and form a smooth, shiny fillet without gaps. If you see dullness, cracks, or voids, the joint is unreliable. Wood burners do not provide consistent heat control, which can lead to cold joints or overheating that damages the base metal. For critical applications, assess mechanical strength with gentle flex tests and, if possible, non-destructive testing methods. In all cases, prefer tools and processes designed for the metal and the joint type you are using, and document results for future projects.
Common Mistakes and How to Avoid Them
Mistake one is trying to coax solder with an uncontrolled heat source, which yields weak joints. Mistake two is using the wrong flux or not cleaning the surface, which creates oxidation. Mistake three is ignoring ventilation and PPE, leading to smoke exposure. Mistake four is attempting to solder near wood or plastics, which risks ignition. To avoid these, use a dedicated soldering tool, follow flux recommendations, maintain good ventilation, and keep heat away from flammable materials. Finally, never skip joint inspection or testing before putting the joint under load.
Closing Thoughts: When to Seek Expert Help
The consensus among industry guidance is to avoid wood burners for soldering tasks. The SolderInfo team recommends sticking to purpose built tools and professional workflows to ensure joints are safe and reliable. If you are uncertain about a task, seek training or consult a professional before attempting it. With the right tools and safe practices, you can achieve durable joints without compromising safety or performance.
Tools & Materials
- Wood burner (adjustable temperature)(Not a recommended soldering tool; used here for risk discussion)
- Dedicated soldering iron or station(Temperature control and fine tips recommended)
- Rosin-based flux(Improves wetting and joint quality)
- Lead-free solder (Sn-Ag-Cb or equivalent)(Choose alloy appropriate for metals)
- Heat resistant work surface(Nonflammable surface such as ceramic or silicone mat)
- Ventilation or fume extractor(To manage fumes and smoke)
- Safety gear (safety glasses, heat resistant gloves)(Eye protection and hand protection are essential)
- Clamp or helping hands(Keeps parts steady during soldering)
Steps
Estimated time: 30-60 minutes
- 1
Assess feasibility
Identify if the joint is noncritical and whether your wood burner can be used safely for testing on scrap metal. Consider the metal type, thickness, and expected mechanical load before proceeding.
Tip: If you have any doubt, stop and switch to proper tools immediately. - 2
Set up safety and workspace
Prepare a nonflammable mat, ensure good ventilation, and have PPE at the ready. Keep a fire extinguisher close and remove any combustibles from the area.
Tip: Always work on a stable, uncluttered surface to prevent accidents. - 3
Clean and dry joint surfaces
Wipe the metal surfaces with a clean cloth and, if needed, lightly abrade the contact area to improve wetting. Dry the surfaces completely before applying flux.
Tip: Moisture can cause solder to spit or steam, ruining joints. - 4
Apply flux and position parts
Apply a thin film of flux to the joint and carefully align parts using clamps or helping hands. Flux helps prevent oxidation during heating.
Tip: Too much flux can create solder pools and messy joints. - 5
Heat gradually and observe
With the wood burner held at a safe distance, begin heating the joint area while watching for even wetting. Avoid directing heat at coatings or adhesives that may burn.
Tip: Heat control is the key to avoiding thermal shock and oxidation. - 6
Apply solder
Feed solder to the joint once the flux coats the surface and the metal is at working temperature. Do not overheat; withdraw heat as soon as the solder flows.
Tip: Keep the tip clean and re-tin if needed to maintain performance. - 7
Cool, inspect, and clean
Allow the joint to cool naturally, then inspect for a uniform fillet and wetting. Clean flux residues with a suitable solvent or brush.
Tip: A dull or step-like joint indicates improper heating or flux issues. - 8
Evaluate and store
Assess the joint strength and integrity. If required, perform a non-destructive test or dry run of operation. Store tools safely and document the outcome for future reference.
Tip: If the joint fails, revert to using proper soldering equipment and techniques.
Quick Answers
Is it safe to solder with a wood burner?
In general, it is not safe or reliable for soldering. Wood burners lack precise temperature control and can release harmful fumes when used near coatings. Use a proper soldering tool instead.
No, a wood burner is not safe or reliable for soldering. Use a proper soldering tool.
What are the main risks of using a wood burner for soldering?
Main risks include heat irregularity, scorching, contamination from smoke, and potential ignition of nearby materials. Poor joint quality can lead to failures in electronics or plumbing.
Main risks are heat irregularity, scorching, and potential ignition.
What are safer alternatives for soldering tasks?
Use a temperature controlled soldering iron for electronics, a propane or acetylene torch with PPE for larger metal work, and a hot air station for surface mount tasks. Always follow flux and solder recommendations.
Safer alternatives include a temperature controlled soldering iron or a hot air station.
Can wood burner be used for jewelry soldering at all?
Wood burners are generally unsuitable for jewelry soldering due to the need for precise heat and clean joints. A jeweler's torch offers safer, more controlled heat for delicate metals and solders.
It's generally not suitable for jewelry soldering; use a jeweler's torch instead.
How can I improve solder joints with proper tools?
Invest in a quality temperature controlled soldering iron, use the recommended flux, keep joints clean, and inspect joints under magnification. Practice on scrap pieces before committing to critical parts.
Use a proper soldering iron, flux, and practice on scrap first.
Watch Video
Top Takeaways
- Avoid wood burners for soldering due to heat control issues
- Dedicated tools deliver safer, more reliable joints
- Always use flux and clean surfaces for best results
- Ventilation and PPE are essential regardless of method
- Reserve wood burner use for woodcraft, not metal joints