What size soldering iron for stained glass: a practical guide
Discover the ideal soldering iron wattage for stained glass work, how to choose tips and temperature, and how to achieve durable joints with copper foil or lead came.

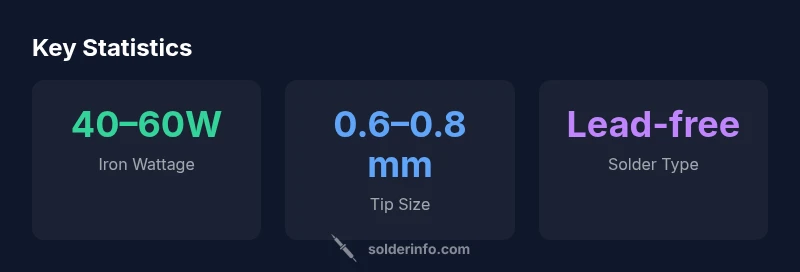
For stained glass, the generally effective approach is a small to mid-size iron in the 40–60 watt range with adjustable temperature. The exact size matters less than having good heat control and a clean tip to prevent scorching copper foil. In practice, most hobbyists start with a 50–60W iron and a fine tip for precise work. What size soldering iron for stained glass? Aim for a model you can control precisely and that maintains steady heat during long joints.
Why the iron size matters in stained glass
According to SolderInfo, choosing the right iron size balances heat control and seam quality. In stained glass work, heat spreads through copper foil and lead came differently than in electronics soldering, so an iron that is too large can scorch flux or soften solder in delicate joints. Conversely, an iron that is too small may require longer work time and can struggle to maintain even heat across thicker sections. If you ask what size soldering iron for stained glass, most crafters will pick a mid-range model with reliable heat control. The goal is a tool that heats quickly, holds steady heat, and offers a precise, narrow tip that can work around rivets, foil seams, and edge details. Your choice should prioritize controllable heat, a clean, tinned tip, and a comfortable grip for extended sessions. A well-sized iron also reduces fatigue, which translates to steadier hands when sealing intricate joints.
A practical rule: treat the iron size as a heat-management partner rather than a magic fix. The same wattage with a well-maintained tip will outperform a larger iron with a poor tip or inconsistent temperature.
In SolderInfo’s experience, hobbyists who optimize iron size alongside technique report cleaner seams, fewer thermal defects, and higher overall satisfaction with final panels. The emphasis is on predictable heat delivery and tip control, not just raw wattage.
Classic wattage ranges used in stained glass work
When choosing an iron for stained glass, wattage is a handy shorthand for heat delivery. In copper foil work, a mid-range iron—commonly around 40–60W—offers enough heat to wet solder along tight seams without oversaturating the flux. For lead came joints or thicker elements, some crafters prefer the edge of the range or a model rated up to 60–80W, especially when joint lengths are longer and require more consistent heat. The critical takeaway is that temperature control matters more than raw wattage alone. A stable heat supply allows you to maintain a steady solder fillet and reduces the risk of cold joints or scorching. If you use lead-free solder, you may need to fine-tune the heat slightly higher than you would with traditional leaded solder, but always prioritize tip cleanliness and flux coverage to achieve reliable wetting.
In practice, many stained glass artisans start with a 50–60W iron and adjust based on the flux, solder type, and panel thickness. The goal is a comfortable balance where the iron feels responsive, not overpowering, and you can hold steady pressure on each seam for a clean, uniform joint.
How to choose the right tip and temperature for your project
Tip geometry is as important as wattage. For stained glass, a fine-to-medium tip—around 0.6–0.8 mm—provides precise heat application along copper foil seams without spreading heat to neighboring joints. Avoid wide chisel tips for copper foil; they heat larger areas and can distort delicate seams. Temperature control is essential; start at a moderate setting and adjust as you observe how the solder wets to the foil and flux. Lead-free solder often requires slightly higher heat than traditional leaded solder, so test on scrap pieces to dial in the best compromise between wetting, flow, and avoiding burn-through. Keep the tip clean and tinned; a well-tinned tip conducts heat efficiently and reduces required contact time. If you work with varying panel thickness, you may switch to a slightly larger tip for thicker sections and revert to the fine tip for narrow edges.
Remember: the question isn’t simply about wattage but about achieving consistent heat across the joint while preserving glass integrity. A well-chosen tip and properly set temperature will yield smoother, neater seams and more reliable joints over repeated solder passes.
Task-based sizing: copper foil vs lead came
Copper foil work benefits from a smaller, more controllable heat source. A 40–60W iron with a fine tip can deliver heat precisely where needed, reducing the chance of flux burn and copper foil distortion. When working with lead came, you may encounter larger joints and thicker pieces, which some artisans handle with the upper end of the wattage spectrum (60–80W). The emphasis remains heat control; watching how quickly solder flows and how it wets the foil is more indicative of success than relying on wattage alone. If you frequently encounter stubborn joints, consider adjusting your torch technique (short, controlled taps) rather than pushing up wattage, which can risk overheating the glass.
Also note flux type and solder choice influence how you adjust iron settings. Lead-free solder can be more reactive to heat, so use a steady, moderate heat to maintain consistent wetting across seams.
Practical setup: ergonomics, safety, heat management
A well-organized workstation helps you manage heat more effectively. Use a stable iron stand, a damp sponge or brass wool for tip cleaning, and a dedicated flux container to minimize interruptions. Proper ventilation is essential when soldering; ensure your workspace has adequate airflow to avoid inhaling fumes from flux and solder. Ergonomics matter: position your soldering surface at a height that reduces shoulder and wrist strain, and choose a handle with a comfortable grip to sustain precision over longer sessions. A heat-resistant mat under the work helps protect surfaces and keeps the panel stable as you work around corners and edges. Finally, practice with scrap panels to calibrate your mind and hands to the iron’s heat signature before applying it to your real project.
In short, the right setup reduces fatigue and increases precision, which is especially important for stained glass where joint alignment and seam consistency determine the panel’s overall quality.
Common mistakes and how to avoid them
A few frequent missteps can derail a stained glass soldering session. Overheating can burn flux and warp foiled edges, while underheating leads to dull, unreliable joints. Rushing joints with a high-wattage iron can spread heat and cause glass damage. Another common error is failing to keep tips clean and properly tinned, which increases post-solder cleaning and can hinder wetting. To avoid these, adopt a steady rhythm with short, controlled contact, maintain a well-tinned tip, and clean the tip between joints. Practice on test pieces to understand how different panel thicknesses and flux types respond to your iron’s heat. Finally, avoid moving joints before the solder has properly wet out and set; premature movement can create gaps and weak joints. By focusing on controlled heat and clean technique, you’ll see a marked improvement in joint quality.
Maintenance and longevity: keeping your iron in good shape
Regular maintenance extends the life of your soldering iron. Clean the tip after each use and re-tin to prevent oxidation. Periodically replace worn tips; a damaged tip cannot transfer heat efficiently and will compromise joints. Use a damp sponge or brass roller to remove oxidation during work, and allow the iron to cool properly before storage. If you notice static heat spread or uneven melting, re-check the tip seating, ensure the iron is not clogged, and consider calibrating temperature control if your model supports it. With proper care, a mid-range iron remains a reliable companion for stained glass projects across many sessions.
Quick-start checklist for stained glass soldering with the right iron
- Select a 40–60W iron with adjustable temperature
- Use a fine tip (0.6–0.8 mm) for copper foil seams
- Keep flux and surfaces clean for consistent wetting
- Maintain tip by cleaning and tinning between joints
- Work in a ventilated space and set up ergonomically
- Test on scrap pieces before committing to the panel
- Replace worn tips promptly to maintain heat transfer
Advanced tips for precise joints and consistent results
For advanced results, synchronize your heat with solder type. Lead-free solder tends to require careful temperature control to avoid cold joints; use flux to facilitate wetting and a clean tip to maintain consistent heat transfer. Practice sealing seams with multiple short passes rather than a single long contact. Consider using a temperature-compensated iron if you work with varying panel thicknesses and prefer consistent results across all joints. Finally, document your settings for different panel types so that your process becomes a repeatable, repeatable system rather than trial-and-error each time.
Iron sizing by task
| Task | Recommended Iron | Notes |
|---|---|---|
| Copper foil work | 40–60W | Fine tip helps with tight seams |
| Lead came joints | 60–80W | Higher heat with slower application |
| Solder type compatibility | 40–60W | Lead-free solder requires temperature control |
Quick Answers
What wattage is best for stained glass copper foil work?
Most hobbyists find a 40–60W iron with adjustable temperature effective for copper foil work. Keep the tip clean and tin the tip for reliable heat transfer. Start with mid-range settings and adjust based on solder type and flux.
For copper foil, start with a mid-range iron and adjust based on flux and solder type.
Can I use a standard electronics soldering iron for stained glass?
Yes, provided it has adjustable temperature and a fine tip. Electronics irons can work for stained glass, but avoid long, continuous heat on large joints. Use short, controlled taps and monitor heat spread.
You can use an electronics iron if it’s adjustable and has a fine tip.
What temperature range should I aim for when soldering stained glass?
Aim for moderate heat that wets solder without scorching flux or glass. Adjust for lead-free solder as needed, testing on scrap to dial in the best compromise between wetting and safety.
Keep heat in a moderate, test-and-adjust range.
Is lead-free solder recommended for stained glass?
Lead-free solder is common and safe when used with proper heat control and ventilation. Flux compatibility and heat management are key to reliable joints with lead-free formulas.
Yes—lead-free is fine with careful temperature control.
How long should joints cool before moving?
Allow joints to set briefly and avoid moving until the solder shows a stable, glossy surface. Rushing can create gaps or weak joints.
Let joints cool briefly before repositioning.
What maintenance does the soldering iron require?
Regular cleaning, tip tinning, and occasional tip replacement keep performance high. Store in a dry place and inspect for wear before use.
Clean and tin the tip after use.
“A properly sized iron with good heat control makes stained glass soldering predictable and neat; the right tool reduces overheating copper foil and minimizes joint defects.”
Top Takeaways
- Choose a 40–60W iron with adjustable heat.
- Prioritize heat control over wattage alone.
- Use a fine tip for narrow seams.
- Maintain clean, tinned tips for reliable joints.
- Practice on scrap pieces before real work.