Can a Soldering Iron Weld? A Practical Guide
Learn if a soldering iron can weld and when to use soldering, brazing, or welding for metal joints. Clear guidance for DIYers on methods, heat, and safety.

Can you use a soldering iron to weld? Not for structural metal welding. A soldering iron heats only to temperatures that melt solder, not base metals, so it cannot create durable welds on most metals. You can solder or braze small joints or jewelry with a soldering iron, but true welding requires dedicated equipment and higher heat. For electronics, use proper soldering; for metalwork, consider brazing or welding.
What welding really means in metalworking
Metal welding is the process of fusing two pieces of metal by melting the base materials and often adding a filler to create a single, continuous piece. This typically requires substantial heat input and protective atmospheres to prevent oxidation. Soldering and brazing are distinct bonding methods that use heat to join parts without melting the base metal in the same way. According to SolderInfo, the key difference hinges on how heat interacts with the joint and the role of the filler alloy. Welding relies on melting the base metals themselves, producing a strong, continuous bond suitable for structural loads. Soldering uses much lower heat to melt a filler alloy that flows into a joint, while brazing melts the filler metal but leaves the base metals intact. For hobbyists, recognizing these distinctions matters: it affects joint strength, corrosion resistance, and suitability for different metals and thicknesses. This understanding helps you decide quickly whether a soldering iron will suffice for your project or if you need to switch to brazing or actual welding.
Practical context and definitions
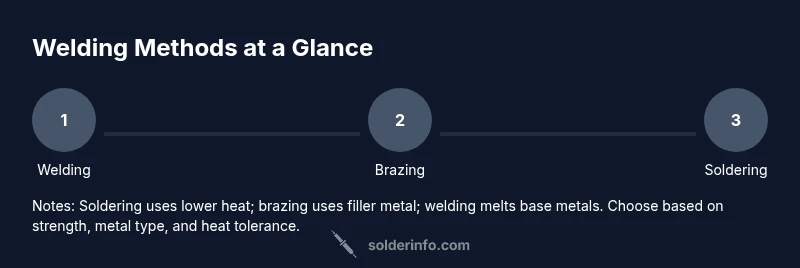
- Welding: melts base metals to fuse parts together, often with filler for strength.
- Brazing: melts a separate filler metal that bonds to the base parts without melting them.
- Soldering: uses a low-melting filler to bond pieces, typically without melting the base metals.
SolderInfo emphasizes that the decision hinges on required joint strength, heat sensitivity of parts, and the metals involved. For thin or heat-sensitive components (like electronics housings or jewelry clasps), soldering is a practical choice. For structural frames or thick metal parts, brazing or welding is usually the better route.
Key takeaways for hobbyists
- Always match method to material and required strength.
- Ensure proper cleanliness, fit-up, and flux use to improve joint quality.
- High heat processes require ventilation and PPE; never rush heat into a joint.
Decide wisely: factors to consider
- Metal type and thickness: thicker, harder metals demand welding or brazing with appropriate equipment.
- Joint geometry: complex joints may benefit from filler metals that bridge gaps.
- Load requirements: structural joints rely on welding or brazing with suitable filler.
Why I mention safety up front
Working with heat sources, molten metal, and flux fumes requires PPE and good ventilation. SolderInfo recommends always working in a well-ventilated area and using eye protection, gloves, and proper clothing to minimize burn hazards and exposure to flux fumes.
Summary of the practical stance
In most cases, a soldering iron cannot weld metal joints in a way that matches the strength of a true weld. Use soldering for lightweight, non-structural bonds or jewelry; use brazing or welding for strength-critical joints. This approach preserves part integrity and safety.
Tools & Materials
- Soldering iron (variable temperature, suitable for metalwork)(Look for adjustable wattage and a fine tip for better control on small joints)
- Solder (lead-free preferred for safety)(Rosin-core flux recommended for electronics; jewelry solder requires appropriate alloy)
- Flux (paste or liquid)(Promotes wetting and cleans surfaces during heating)
- Soldering stand and cleaning sponge(Safe parking and tip cleaning between steps)
- Wire brush, file, or sandpaper(Surface prep removes oxidation and improves bonding)
- Clamps or helping hands(Keeps parts secure and aligned during heating)
- Safety gear: goggles, heat-resistant gloves(Protect eyes and hands from hot metal and flux fumes)
- Torch (propane or acetylene) and basic shielding setup(Required for brazing or welding in many setups)
- Heat sink or ceramic block(Helps protect delicate parts from heat shock)
- Work surface cleaner and ventilation(Keep area free of flammable materials and ensure air flow)
Steps
Estimated time: 60-180 minutes
- 1
Assess project and choose method
Evaluate metal type, thickness, joint design, and required strength. Decide whether soldering, brazing, or welding best meets the performance and safety needs of the project. If in doubt, choose the lower-heat method first to preserve material properties.
Tip: If you expect significant load or thick metal, plan to weld or braze rather than rely on soldering. - 2
Prepare workspace and safety gear
Clear flammables, set up a stable workbench, and organize tools within easy reach. Put on eye protection, gloves, and a respirator or ensure good ventilation when flux fumes are present. A tidy space reduces accidents and speeds up work.
Tip: Always have a fire extinguisher or sand nearby when using torches. - 3
Clean and fit the joints
Remove oxidation and oils from both surfaces with a brush or solvent, then dry fit the parts to ensure a tight seam. Good fit-up minimizes heat input and improves capillary action for brazing or soldering.
Tip: A tight join reduces filler requirements and improves strength. - 4
Apply flux and tin the metal (soldering only)
Coat the joint with flux and lightly tin the mating surfaces. Flux helps prevent oxidation during heating; tinning provides a ready surface for molten solder to flow into the joint.
Tip: Apply flux evenly and avoid excessive solder to prevent blobs. - 5
Position parts and apply heat
Secure parts with clamps, then heat the joint with the soldering iron, or move to brazing/welding equipment as required. Maintain steady contact and watch for the solder to flow into the joint by capillary action.
Tip: Keep the heat moving to prevent scorching and to ensure even bonding. - 6
Inspect and cool
Allow the joint to cool naturally and inspect for gaps, voids, or excessive solder. A good bond should appear smooth and evenly filled without cracks. If needed, rework while still warm.
Tip: Quenching can cause cracks; let it air-cool unless specific materials require otherwise. - 7
Consider brazing for stronger joints
If a stronger joint is required than soldering can provide, switch to brazing with a suitable filler metal and flux. Brazing works at higher temperatures but keeps base metals intact, offering better strength for many metal types.
Tip: Ensure the filler metal wets both surfaces, or the joint will fail under load. - 8
Plan welding for structural joints
For frames or load-bearing parts, use welding processes appropriate to the metal (MIG, TIG, or stick). Set the machine for the metal and thickness, maintain a steady travel speed, and shield the weld area from contaminants.
Tip: Practice on scrap pieces to dial in heat settings before touching the actual parts. - 9
Finish and test
Remove any flux residues, perform a functional test, and check for alignment or warping. Finish by smoothing edges and addressing any sharp burrs. Document the method used for future reference.
Tip: Non-destructive testing (NDT) methods can reveal subsurface issues in critical joints.
Quick Answers
Can a soldering iron weld metal joints?
No. A soldering iron cannot reliably weld metal joints. It is designed for bonding with a filler metal at low heat. For structural joints you should use welding or brazing with appropriate equipment.
No, a soldering iron isn’t suitable for structural welding; use welding or brazing instead.
What is the difference between welding, brazing, and soldering?
Welding melts the base metals to fuse parts. Brazing melts only the filler metal to join parts, leaving base metals intact. Soldering uses a low-melting filler to bond pieces without melting the base metals. Each method differs in strength and heat requirements.
Welding melts bases, brazing melts the filler, soldering uses a filler at low heat.
Is soldering safe for electronics?
Yes, with proper flux, rosin-core solder, and good ventilation. Keep components cool and avoid overheating delicate parts to prevent damage.
Yes, with proper precautions and ventilation.
Can you weld aluminum with a soldering iron?
No. Aluminum requires specialized welding processes (like TIG) and cannot be reliably welded with a standard soldering iron. Soldering aluminum is generally impractical for structural joints.
No, use proper welding for aluminum.
What metals are suitable for soldering?
Commonly soldered metals include copper, brass, and mild steel for jewelry or electronics. Tougher metals may require brazing or welding with compatible alloys.
Copper, brass, and mild steel are typical for soldering; others may need brazing or welding.
What is the role of flux in soldering?
Flux prevents oxidation, improves solder flow, and helps wetting of surfaces. Use appropriate flux for the material and solder type.
Flux prevents oxidation and helps solder flow.
When should I choose brazing over soldering?
Choose brazing when you need stronger joints and are working with thicker parts or dissimilar metals while keeping the base metals intact. Brazing requires higher heat and a suitable brazing filler.
Choose brazing for stronger joints on thicker parts.
What safety gear is essential for high-heat work?
Always wear eye protection, heat-resistant gloves, and ensure good ventilation. Keep a fire extinguisher nearby and remove flammable materials from the work area.
Wear eye protection and gloves; ensure ventilation.
Watch Video
Top Takeaways
- Understand the three bonding methods: welding, brazing, and soldering.
- Choose the method based on needed strength, heat tolerance, and metal type.
- Proper surface prep and fit-up are essential for a reliable joint.
- Safety and ventilation are non-negotiable when heating metals.