Torch and Solder: A Practical How-To Guide
Learn how to safely use a torch with solder across electronics, jewelry, and plumbing. This step-by-step guide covers tools, flux, heat control, safety, and maintenance for durable joints.

This guide helps you master torch-based soldering across electronics, jewelry, and plumbing. You’ll learn how to choose the right torch and solder, prep surfaces, apply flux, control heat, and inspect joints for reliability. Safety, ventilation, and maintenance are emphasized throughout to prevent accidents and improve results.
Torch and Solder: A Practical Overview
Soldering with a torch combines heat, filler metal, and flux to join metals quickly and durably. The technique is widely used in electronics, jewelry, and plumbing, but the tools and heat control differ greatly between applications. The SolderInfo team emphasizes that success hinges on selecting the right torch, choosing appropriate solder and flux, and staying mindful of safety and ventilation. Torch-and-solder work is not just about heating; it’s about managing heat flow, joint cleanliness, and alloy selection to form reliable, conductive joints. In professional practice, practitioners tailor their approach to the material pair, geometry, and service environment. For hobbyists and professionals alike, understanding these fundamentals reduces waste and rework, and increases satisfaction with final results.
Safety and Preparation
Heat makes soldering efficient, but it also elevates risk. Always work in a well-ventilated area and keep a fire extinguisher nearby. Wear safety glasses and heat-resistant gloves. Keep flammable liquids away from the bench, and never leave a lit torch unattended. Before you begin, secure the workpiece, tidy the workspace, and inspect extinguishing options. SolderInfo analysis emphasizes planning and PPE as the foundation of safe practice, especially when using torches near plastics or flammable boards. Ventilation is essential to reduce fume exposure during fluxing and heating. In jewelry and electronics contexts, keep a fireproof mat underneath and a damp sponge or brass sponge on hand for cleaning and heat control.
Materials and workspace setup
- A clean, dry bench with a non-slip mat
- Soldering torch (butane or propane) and accessories
- Glass or ceramic tweezers, pliers, and a wire cutter
- Fireproof flux and appropriate solder wire
- Safety glasses and heat-resistant gloves
Creating a disciplined workspace reduces accidents and makes soldering outcomes more predictable. The SolderInfo team notes that planning the sequence of steps and maintaining tidy heat zones are as important as the actual heating.
Tool and Material Readiness
A good start is to assemble all tools and materials before you heat. This minimizes rushed movements and sudden heat bursts that can ruin joints. Check your torch for leaks, confirm the flame produces a clean, sharp blue cone, and verify your flux is not dried out. If you work with electronics, keep the PCB away from direct flame and use a heat sink to protect sensitive components. With jewelry or plumbing work, you can rely on direct heat, but still manage heat input to avoid overheating the base metal. The right mix of heat and flux determines whether you get a bright, shiny joint or a dull, grainy one.
Torch and Solder Fundamentals
Torches used for soldering fall into several families, including micro-torches, handheld propane/butane torches, and larger fuel-gueled units. Each type has a different flame temperature, control fidelity, and heat delivery profile. Solder comes in various alloys—lead-free options predominate for electronics and jewelry due to health concerns; lead-based solders may be encountered in plumbing but require strict hygiene and ventilation. Flux acts as the chemical activator that cleans and prepares the metal surfaces, improves wetting, and prevents oxidation during heating. In all cases, flux choice should align with the alloy system you’re using and the work environment. SolderInfo suggests choosing rosin-core flux for electronics and borax-based flux for metalwork where high heat is typical.
Surface prep and flux application
Clean metal surfaces thoroughly to remove oils, oxides, and debris. Abrade lightly with a fine abrasive or emery cloth, then wipe with isopropyl alcohol. Apply flux evenly to the joint area; flux helps heat transfer and prevents oxidation. Expect flux to burn off and hiss as you heat—this is normal, but you should avoid excessive spatter by keeping joint gaps small and stable. A clean surface improves solder flow and joint reliability. In jewelry contexts, you may choose a thinner flux to avoid pooling and ensure a smooth finish.
Flux, Solder, and Alloy Choices
For electronics, rosin-core solder and no-clean flux are common, with lead-free alloys like SACs (tin-silver-copper) as a standard. Jewelry often uses silver solder or brass-based alloys, with borax flux to help the alloy flow at higher temperatures. Plumbing typically uses tin-lead or tin-antimony alloys in rosin-based flux environments, but modern codes favor lead-free solders. When selecting flux, consider the cleanup process required after the joint has cooled. No-clean flux simplifies post-solder cleanup, but some applications still benefit from solvent-based removal.
Heat Management and Control
Heat management is the most critical skill when using a torch. Apply heat to the base metal evenly, and let the solder flow into the joint by capillary action. Avoid overheating, which can burn flux, degrade metals, and weaken joints. A typical technique is to bring the joint to the solder’s melting point and then back off to let capillary action draw the filler metal in. When used properly, a torch creates strong, conductive joints with minimal cleanup. For electronics, use a heat sink to protect sensitive components; for jewelry, watch for color changes in the metal that indicate overheating. SolderInfo recommends keeping your hands steady and planning the heating sequence before starting.
Final Inspection, Cleaning, and Storage
Allow joints to cool naturally on a heat sink to prevent thermal shock. Inspect for a smooth, evenly filled joint with a uniform silver or gold sheen, depending on alloy. Remove flux residues with an appropriate cleaner, but avoid harsh solvents on delicate components unless specified by the flux manufacturer. Store solders and flux in dry, sealed containers away from heat sources. Regular maintenance includes cleaning tips and verifying the torch nozzle for clogs. A well-maintained toolkit reduces variance and improves repeatability across projects.
Tools & Materials
- Torch (butane or propane)(Select a handheld model with adjustable flame and flame guard.)
- Solder wire (lead-free preferred for electronics)(Choose rosin-core for electronics; pure or alloy-based for jewelry.)
- Flux (rosin-core for electronics; borax-based for metalwork)(No-clean flux can reduce cleanup steps.)
- Heat-resistant mat or fireproof work surface(Silicone mats work well; keep away from flammable materials.)
- Safety glasses (ANSI Z87.1)(Eye protection is non-negotiable.)
- Heat-resistant gloves(Avoid direct skin contact with hot metal or flame.)
- Tweezers/pliers and soldering pick(For precise placement of parts and filler metal.)
- Isopropyl alcohol (70% or higher)(For surface cleaning before fluxing.)
- Sponge or brass wool for cleaning(Wet sponge helps regulate heat and removes oxidation.)
- Ventilation or fume extractor(Protective measure against fumes from flux and heated metals.)
- Fireproof tweezers or clamps(Optional but helpful for holding parts steady.)
- Wire cutters(Trim solder precisely without bending joints.)
Steps
Estimated time: 60-90 minutes
- 1
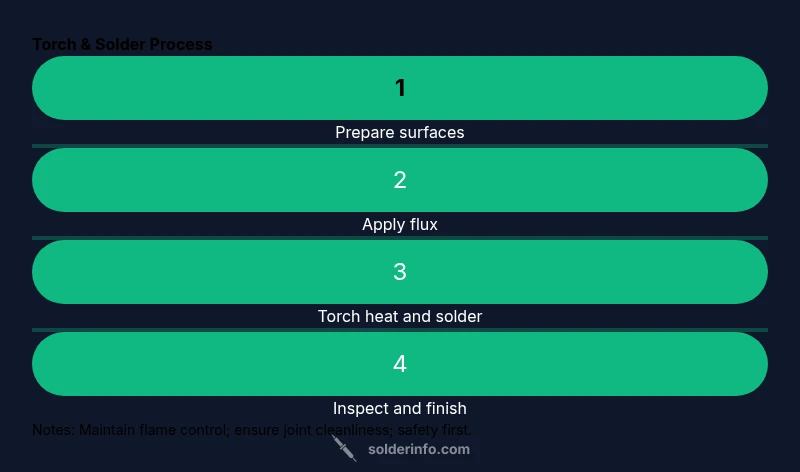
Prepare workspace and safety gear
Clear the bench, lay out tools, and put on safety glasses and heat-resistant gloves. Verify ventilation and have a fire extinguisher within reach. This upfront preparation reduces accidents and ensures you can focus on technique.
Tip: Position your hand so you can reach the valve and flame control without stretching. - 2
Clean and clamp the workpiece
Wipe surfaces with isopropyl alcohol to remove oils. Lightly abrade the joint area if needed. Secure the pieces with clamps or tweezers to prevent shifting during heating.
Tip: Use a non-flammable clamp to avoid heat conduction into your fingers. - 3
Apply flux evenly to the joint
Coat the mating surfaces with flux; flux improves heat transfer and prevents oxidation. For electronics, apply just enough to cover the joint; too much flux can cause spatter.
Tip: Flux should sizzle gently as you approach the joint; this is a sign of active cleaning. - 4
Ignite and adjust the torch flame
Turn on the torch and set a clean, tight blue flame. Keep the flame size small to control heat input. A wide flame can overheat joints and damage components.
Tip: Practice with scrap copper to calibrate heat before working on the actual joint. - 5
Heat the joint and apply solder
Apply heat to the joint through the base metal, not the filler metal directly. When the base metal is hot enough, touch solder to the joint tip and let capillary action draw it in. Remove heat as soon as the joint is filled and the solder flows evenly.
Tip: If solder beads or rejects, reheat gently and try again rather than forcing the filler metal. - 6
Cool, inspect, and clean
Let the joint cool naturally on a heat sink. Inspect for a clean, shiny fillet without gaps. Wipe away flux residue with isopropyl alcohol or appropriate cleaner. Store tools and label the solder for future use.
Tip: A dull or grainy finish indicates overheating or poor flux coverage; adjust your heat and flux next time.
Quick Answers
Is a torch necessary for all soldering tasks?
Not every task requires a torch. Electronics and micro-soldering often use a controlled soldering iron or station, while jewelry and plumbing may benefit from a handheld torch for faster heat transfer. The choice depends on joint size, heat tolerance of materials, and precision required.
A torch is not always needed. For small electronics, use a soldering iron; for larger joints in jewelry or plumbing, a torch can speed up heat delivery.
Can I use a household butane lighter for small jewelry work?
A household lighter is generally not recommended for jewelry work due to limited heat control and safety risks. A dedicated micro-torch provides adjustable flame and better heat management, which improves joint quality and reduces the chance of damage.
A household lighter is not ideal. For jewelry, a dedicated micro-torch offers better control and safety.
What flux type should I use for electronics vs jewelry?
Electronics typically use rosin-core or NO-CLEAN flux to minimize residue. Jewelry work often benefits from borax or specialized jewelry flux to handle higher heat and different metals. Match flux chemistry to alloy and cleaning needs.
Electronics use rosin-core or no-clean flux; jewelry uses borax-rich flux for high-heat work.
Is lead-based solder safe to use?
Lead-based solders are generally avoided in electronics and jewelry due to health and environmental concerns. Use lead-free alloys where possible and follow safety guidelines for any solder containing lead if used in plumbing or other approved contexts.
Lead-based solder is risky; prefer lead-free alloys for most projects and handle any lead with strict safety.
How do I prevent cold joints?
Ensure surfaces are clean and fluxed, heat evenly, and apply solder only when the joint is hot enough to flow. Avoid moving parts during heating and allow sufficient cooling time for a proper fillet formation.
Keep surfaces clean, heat evenly, and let solder flow before moving the joint.
Can torches damage PCB traces?
Yes—excessive heat can lift copper and damage traces. Use heat sinks, keep the flame at a safe distance, and avoid direct heating of sensitive areas. For delicate electronics, consider alternative methods like induction heat or a micro-torch with strict control.
Heat can lift traces; protect PCB with heat sinks and controlled flame.
Top Takeaways
- Prepare and PPE first; safety shapes outcomes.
- Flux and surface prep drive solder flow.
- Control heat to prevent damage and cold joints.
- No-clean flux simplifies cleanup and reduces residue.
- Inspect joints thoroughly and ventilate during work.