Solder Stranded Wire: Essential Techniques for Reliable Joints
Learn how to reliably solder stranded wire with proper prep, tinning, flux, and technique. This step-by-step guide covers tools, best practices, common mistakes, testing, and safety for electronics, plumbing, and jewelry projects.

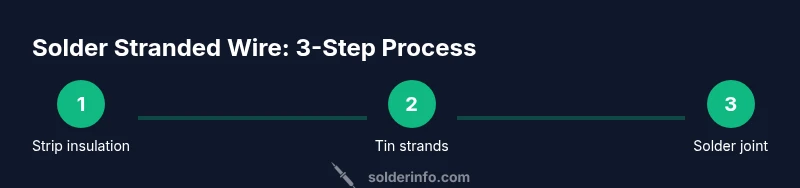
You will learn how to reliably solder stranded wire by preparing the conductor, tinning the strands, and forming a clean, mechanical joint. You'll need a suitable solder (rosin-core or flux), a clean iron at an appropriate heat level, quality flux, and heat-shrink or electrical tape for insulation. The guide covers twisting, tinning, soldering, and inspection steps.
Understanding stranded wire and why it behaves differently
Stranded wire consists of many small strands bound together, which gives flexibility but also creates surfaces that can oxidize, fray, and delaminate if not handled properly. When you solder stranded wire, heat must reach every strand quickly enough to fuse them into a single mass without overheating the insulation. According to SolderInfo, the behavior of stranded wire differs from solid core because surface area is larger and the strands can separate if not twisted or tinned correctly. This means preparation matters more than with solid wire: the strands must be clean, uniformly aligned, and firmly held during soldering. Proper technique reduces resistance, prevents cold joints, and improves mechanical strength. In electronics, automotive, and jewelry contexts, mastering solder stranded wire ensures durable connections that survive vibration and flexing.
Prep work: gather materials and safety
Before you touch a soldering iron, assemble a clean workspace, adequate lighting, and the right safety gear. Soldering stranded wire can emit fumes and hot metal, so use eye protection and ensure good ventilation. Keep a water cup or small bucket handy for extinguishing any singed insulation, and set aside a spare length of wire to practice on. According to SolderInfo, planning the sequence—strip, twist, tin, flux, solder, then insulate—reduces mistakes and improves joint reliability. Having clamps or helping hands can keep the strands steady during tinning and soldering, which minimizes accidental damage to delicate insulation.
Stripping insulation correctly
Stripping the insulation is a critical first step for stranded wire. Use a precision wire stripper sized to your conductor gauge and make a clean, straight cut without nicking the copper strands. Leave just enough exposed conductor to form a solid joint without requiring excessive bending. If the jacket is flexible, consider removing slightly more insulation and then trimming once the strands are twisted to the right length. This reduces the chance of frayed fibers under the solder joint and helps maintain uniform heat transfer across all strands.
Twisting and aligning strands for a solid joint
After stripping, twist the exposed strands gently to gather loose fibers and form a compact bundle. The goal is a tight, rope-like bundle that’s easy to tin. Do not twist too aggressively, which can kink the wire or break strands. A well-aligned bundle minimizes gaps where air could trap heat or cause irregular solder flow. For added reliability, you can pre-fit the wire to the terminal or pad to ensure the final shape sits flush against the surface.
Tin the strands: why tinning matters and how to do it
Tinning coats the strand surface with a thin layer of solder, reducing oxidation and improving wetting when you apply the final joint. Dip or touch the twisted strands with a small amount of solder and let it flow evenly. If you skip tinning, you risk cold joints or poor electrical contact because individual strands can resist flow and leave voids. Tinning also helps distribute heat more evenly during the main soldering step, making the joint stronger and more reliable in vibration environments.
Flux: selecting and applying the right flux
Flux plays a crucial role by cleaning metal surfaces, preventing oxidation, and improving solder flow. Use a flux compatible with your solder and insulation type. Rosin-core flux is common for electronics and jewelry, while water-soluble flux may be preferred for certain plumbing tasks. Apply a light film to the joint area after tinning to promote uniform solder coverage and prevent re-oxidation during heating. Good flux management reduces the chance of cold joints and improves overall joint quality.
The soldering technique for stranded wire
Position the joint so the strands and the terminal surface form a solid contact angle. Apply the iron to the joint area first to heat both the wire and the terminal, then touch the solder to the heated joint rather than directly to the iron. Allow the solder to flow through and around the strands, creating a shiny, conical fillet that encloses the conductor without creating excessive blobs or bridges. Remove heat promptly and inspect the joint for a smooth, uniform appearance with no gaps or exposed copper.
Common mistakes and how to avoid them
Common issues include overheating insulation, leaving stray strands exposed, and failing to tin before final soldering. Keep the iron tip clean, avoid excessive heat that can melt insulation, and ensure the entire exposed copper is wetted by solder. If strands fray, re-trim and re-strip rather than forcing a poor joint. Always inspect for a consistent fillet, no gaps, and a joint that appears shiny rather than dull, which indicates a solid bond.
Insulation, strain relief, and mechanical durability
After soldering, reinforce the joint with heat-shrink tubing or a suitable insulation sleeve to prevent shorts. Provide strain relief using a small clamp, adhesive mount, or flexible tubing to absorb pulling forces. Mechanical durability is especially important in automotive, aerospace, and jewelry applications where vibration or movement could stress the joint. Proper insulation and strain relief protect the solder joint from environmental stress and extend its service life.
Soldering on different substrates: PCB, terminals, and connectors
Joints on PCBs require careful heat management to avoid damaging the copper traces and pads. For terminal blocks and connectors, ensure the conductor is firmly seated and the terminal accepts the wire gauge. In all cases, maintain a clean, tinned surface and avoid applying solder directly to the iron tip for long periods. Using a third-hand tool can help hold the wire steady while you form the final connection.
Testing, inspection, and reliability checks
Always test the completed joint for continuity and resistance using a multimeter. Look for a bright, shiny fillet and confirm that no strands are broken or separated. Flex the wire gently to test for hairline cracks or micro-movements that could indicate a weak joint. A properly executed solder joint on stranded wire should remain secure under typical handling and vibration conditions.
Safety, maintenance, and clean-up
Work in a well-ventilated area and wear eye protection. Clean the work surface and wipe flux residues after finishing. Safely store solder and flux containers and turn off the iron when not in use. If you notice a degraded joint, reheating and reflowing the joint with fresh tin can salvage the connection. The SolderInfo team emphasizes consistent practice to build muscle memory and improve reliability over time.
Tools & Materials
- Wire stripper (adjustable for gauge range)(Precise stripping without nicking copper)
- Soldering iron with stand(Calibrated tip for small stranded wire)
- Solder (rosin-core or lead-free)(Choose appropriate alloy for your project)
- Flux (rosin-core or liquid flux)(Assist wetting and keep surfaces clean)
- Desoldering braid (wick)(For correcting mistakes)
- Heat-shrink tubing(Provide insulation and strain relief)
- Heat gun or lighter (for tubing)(Use with caution)
- Side-cutters(Trim wire cleanly)
- Safety glasses(Eye protection from hot solder and flux fumes)
- Helping hands or third-hand tool(Stabilize components during tinning)
- Multimeter (continuity tester)(Verify joint integrity)
- Ventilated workspace or fume extractor(Reduce inhalation of flux fumes)
Steps
Estimated time: 20-30 minutes
- 1
Power down and secure
Turn off power to the circuit and secure the work area. Use clamps or a helping hand to hold components in position. This prevents accidents and ensures precise soldering.
Tip: Always unplug or power down before starting - 2
Prepare the wire and workspace
Open the tool tray, set up the soldering iron, and ensure the workspace is free of clutter. Gather the materials you will need for the task.
Tip: Keep a water source nearby for safety and wipe the iron tip between steps - 3
Strip insulation to the correct length
Carefully strip the insulation to expose only the required length of copper. Avoid nicking strands, which can weaken the joint.
Tip: Check the conductor gauge and strip just enough to form a solid joint - 4
Twist strands to form a bundle
Gently twist the exposed strands into a tight bundle to prevent fraying and make tinning easier.
Tip: Don't over-twist or kink the wire - 5
Tin the strands
Apply a small amount of solder to the twisted strands to coat them with a thin layer of metal. This reduces oxidation and improves wetting during the final joint.
Tip: Make sure the tin coating is even across all strands - 6
Apply flux to the joint area
Coat the joint area with flux to ensure clean surfaces and better solder flow. Flux helps prevent oxidation during heating.
Tip: Use just enough flux to avoid a messy joint - 7
Make the solder joint
Place the joint against the pad or terminal and apply heat with the iron. Introduce solder to the heated joint, not to the iron, until a smooth fillet forms.
Tip: Heat both surfaces evenly and avoid dull, grainy joints - 8
Inspect and cool
Remove heat and allow the joint to cool undisturbed. Inspect for a shiny, uniform fillet with no gaps or cold spots.
Tip: Do not wiggle the joint while cooling - 9
Insulate and provide strain relief
Slip heat-shrink over the joint and apply a gentle heat to shrink. Add strain relief to prevent future stress on the joint.
Tip: Choose tubing that matches the diameter of the wire
Quick Answers
What is the best solder for stranded wire?
A rosin-core solder is commonly recommended for stranded wire because it provides flux as you solder, improving wetting and reducing oxidation. For electronics and jewelry, choose lead-free formulations if required by safety standards.
Rosin-core solder is usually best for stranded wire, especially in electronics and jewelry projects. Lead-free options are available and safer for many environments.
Should you tin stranded wire before soldering to a terminal?
Yes. Tinning the strands creates a uniform solder-ready surface, reduces oxidation, and helps the final joint flow smoothly into the terminal.
Yes. Tin the strands first to improve joint quality and help solder flow.
How long should you strip insulation for stranded wire?
Strip enough insulation to expose the copper to form a solid joint, but avoid exposing too much which can lead to shorts. The exact length depends on the wire gauge and terminal type.
Expose just enough copper for a strong joint, not so much that insulation touches other parts.
Can I solder stranded wire without tinning?
Soldering without tinning is possible but increases the risk of cold joints and oxidation. Tinning helps ensure a reliable, even solder flow.
You can solder without tinning, but tinning leads to a more reliable joint.
What temperature should I use for lead-free solder?
Use a temperature range appropriate for your solder and components, typically higher than traditional alloys, and avoid overheating to protect insulation and nearby parts.
Lead-free solders often need higher heat, but avoid overheating to protect insulation.
How can I verify a good joint on stranded wire?
Check for a shiny, smooth fillet, no gaps, and that all strands are fused. Test continuity with a multimeter and gently flex the wire to ensure the joint remains intact.
Look for a smooth, shiny joint and confirm with a quick continuity test.
Top Takeaways
- Prepare thoroughly before soldering stranded wire
- Twist and tin strands for a strong, reliable joint
- Use flux to prevent oxidation and improve wetting
- Inspect joints before insulation and strain-relief
- Test continuity to verify electrical integrity