Pre Solder: Essential Preparation for Strong Joints
Learn how to prepare surfaces before soldering—cleaning, fluxing, tinning, and safety steps to ensure reliable bonds in electronics, plumbing, and jewelry. This guide covers best practices for pre-solder prep and common pitfalls.

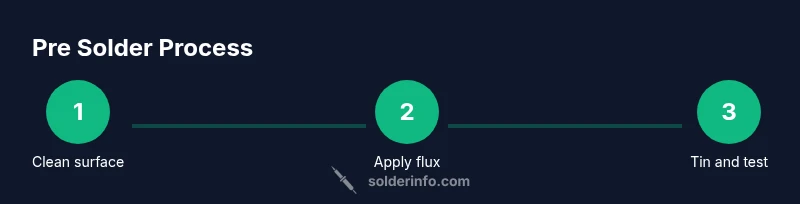
This guide shows how to perform pre solder preparation to ensure reliable joints across electronics, plumbing, and jewelry. You will learn surface cleaning, flux selection and application, tinning surfaces, proper temperature control, and safe workspace setup. Mastering these steps reduces cold joints and improves heat transfer in a variety of materials.
What pre solder means and why it matters
Pre solder is the deliberate preparation of metal surfaces before applying solder, ensuring a clean, oxide-free interface and optimal flux activity. It is essential across electronics, plumbing, and jewelry work. The SolderInfo team emphasizes that effective prep reduces cold joints, improves heat transfer, and yields durable bonds. Proper prep sets the stage for a clean joint, minimizes the risk of voids, and helps you achieve repeatable results even with low-quality components. In DIY settings, taking a systematic approach to cleaning, fluxing, and temporary tack can dramatically improve the outcome of both small-scale repairs and larger assemblies. By investing time in prep, you reduce later rework and save time overall, especially when working with lead-free solders or sensitive substrates.
Surface cleanliness and oxidation control
Surface cleanliness is the foundation of a strong solder joint. Oxides, oils, fingerprints, and moisture impede solder wetting and heat transfer. Begin with a visual inspection: look for dull, oxidized patches or oily residues. Use a lint-free wipe dampened with isopropyl alcohol to remove oils, then lightly scrub with a non-metallic brush or tampon to break loose oxidation. For stubborn residues, a dedicated flux remover or acetone can help—always ensure good ventilation and follow the manufacturer’s safety data. Allow surfaces to dry completely before fluxing. In electronics, avoid contaminating pads with fingerprints; even tiny oils can hinder solder flow.
Flux fundamentals and selection
Flux is not just a lubricant; it chemically facilitates wetting and protects freshly melted solder from oxidation. Choose a flux appropriate to the substrate: rosin-based fluxes for electronics, water-soluble fluxes for easy cleaning, or acid fluxes for plumbing (used sparingly and thoroughly cleaned afterward). Apply only a thin, even film; excessive flux can create flux blobs that burn and corrode over time. For delicate components, consider flux with lower acidity and a dedicated flux brush to avoid cross-contamination. Remember that flux performance is as important as surface cleanliness in achieving a reliable joint.
Surface prep for different materials
Different materials require tailored prep. Copper and copper alloys respond well to scrubbing and fluxing, but electronics boards demand careful handling to avoid residue and corrosion. For copper pipes, mechanical cleaning followed by flux and soldering with compatible tinning wire yields strong joints. For jewelry such as silver or gold pieces, polishing to a bright surface reduces oxidation and allows smoother flow of solder. Plastics and polymers often require heat-sensitive protocols; in those cases, pre-tinning and precise heat control become critical. Always match flux type and solder alloy to the substrate to optimize wetting and corrosion resistance.
Tinning and its role in pre solder
Tinning involves applying a thin layer of solder to the iron tip or a metal surface to improve heat transfer and wetting. A lightly tinned iron tip heats faster and reduces the risk of oxidation during the joint. When tinning surfaces, apply just enough solder to form a micro-coating without creating excess pools. For wire or pin ends, tinning helps the solder to flow more evenly and reduces the chance of cold joints. Remember to re-tin the tip as needed during extended tasks to maintain efficiency and consistency.
Temperature control and heat management
Proper heat management is essential for a good pre-solder prep. Overheating can burn flux, damage coatings, or wick heat away from the joint, while underheating leads to poor wetting. Use a stable soldering iron at the recommended temperature for the chosen solder alloy and flux. For fine electronics work, aim for a shallow, steady touch rather than prolonged heat application. If you’re using a hot air station, keep airflow controlled to avoid blowing away flux or overheating the substrate. Practicing steady hand control in short intervals improves repeatability and reduces the risk of damage.
Common pitfalls and how to avoid them
A few frequent mistakes can ruin prep: skipping cleaning, using expired flux, applying too much flux, and not allowing surfaces to dry. Always verify that flux is intact and not gummy before use. Keep tools clean and change scrapers or brushes between boards to avoid cross-contamination. If a joint wets poorly, pause to re-clean, re-flux, and re-tin as needed. Document settings for future projects so you can reproduce the same results. Finally, maintain a clean, organized workspace to avoid accidental contamination or misplacement of parts.
Safety, workspace setup, and environmental considerations
Ventilation matters when using flux and solvents. Work in a well-ventilated area or use a fume extractor. Wear safety glasses and gloves when handling hot surfaces and chemicals. Keep solvents away from open flames and store flux in a cool, dry place. Maintain an orderly workspace with a dedicated area for soldering and a separate area for cleaning and inspection. A small fan can help dissipate fumes, but avoid blowing flux directly onto you or components. By establishing a safe routine, you reduce hazards and improve your overall results.
Quick-start checklist before you begin
- Clean and dry all surfaces with isopropyl alcohol
- Inspect for oxidation and damage; re-clean as needed
- Choose appropriate flux and apply a thin film
- Pre-tin the iron tip and target surfaces lightly
- Set up heat source and ensure ventilation
- Align components and practice a few test wets on scrap material
- Inspect joints after cooling and remove residue with flux remover if needed
Tools & Materials
- Soldering iron or hot air station(Ensure temperature control; use appropriate tip for small components)
- Flux (rosin-based or water-soluble)(Choose flux compatible with solder type and substrate)
- Solder (lead-free preferred for electronics)(Select a compatible alloy (e.g., Sn63/Pb37 or lead-free) and diameter)
- Isopropyl alcohol (70-99%)(For surface cleaning and residue removal)
- Lint-free wipes or pads(To avoid leaving fibers on the surface)
- Solder wick (desoldering braid)(For cleanup and rework)
- Flux remover or acetone(To remove excess flux after soldering)
- Safety gear (goggles, fume mask)(Protect your eyes and lungs)
- Soft brush or non-metal scrub pad(For gentle surface cleaning)
Steps
Estimated time: 30-60 minutes
- 1
Prepare workspace and safety gear
Set up a clean, well-ventilated area. Put on safety goggles and gloves. Power down equipment and disconnect any live circuits. This reduces the risk of accidental burns or splashes and ensures accurate temperature control during prep.
Tip: Keep a dedicated, well-lit space for soldering to minimize distractions and errors. - 2
Clean and inspect surfaces
Wipe surfaces with isopropyl alcohol and dry thoroughly. Inspect for oxide layers or oils and address any residues with an additional wipe or brush. Dry surfaces prevent flux from pooling and improve solder wetting.
Tip: Use fresh wipes and avoid reusing contaminated towels. - 3
Apply flux evenly
Apply a thin, uniform layer of flux to the metal surfaces. A light film is enough to promote wetting; avoid globs that can burn or cause excess solder to wick away from the joint.
Tip: Brush flux along the direction of the joint to avoid air entrapment. - 4
Tin the iron tip and prepare surfaces
Tin the iron tip lightly to prevent oxidation during heating. If necessary, pre-tin exposed wire ends or pads to create a ready surface for solder flow.
Tip: Wipe the tip clean between tinnings to maintain efficient heat transfer. - 5
Position components and apply heat
Place components in alignment, then apply heat to the joint area with a steady, short contact. Feed solder to the joint (not directly onto the tip) to create a consistent fillet.
Tip: Avoid overheating; excessive heat can damage components and substrates. - 6
Inspect and rework if needed
Allow the joint to cool naturally and inspect for smooth, shiny wetting with no gaps or blobs. If needed, reflow or touch up with a small amount of solder.
Tip: If you see a cold joint, reheat quickly and apply fresh solder after cleaning. - 7
Cleanup and storage
Remove excess flux with flux remover or acetone, then store tools in a dry place. Label leftover flux and solder reels for future projects to maintain consistency.
Tip: Clean as you go; residual flux can be corrosive in the long term.
Quick Answers
What is pre solder and why is it important?
Pre solder refers to the series of steps taken before applying solder to a joint, including cleaning, fluxing, and tinning. It matters because it establishes clean interfaces and proper wetting, which leads to stronger, more reliable joints in electronics, plumbing, and jewelry.
Pre solder is prepping surfaces before soldering to improve joint reliability and wetting; it reduces failure from oxidation and contaminants.
Can I skip pre-solder prep for simple joints?
Skipping prep can save time in the short term, but it increases the risk of cold joints and weak bonds. Even simple joints benefit from at least basic cleaning and fluxing to ensure consistent results.
Skipping prep may save time, but it can compromise joint quality and durability.
What flux types work best for beginners?
Rosin-based flux is common for electronics and is often easier to work with for beginners. Water-soluble flux cleans more easily but requires thorough washing after soldering. Choose based on your substrate and solder alloy.
Rosin flux is a good starting point for electronics; water-soluble flux can be cleaned more easily but needs washing.
Is pre-solder compatible with lead-free solder?
Yes. Pre-solder prep works with lead-free solders; ensure flux and surface prep are compatible with the chosen alloy and avoid overheating to prevent damage.
Lead-free solder works with proper prep; keep temperatures in check to avoid issues.
What signals indicate poor prep quality?
Common signs include dull or oxidized surfaces, solder beads that do not wet the joint, spattered flux, or a soft/dull joint after cooling. Revisit cleaning and fluxing steps if these occur.
Poor prep shows as dull joints and poor wetting; re-clean and reflow as needed.
How long does pre-solder prep typically take?
Prep time varies with joint complexity but usually takes a few minutes per joint, including cleaning, fluxing, and tinning. Larger assemblies will take longer, especially when multiple joints require careful alignment.
Most prep takes a few minutes per joint, depending on complexity.
Watch Video
Top Takeaways
- Prep surfaces thoroughly for reliable joints.
- Choose and apply flux wisely to improve wetting.
- Control heat to avoid damage and ensure proper wetting.
- Tin surfaces and tools to reduce oxidation.
- Inspect joints and clean up residues for longevity.