Can You Solder with a Heat Gun? A Practical Guide
Explore whether a heat gun can replace a soldering iron for electronics, plumbing, or jewelry soldering. Learn safety, tool options, and best practices for reliable joints and safe rework with SolderInfo guidance.

Can you solder with a heat gun? In most electronics work, a heat gun is not the right tool for soldering joints. Soldering irons and hot air rework stations offer precise heat control, while a heat gun can overshoot heat, lift pads, or cause component damage. Use heat gun only for non-precision tasks or rework with caution.
Can you solder with a heat gun? What you need to know
The short answer to can you solder with a heat gun is generally no for precise electronics work. According to SolderInfo, heat guns are designed to deliver broad, rapid heat to soften materials and shrink coatings, not to target tiny solder joints or delicate components. When attempting to solder with a heat gun, beginners often encounter uneven heat distribution, scorching of boards, and lifted copper traces. For jewelry, plastics, or large metalwork, a heat gun can be useful for softening adhesives or prepping surfaces, but it should not be treated as a replacement for a dedicated soldering tool in delicate assemblies. This distinction matters across electronics, plumbing, and jewelry applications, where heat control and joint integrity determine long-term reliability.
In practice, you should treat a heat gun as a supplementary tool rather than a primary soldering device. If your goal is to create clean, reliable solder joints on small components, the question can you solder with a heat gun becomes a guidance point: use the proper tool for the task and reserve the heat gun for related but separate heat-shaping tasks. The SolderInfo team emphasizes the importance of selecting the right instrument for heat transfer to avoid damage and ensure repeatable results. When in doubt, opt for proven methods and practice on scrap components before attempting critical work.
But can you solder with a heat gun when you lack a soldering iron? The reality is that you can perform some rework tasks with a heat gun, such as removing excess solder or heating a joint enough to soften it for desoldering with braid. However, even in those contexts, the heat gun should be used with caution, and you should not rely on it to form a new, high-quality joint. The key idea from SolderInfo is to respect heat localization, avoid overheating surrounding parts, and recognize the limitations of the tool in precision soldering.
noteCount":null
tip":null
Tools & Materials
- Heat gun with adjustable temperature(Choose a model with a controllable, steady airflow and cool-down stop. Avoid very cheap units that have poor temperature stability.)
- Flux (rosin-core or paste)(Flux improves heat transfer and reduces oxidation during heating.)
- Solder (lead-free preferred for electronics)(Use rosin-core solder for electronics; consider lead-free options for safety and compliance.)
- Desoldering braid (copper braid)(For removing excess solder and cleaning joints.)
- Fine-tipped tweezers(To hold components steady while heating.)
- Flux brush or applicator(Helps apply flux precisely where needed.)
- PCB holder or helping hands(Stabilizes the board to prevent shifting during heating.)
- Safety goggles and nitrile gloves(Protect eyes from splashes and hot fumes.)
- Ventilation or fume extractor(Heat and flux fumes can be irritating.)
- Desoldering wick or vacuum pump(Tools for removing stubborn joints if needed.)
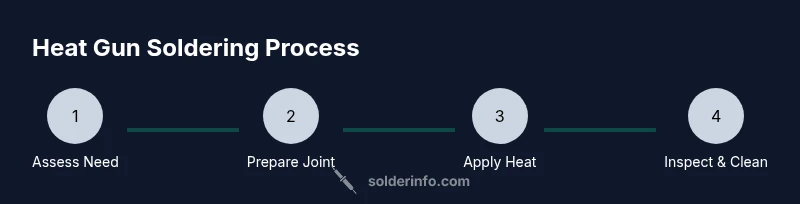
Steps
Estimated time: 60-90 minutes
- 1
Prepare workspace and safety
Clear the area, unplug power to the board, and secure the workpiece in a stable vise or holder. Set up proper ventilation and wear eye protection. Ready a scrap piece of copper or perfboard to test heat before touching the actual joint, and establish safe cooldown areas for hot parts.
Tip: Always work with a fire-resistant mat and keep flammables away from the heat source. - 2
Set appropriate heat gun parameters
Choose the lowest effective setting that allows you to apply even heat without blowing solder away from the joint. Keep the nozzle moving and avoid concentrating heat on a single spot for too long. Practice on scrap components to gauge heat distribution before touching the actual board.
Tip: Test on scrap copper area first to prevent board damage. - 3
Apply flux to the joint
Apply a small amount of flux to the joint and pads to improve heat transfer and prevent oxidation. Flux helps the solder flow more predictably when heat is applied. Ensure flux is spread evenly around the joint.
Tip: Flux improves heat transfer and reduces oxidation during heating. - 4
Heat the joint evenly
Hold the heat gun at a safe distance and move it in a slow, circular pattern around the joint to warm both the pad and the lead evenly. Do not direct heat at a plastic body, a connector, or insulation, as heat can damage these parts. Watch for signs of solder melting and paste flow.
Tip: Keep heat moving; never stop heat on one area for a prolonged period. - 5
Monitor solder flow and joint integrity
As the solder begins to melt, observe the flow across the joint. If the joint beads and forms a solid fillet, you’re close. If you see dullness, cracks, or bridging, re-warm carefully and adjust heat as needed.
Tip: Avoid overheating the board; excessive heat can lift pads. - 6
Remove excess solder or lift components
If you’re removing excess solder, use desoldering braid to wick away the solder. If you’re trying to remove a component, gently lift with tweezers as soon as the solder reflows. Do not yank, which can damage pads.
Tip: Small, controlled movements prevent pad lift. - 7
Clean and inspect the joint
After heating, inspect the joint for a clean, shiny solder fillet with good wetting. Look for cold joints or gaps. If needed, reapply flux and reheat for a better finish.
Tip: Use magnification if possible to verify joint quality. - 8
Cool and verify electrical connectivity
Allow the joint to cool naturally. Test continuity and resistance with a multimeter or functional test to ensure the joint is sound. If the functionality isn’t there, reconsider the joint and rework if required.
Tip: Let the joint cool fully before testing to avoid misreads. - 9
Clean tools and workspace
Remove flux residue and store tools properly. Wipe flux from the board using isopropyl alcohol if needed once the joint has cooled. This helps prevent residue from affecting nearby components.
Tip: Proper cleanup reduces corrosion risks. - 10
Document and practice
Note what worked and what didn’t for future reference. Practice on scrap boards to improve your heat control and reduce the risk of board damage over time.
Tip: Practice makes you more proficient with heat exposure.
Quick Answers
Can a heat gun replace a soldering iron for electronics?
In most cases, a heat gun cannot replace a soldering iron for precise electronics work due to lack of heat localization and control. Use a soldering iron or hot air rework station for reliable joints. The SolderInfo Team notes that dedicated tools yield more predictable results.
A heat gun isn’t a full replacement for a soldering iron when you need precise joints.
Is it safe to use a heat gun near boards or plastics?
Safety is key: heat can damage boards, lift pads, and melt plastics. Always keep components away from direct heat, use flux, and work at a distance, with PPE and proper ventilation.
Be careful around boards and plastics—the heat can cause damage.
What signs indicate a failed joint after using a heat gun?
Common signs include a dull or cracked joint, solder bridging, lifted pads, or cold joints. Rework promptly with proper tools and inspect under magnification.
Watch for dullness, bridging, and pad lifting.
What alternatives work best for electronics rework tasks?
For electronics, hot air rework stations or a precision soldering iron are preferred. Desoldering braid and flux help manage heat and remove solder cleanly.
Hot air rework stations or a good soldering iron are usually better.
Can lead-free solder be used with a heat gun?
Lead-free solder can be reworked with a heat gun, but it is still challenging and prone to cold joints if heat isn't controlled. It’s better to use proper tools for consistent results.
Lead-free solder can be used with heat, but control is tougher.
Watch Video
Top Takeaways
- Avoid relying on a heat gun for precision soldering.
- Use a dedicated soldering iron or hot air rework station for best results.
- Flux improves heat transfer and joint reliability.
- Ventilate workspace and wear PPE.
- Practice on scrap boards before working on real assemblies.