Solder Hose Bib Guide: Install & Repair Outdoor Faucets
Learn how to safely solder a solder hose bib for outdoor faucets, with lead-free options, essential tools, and a clear step-by-step guide for leak-free repairs.

By the end of this guide, you will be able to safely solder a solder hose bib to copper or threaded supply lines, seal joints, and prevent outdoor leaks. You’ll choose lead-free solder, select the right flux, and follow a clear, step-by-step process. This quick path emphasizes safety, proper tools, and leak testing.
What is a solder hose bib and why it matters
A hose bib is the outdoor faucet that feeds water to your garden hoses, irrigation lines, and outdoor equipment. When dispensing water outdoors it should remain reliable year-round. A solder hose bib refers to the practice of joining a replacement bib or tailpiece directly to the supply line using solder and flux, often on copper or brass pipe. This method is common when the bib head or the tailpiece develops a leak, or when upgrading to a lead-free option that meets drinking-water standards. According to SolderInfo, the key to a durable repair is proper prep, clean joints, and using the correct lead-free solder for outdoor plumbing.
Outdoor plumbing connections face weather, freezing temperatures, and chemical exposure from fertilizers. A poorly prepared joint can fail quickly as metal expands and contracts with temperature swings. The goal is a clean, watertight seal that resists corrosion. Before you begin, verify you have the right adapters if you’re not directly soldering to copper, confirm whether your bib is threaded or compression-based, and check local codes. In this section we’ll cover compatibility (copper vs brass), safety steps, and testing procedures so DIYers and professionals can complete the job with confidence.
Why outdoor hose bib repairs require care and planning
Outdoor fixtures endure thermal cycling, moisture exposure, and potential backflow risks. A well-executed solder joint minimizes leaks, reduces frost risk in cold climates, and keeps irrigation equipment from drawing contaminants. The process also matters for potable-water safety—using lead-free solder and approved flux is essential. If you’re upgrading to a modern, code-compliant bib, ensure the replacement portion fits the pipe diameter and thread style. A thoughtful approach saves time and reduces the need for repeat visits to the project site.
Compatibility and preparation: copper, brass, and fittings
Soldering a hose bib generally involves copper or brass piping. Copper is the easiest surface for soldering due to its smooth, clean finish when properly prepared. Brass bibs are common for outdoor use, but ensure the tailpiece and coupling are compatible with your piping. Before heating, inspect the pipe for corrosion, burrs, or damaged threads. Replace defective sections to prevent future leaks. Use appropriate adapters if you need to bridge mismatched materials, and confirm the bib’s tail size matches the pipe end.
Surface prep and cleaning best practices
A strong solder joint begins with clean metal. Cut the pipe square, deburr the edge, and remove oxidation with a brass brush. Wipe down with a dry rag to remove oil or moisture. Apply flux evenly to both surfaces; a thin, consistent coat ensures the solder will wet the joint properly. If you’re reusing an old bib, remove built-up residue from the threaded area and ensure the end of the pipe is smooth. Excess flux can burn and cause residue; wipe away excess before heating.
Soldering approach: direct sweat vs threaded adapters
There are two main routes: sweat-solder directly onto a copper stub-out, or use a threaded adapter that screws onto the bib tail and pipe. Sweat-soldering produces a compact, leak-resistant joint but requires precise flame control and proper heat management to avoid damaging nearby fittings. Threaded adapters offer easier disassembly and alignment but may introduce an extra joint that could leak if not sealed correctly. Choose based on pipe material, space, and required durability.
Testing, maintenance, and troubleshooting after soldering
Never rely on a single leak test; perform a gradual pressure test by turning on the water and watching for drips along the joint. If a leak appears, reheat the joint and reflow solder, ensuring the joint wets completely. Outdoor joints should be inspected seasonally, especially after freeze-thaw cycles. If corrosion or persistent leaks occur, consider replacing the bib or reworking the connection with a new adapter. The SolderInfo team recommends documenting the joint with photos for future maintenance.
Tools & Materials
- Adjustable wrench(Use to hold fittings steady without rounding surfaces)
- Copper pipe cutter(Clean, square cuts are essential for a good solder joint)
- Propane soldering torch(Ensure a stable flame and keep a fire-safe area)
- Lead-free solder(Choose solder suitable for potable-water lines)
- Flux (copper flux or paste flux)(Use an appropriate flux to promote wetting and prevent oxidation)
- PTFE tape or pipe thread sealant(Seal threaded connections to prevent leaks)
- Solder wick(Optional aid for cleaning small drips during testing)
- Safety glasses(Protect eyes from hot metal and flux splatter)
- Heat-resistant gloves(Shield hands from heat and solder spills)
- Marker and sandpaper/brush(Mark cut lines and clean surfaces before fluxing)
- Bucket or rags(Contain drips and cleanup flux residue)
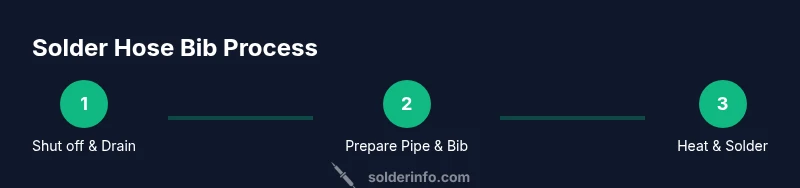
Steps
Estimated time: 60-90 minutes
- 1
Shut off water and drain line
Locate the main shut-off valve and close it, then open the outdoor faucet to relieve pressure and drain residual water from the line. This minimizes water in the system and reduces the risk of burns when heating the joint.
Tip: If possible, perform this step outdoors to avoid humidity buildup in enclosed spaces. - 2
Remove old bib or prepare stub-out
If replacing an existing bib, disconnect and remove the old tailpiece, leaving a clean stub-out. If reworking a direct sweat joint, ensure the pipe end is square and free of burrs.
Tip: Use a marker to note the pipe orientation to ensure correct reassembly. - 3
Clean and prep the pipe end
Cut the pipe square, deburr, and clean the end with a brass brush. Wipe down with a dry cloth to remove oils and moisture before applying flux.
Tip: A clean surface wets better with solder, which reduces the risk of leaks. - 4
Apply flux and align fittings
Brush on a thin, even coat of flux to both the bib tail and the pipe end, then place the bib against the pipe or fit the adapter. Ensure the joint will be fully wetted by the solder.
Tip: Flux should be smooth and not clumpy; clumps can trap air or moisture. - 5
Heat and apply solder
Apply heat to the joint with the torch, not directly to the solder. Feed solder into the joint as it heats, allowing capillary action to pull it into the joint. Stop heating once a smooth, shiny bead forms.
Tip: Keep flame moving to avoid scorching nearby surfaces. - 6
Cool, inspect, and test
Allow the joint to cool, then turn the water back on slowly and inspect for leaks. If you see a drip, reheat and apply more solder, ensuring complete wetting of the joint.
Tip: Test under both low and slightly higher pressure to confirm durability. - 7
Finish and winterize
Wipe away flux residue, re-secure any fittings, and document the repair. For outdoor use, consider winterizing by draining the line and insulating exposed piping to prevent freezing.
Tip: Keep a small record of the work and date for future maintenance.
Quick Answers
Do I need to solder a hose bib or can I use a compression fitting?
Both methods are viable; soldering offers a more durable, leak-free joint for copper lines, while compression fittings provide easier disassembly and replacement. Choose based on pipe material, space, and your comfort with heat.
You can use either soldering or a compression fitting. Soldering is typically more durable for copper pipes, while compression fittings are easier for replacement, depending on space and materials.
Is it safe to solder outdoors in cold weather?
Cold weather can slow flux drying and solder flow. If you must work outside, keep joints shielded from wind, use a windbreak, and allow extra time for flux to set before heating.
Yes, you can solder outdoors in cold weather, but you may need to shield the joint, use a windbreak, and give flux extra time to set before heating.
What is the best lead-free solder for outdoor plumbing?
Choose a lead-free solder designed for plumbing and potable-water systems, with compatible flux. Follow manufacturer instructions for cleaning, fluxing, and curing times for outdoor joints.
Use a lead-free plumbing solder with compatible flux, following the manufacturer’s directions for outdoor use.
How long should flux stay on the pipe before heating?
Apply a thin, even coat of flux and wait a few seconds for it to settle before heating. If flux dries out quickly in hot weather, reapply a light layer.
Let the flux settle for a few seconds before heating, and reapply lightly if it dries out in hot weather.
What steps lead to a leak-free hose bib installation?
Ensure clean, square pipe ends; use proper flux; apply heat evenly; wet the joint completely with solder; test under pressure after cooling. If leaks persist, rework the joint or replace the bib.
Keep ends clean and square, flux properly, heat evenly, and test under pressure after cooling. Rework if leaks appear.
Watch Video
Top Takeaways
- Plan the right soldering approach for outdoor bibs.
- Prepare and clean surfaces to ensure reliable wetting.
- Test joints thoroughly after cooling to confirm durability.
- Prioritize safety and adhere to local codes.