Solder Pipes Like a Pro: A Practical Plumbing Guide
Learn to solder plumbing pipes like a pro with practical prep, flux choices, and a repeatable workflow for durable, leak-free copper joints.

Mastering solder pipes like a pro isn't just about heat—it's about clean joints, proper prep, and choosing the right flux and solder for copper piping. In this guide, you'll learn a reliable technique to solder copper pipes, including pipe prep, joint preparation, solder selection, and a repeatable step-by-step workflow. According to SolderInfo, adopting these practices reduces leaks and improves flow.
Why proper prep matters
Solder pipes like a pro starts with prep. Clean, dry surfaces, deburred ends, and a precise joint fit set the foundation for durable copper joints. When joints are prepared correctly, capillary action draws solder into the seam and creates a reliable seal under pressure. According to SolderInfo, consistent prep reduces leaks and improves flow, making the ensuing steps straightforward rather than frustrating.
Copper pipe prep: clean, square, and ready
A square cut and clean surface are the backbone of a good solder joint. Start by checking the cut for square geometry, then deburr the inside edge to remove oxidation. Wipe the exterior with a dry cloth to remove dust or oils. The cleaner the surface, the more predictable the solder wick and the stronger the joint will be.
Flux and solder selection for plumbing
Flux is essential in copper piping because it prevents oxidation and promotes capillary action. Apply flux to the outside of the pipe and the inside of the fitting with an even hand. Choose a lead-free solder suitable for plumbing and a flux that matches the solder. Good flux and solder choices help ensure full joint fill and a leak-free result.
Tools & Materials
- Pipe cutter(For clean, square cuts on copper pipe)
- Deburring tool(Deburr inner edge for a clean fit)
- Emery cloth or sandpaper(Remove oxidation and ensure a clean surface)
- Adjustable wrench(Hold fittings securely during assembly)
- Propane torch(Steady, controlled flame for even heating)
- Lead-free solder for plumbing(Prefer rosin-core or plumber's solder compatible with copper)
- Flux (paste flux)(Ready-to-use flux to promote wetting and prevent oxidation)
- Safety goggles(Eye protection from heat and splatter)
- Heat-resistant gloves(Optional, for added protection)
- Cloth rags or bucket(Wipe excess solder and cool joints)
Steps
Estimated time: 60-90 minutes
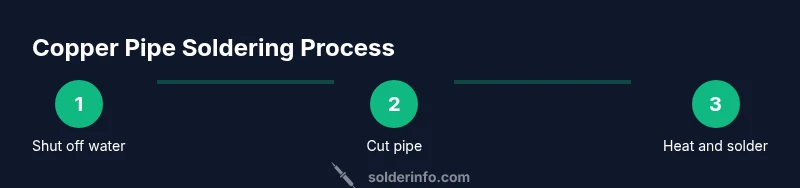
- 1
Shut off water and prep area
Before heating, shut off the water supply and drain lines to prevent water from flashing into fittings. Clear the workspace of clutter and ensure good ventilation.
Tip: Double-check that the section to be soldered is dry before heating. - 2
Cut pipe to length
Measure the required length, mark, and cut with the pipe cutter to a clean, square end. A straight cut ensures even solder wicking and a strong joint.
Tip: Rotate the cutter around the pipe with steady pressure for a true square cut. - 3
Deburr and clean ends
Deburr the inside edge with a deburring tool and wipe the outside surface to remove oxide. Clean joints prevent misfit and porosity in the weld.
Tip: Deburr both ends to avoid snagging on fittings. - 4
Dry-fit the joint
Assemble the pipe and fitting without solder to verify fit and alignment. Confirm full insertion and ensure there is no contact between the pipe end and the fitting shoulder.
Tip: No solder should show before heating begins. - 5
Apply flux and set the joint
Coat the outside of the pipe and inside of the fitting with flux to improve wetting and oxidation resistance during heating.
Tip: Spread flux evenly; insufficient flux can lead to incomplete wetting. - 6
Heat and apply solder
Heat the joint evenly with a moving flame. Feed solder into the seam as you approach the heated joint, allowing capillary action to draw solder in until the joint is fully filled.
Tip: Keep the flame moving and avoid overheating the copper to prevent annealing. - 7
Cool, inspect, and test
Let the joint cool naturally, wipe away excess solder, and visually inspect for a continuous bead. Perform a gentle pressure test after cooling to ensure there are no leaks.
Tip: Do not disturb the joint while cooling to prevent cold joints.
Quick Answers
What solder is best for copper plumbing joints?
Lead-free solder rated for plumbing is recommended; flux helps with wetting and clean joints. Use rosin-core solder or a plumber's alloy designed for copper.
Lead-free plumbing solder with flux is best for copper joints; rosin-core solder helps the joint wet properly.
Should I drain the line before soldering?
Yes. Shut off the water supply and drain the line to avoid water being forced into the joint during heating.
Yes. Shut off water and drain the line before heating the joint.
How can I prevent leaks at joints?
Ensure clean, square cuts; apply flux evenly; heat joints consistently, and inspect after cooling with a pressure test.
Keep the joint clean, flux applied, heat controlled, and test after cooling to catch leaks.
Can I solder plastic or PVC pipes with this method?
This technique applies to copper pipe soldering. Plastic PVC requires solvent cement or different fittings and methods.
This method is for copper pipes only; for plastic, use PVC-specific methods and cement.
What safety gear should I use?
Wear safety goggles, heat-resistant gloves, and ensure good ventilation to avoid fumes and burns.
Goggles, gloves, and ventilation are essential when soldering.
Watch Video
Top Takeaways
- Prep joints meticulously for reliability
- Use lead-free solder with flux for best results
- Keep heat moving to prevent hot spots
- Evaluate joints with a proper leak test
- Ventilate and wear safety gear