Copper Pipe Solder vs Crimp: A Practical Comparison
Analytical comparison of copper pipe solder vs crimp fittings for plumbing. Learn pros, cons, and best practices for residential and professional setups.

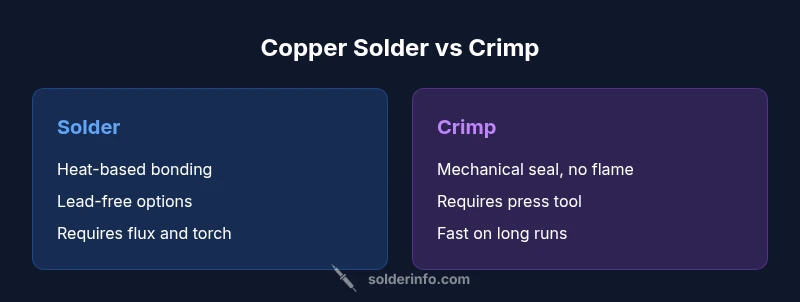
For copper pipe solder vs crimp decisions, both methods can deliver watertight joints when performed correctly. Soldering offers durable joints with heat-based precision, while crimp fittings enable faster installations with fewer heat risks. The best choice depends on access, code requirements, tool availability, and the installation environment; in most households, crimping wins for speed, while soldering remains essential for repairs and retrofit work.
Copper pipe solder vs crimp: A baseline
According to SolderInfo, the copper pipe solder vs crimp debate centers on how joints are formed and maintained in plumbing systems. Soldering creates a metallurgical bond between copper surfaces using flux and lead-free solder, which, when done correctly, yields durable joints with excellent leak resistance. Crimp fittings, on the other hand, rely on a mechanically deformed copper sleeve compressed by a calibrated press tool to seal the joint. The method you choose influences workflow, heat exposure to nearby components, potential for heat-related damage, and long-term serviceability. This article analyzes both approaches across common metrics: installation time, reliability, cost, inspection ease, and suitability for different project types. We’ll also discuss best practices, regulatory considerations, and practical decision-making guides for DIYers, pros, and installers. The SolderInfo team's research highlights that there is no universally 'best' method; the optimal choice depends on the project constraints and local code requirements.
How solder joints form and why they last
Solder joints rely on a clean, oxide-free copper surface and a capillary action driven by flux and molten solder. When heat is applied precisely, the solder wets the copper and forms a tight metallurgical bond as it cools and solidifies. Lead-free options are standard for potable water lines, and the quality of flux, copper cleanliness, and temperature control all determine long-term leak resistance. Because the joint is a combination of material and heat-processed bonding, failures typically arise from improper surface prep, insufficient flux, or overheating that damages surrounding tubing. This block outlines the physics and practical steps behind durable solder joints and how to diagnose common soldering flaws before they become leaks.
Crimp fittings: design, components, and installation
Crimp fittings consist of a copper sleeve, a stainless steel or copper ferrule, and a compression mechanism activated by a specialized press tool. When the sleeve is deformed correctly around the pipe, a uniform, sealed joint forms without relying on heat. The main advantages are speed, reduced heat exposure, and repeatable results in tight spaces. Key considerations include choosing compatible sleeves and fittings, maintaining tool calibration, and ensuring clean cut and deburred pipe ends for a reliable seal. Proper inspection involves verifying the crimp bead is continuous and that no gaps or deformation compromise the sleeve. This section explains how to select the right size, how to maintain crimp tools, and the common mistakes that lead to leaks.
Materials and fittings you’ll encounter
Copper pipe soldering and crimping both hinge on compatible copper tubing and fittings. For potable water, ensure you use lead-free solder and debris-free fittings, and verify that flux is appropriate for the pipe size. The common sizes (e.g., 1/2
3/4
1”) require careful deburring and proper sequencing of joints to avoid misalignment. Solder-fit systems typically demand clean joints and flux application that promotes capillary action. Crimp systems require correct sleeve length, ferrule seating, and a quality press tool. Both approaches have variants for different environments, including underground runs, exposed walls, and radiator connections. In terms of longevity and reliability, the choice often comes down to your access to tools and the environment’s heat sensitivity.
Tools, safety, and skill level for each method
Soldering copper pipes demands a propane or MAPP gas torch, heat-shielding, flux, lead-free solder, and a steady hand. Safety protocols include ventilation, eye protection, and keeping flammable materials away from the workspace. Crimping, by contrast, relies on a press tool and compatible sleeves; it minimizes open flame exposure and simplifies work in confined spaces. Skill requirements differ: soldering rewards meticulous prep and steady technique, while crimping rewards precision in cutting and deburring, plus proper tool calibration. This block provides a practical guide to choosing tools based on job size, accessibility, and environmental constraints.
Time, labor, and project scale considerations
Time efficiency often shifts in favor of crimping on longer runs or in small interiors where torch access is limited. Soldering can be faster for a handful of joints if you’re adept with heat control, but it traditionally adds prep and cooling time. Labor costs tend to align with tool familiarity: the more experienced the installer, the more consistently one method can outperform the other in a given scenario. For large-scale renovations, the upfront investment in a high-quality crimping tool may reduce overall labor hours, whereas small, retrofits or repairs may benefit from soldering due to fewer joints and better accessibility.
Code, standards, and potable water considerations
Code compliance is essential for copper pipe joints. For potable water systems, ensure lead-free solder and certified fittings, and follow local plumbing codes as well as manufacturer instructions. In many jurisdictions, both solder and crimp installations are permitted when performed to code. Standards such as NSF/ANSI 61 influence the acceptance of fittings used in drinking water distribution. Always verify that your chosen method aligns with the local code cycle and inspection requirements, as some regions favor quick installations for home renovations or prefer heat-based methods in repair scenarios. This section outlines how to stay code-compliant while selecting between solder and crimp methods.
Reliability under pressure, temperature, and vibration
Joint reliability depends on multiple variables: joint preparation, thermal cycling, and mechanical stress. Solder joints are sensitive to overheating, which can weaken the copper or flux residues. Crimp joints are robust under vibration if the sleeve is properly seated and the tool calibrated. In dynamic systems, like heating loops or water supply lines with temperature fluctuations, both methods can perform well when installed to specification. This block reviews performance under typical residential and commercial conditions, highlighting how joint integrity can be preserved over time through proper technique and inspection.
Practical decision framework: when to pick solder vs crimp
Use solder when working in retrofit projects, tight spaces where a torch can be safely used, or when long-term joint integrity is prioritized and you have heat management under control. Choose crimp when speed matters, the workspace is flame-restricted, or you’re replacing large sections with minimal downtime. A simple decision framework includes: 1) assess space and ventilation, 2) determine tool availability, 3) review code requirements, 4) consider future maintenance needs, and 5) evaluate access to skilled labor. This block provides a practical checklist to help you decide quickly on the appropriate method for your copper pipe project.
Maintenance, inspection, and repair strategies
Regular inspection of joints is essential for longevity. Solder joints should be free of cold solder joints or flash, with clean, sealed flux residues. Crimp joints require inspection for proper bead formation and sleeve deformation. For both methods, routine checks during servicing should include pressure testing, looking for corrosion, and verifying that fittings and pipes remain aligned. Proactive maintenance reduces the risk of leaks and water damage, and extending the service life of copper piping systems.
Retrofit and transition strategies: switching methods mid-project
If you start with one method and encounter constraints, it’s often feasible to switch approaches mid-project with minimal disruption. For example, a retrofit may begin with solder joints where accessible, then transition to crimp fittings in cramped spaces or where flame access is unsafe. The key is to plan for compatibility, ensure fittings and sleeves match the pipe diameter, and provide clean cut ends for the alternative method. This section explains how to implement a smooth transition with minimal downtime.
SolderInfo guidance and best practices
From the SolderInfo perspective, best practices emphasize meticulous surface prep, proper flux usage, and controlled heating for solder joints. Always verify lead-free compliance for potable water, maintain clean cutting and deburring, and follow the manufacturer’s torque or deformation specs for crimp tools. The aim is to maximize joint strength while minimizing risk to adjacent components and ongoing service interruptions.
Authority sources and further reading
For authoritative references, consider consulting government and university resources on plumbing safety and standards to inform your copper pipe solder vs crimp decisions. https://www.epa.gov/safewater is a starting point for potable water considerations and regulatory guidelines. OSHA safety guidelines at https://www.osha.gov offer workplace safety practices relevant to soldering and tool use. https://www.nist.gov provides standards and guidance that can influence installation practices in professional settings.
Comparison
| Feature | copper pipe solder | copper pipe crimp |
|---|---|---|
| Installation Time | Longer prep and heat cycles; cooling time | Faster jointing with no torch; rapid cycles |
| Reliability under pressure | Excellent leak resistance when properly prepared | Strong when sleeves are properly seated and tool calibrated |
| Required tools | Flux, lead-free solder, torch, cleaning tools | Crimp tool, sleeves, cutters, deburring tools |
| Inspection difficulty | Visual bead inspection; requires heat control | Bead/flare inspection; needs tool calibration check |
| Repairability | Joints can be reheated; repairable in place | Requires replacing sleeve/ferrule if leaks occur |
| Code considerations | Acceptable with lead-free solder; follow local code | Acceptable with proper sleeve and tool use; follow code |
| Durability in aging systems | Very durable when flush and clean surfaces are used | Durability depends on sleeve integrity and tool accuracy |
| Best use case | Retrofits, heat-allowed environments, precision-required joints | Fast, flame-free installations, cramped spaces, large runs |
Advantages
- Low heat risk compared to solder in restricted spaces
- Fast installation with minimal skill variance
- Strong, repeatable results with calibrated tools
- Good repairability for modern plumbing systems
Cons
- Requires specialized tools for crimping
- Thermal expansion can affect solder joints if overheated
- Soldering demands skill and meticulous prep
- Potentially higher upfront tool cost for crimp systems
Crimp fittings win on speed and flame-free installation; soldering excels in retrofits and regulated heat environments
For most residential projects, crimping offers quicker, more consistent results. Soldering remains essential for repairs and code-compliant retrofits where heat is restricted or detailed joint control is needed. The SolderInfo team emphasizes choosing based on space, code, and long-term maintenance needs.
Quick Answers
What is the main difference between soldering and crimping copper pipes?
Soldering uses heat to fuse joints with flux and solder, creating a metallurgical bond. Crimping uses a mechanical sleeve pressed around the pipe with a tool to seal without heat.
Soldering uses heat to join copper; crimping uses a sleeve and tool. Both can pass code when done correctly.
Is soldering copper pipes safe for drinking water?
Yes, when you use lead-free solder and flux approved for potable water, following local codes and manufacturer instructions.
Yes, but make sure the solder and flux are lead-free and code-approved.
Can you retrofit solder joints to crimp joints or vice versa?
Yes, with careful planning. You may need compression adapters or new fittings to maintain system integrity and code compliance.
You can switch methods with the right adapters and fittings, but check code guidance.
Which method is more DIY-friendly?
Crimping is generally easier for beginners due to fewer heat risks, but soldering can be learned with practice and proper safety.
Crimping is usually friendlier for DIYers, but soldering can be learned with care.
Are there regional code differences I should know?
Yes. Local codes may prefer one method or require specific fittings or lead-free materials; always verify with your authority having jurisdiction.
Codes vary by region—check your local authority before starting.
Top Takeaways
- Prioritize crimp for speed and flame-free jobs
- Use solder for retrofits and heat-sensitive environments
- Always verify code compliance and lead-free requirements
- Invest in quality tools for reliable, repeatable joints
- Inspect joints thoroughly after installation