Can You Solder Refrigeration Lines? A Practical Guide
A comprehensive, safety-first guide explaining whether you can solder refrigeration lines, when brazing is required, and how to perform joint repairs with proper tools, purging, and leak testing.

Definition: Soldering refrigeration lines is not ordinary soldering; joints are brazed with a compatible filler metal, and the process requires proper purge, ventilation, and leak testing. In most cases, this work is performed by licensed HVAC technicians due to refrigerant safety, nitrogen purge requirements, and system integrity concerns.
Can you solder refrigeration lines? Why this matters
If you’re asking can you solder refrigeration lines, the short answer is that these joints are typically brazed, not soldered, and require specialized equipment, skills, and safety measures. In HVAC and refrigeration work, copper tubing is joined with a high-melting-point filler metal, usually silver-based, using a torch. A proper purge of air and moisture is essential to prevent leaks, corrosion, and refrigerant contamination. According to SolderInfo, this work belongs in the hands of qualified technicians who understand the hazards of refrigerants and the exact joint tolerances required for a leak-tight connection. DIY attempts without the right training risk compromised energy efficiency and dangerous leaks. The scope goes beyond heating a pipe; it’s about maintaining system integrity under pressure and ensuring compliance with environmental and safety rules. For someone considering can you solder refrigeration lines at home, consider whether you’re equipped to recover refrigerant, vent high-pressure gas safely, and pass the leak test with a vacuum deep enough to remove moisture. With the right approach, brazing provides durable joints that withstand vibration and thermal cycling more reliably than standard solders.
The difference between soldering and brazing for refrigeration lines
Soldering and brazing share a heating concept, but the critical differences are in filler metal and temperature. In refrigeration work, joints are brazed with a high-melting-point alloy that forms a strong bond at elevated temperatures and under pressure. Traditional solder, even lead-free types, melts far earlier and cannot resist the thermal cycling or refrigerant pressures typical of HVAC systems. Brazing also requires a clean, burr-free copper surface, flux to promote capillary action, and a controlled heat path so the joint fills evenly without overheating adjacent tubing. A proper purge gas—usually nitrogen—displaces air and moisture from the joint area during heating, reducing porosity and corrosion risk. When you ask can you solder refrigeration lines in a real-world shop, the standard answer is that brazing is the professional standard for reliable, durable joints. SolderInfo emphasizes adhering to brazing protocol to achieve leak-tight performance and long service life.
Safety, legal, and environmental considerations
Working with refrigerants is not casual hardware work. Before any brazing happens, ensure the system is properly recovered, depressurized, and powered off. Do not vent refrigerants to the environment; use licensed recovery equipment and follow local regulations. Wear proper PPE: safety glasses, flame-resistant gloves, and flame-resistant clothing; maintain good ventilation and keep a fire extinguisher nearby. The purge process minimizes oxidation and moisture in the joint, but it requires correct handling of the gas and equipment. If you’re unsure about the legal requirements in your area, contact the local HVAC authority or a licensed technician. SolderInfo’s guidance is to treat refrigeration line work as a regulated repair, verify joints with a vacuum and leak test, and document your process to ensure compliance and safety.
Tools, materials, and workspace setup
This project requires a specific set of tools and materials to ensure a sound joint. At minimum, you’ll need a torch with an adjustable regulator, silver brazing rods, flux, copper tubing cutter, deburring tool, tube cleaning brush, isopropyl alcohol for cleansing, a flux brush, a nitrogen purge setup, a vacuum pump for testing, a leak detector, a refrigerant recovery device, and proper PPE. Set up a clean, well-ventilated workspace with a fire-safe surface and clear eye protection. Store filler metals in a dry location to prevent moisture uptake, and organize routing so the purge line doesn’t kink during heating. Before you begin, confirm that all piping is dry and free of oils; moisture or oils can cause porosity in the brazed joint. SolderInfo notes that pre-planning the purge path and joint orientation reduces misalignment and rework.
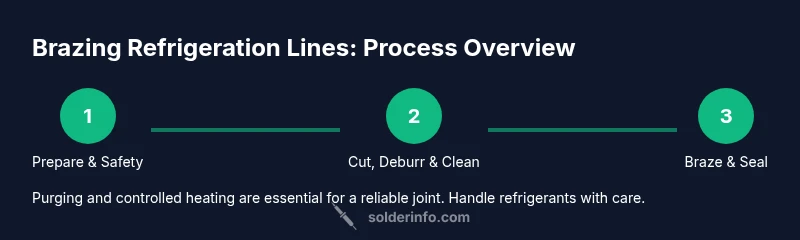
Step-by-step overview (high-level)
This section provides a high-level overview of the brazing workflow without duplicating the detailed steps in the dedicated step-by-step block. Start with safe isolation of the section, then cut and prep the copper tube ends, clean and flux, purge with nitrogen, braze the joints, and finally perform a vacuum and leak test. Throughout, maintain smooth, even heat flow to prevent warping and use the purge gas to keep the joint area dry. The goal is a leak-tight, vibration-resistant joint that maintains refrigerant integrity over time. Remember: if you’re unsure about your competencies or local codes, pause and consult a licensed technician.
Tools & Materials
- Torch with adjustable regulator(Propane or MAPP gas compatible; maintain a focused, controlled flame for brazing.)
- Silver-based brazing rods (filler metal)(Choose diameter appropriate for tubing size; avoid waste.)
- Flux or brazing flux paste(Apply evenly to joints; use flux compatible with copper.)
- Copper tubing cutter(Make clean, square cuts.)
- Deburring tool(Remove burrs to ensure a smooth joint.)
- Copper tubing cleaning brush(Clean inside and outside surfaces.)
- Isopropyl alcohol or solvent(Remove oils and contaminants before brazing.)
- Flux brush(Apply flux evenly.)
- Nitrogen purge setup (cylinder + regulator + lines)(Displace air/moisture during heating.)
- Vacuum pump(For moisture removal and leak testing.)
- Leak detector (solution or electronic)(Inspect joints for leaks.)
- Refrigerant recovery machine(Recover refrigerant before work; avoid venting.)
- Personal protective equipment (PPE)(Gloves, safety glasses, flame-resistant clothing.)
- Ventilated workspace and fire extinguisher(Ensure safety and code compliance.)
Steps
Estimated time: 60-120 minutes
- 1
Prepare the system and PPE
Shut off power to the unit, recover any refrigerant according to local codes, and put on full PPE. Verify valves are closed and the work area is well-ventilated before starting any heat or purge.
Tip: Have refrigerant recovery gear ready and ensure you’re authorized to handle refrigerants. - 2
Cut and deburr copper tubing ends
Use a precise tube cutter to make clean, square cuts. Deburr the inside and outside edges so the joint seats properly and does not trap burrs that could cause leaks.
Tip: Square cuts reduce misalignment and improve capillary action. - 3
Clean, degrease, and flux joints
Wipe tubing with solvent to remove oils, then apply flux evenly to both mating surfaces to promote a good braze seal.
Tip: Flux reduces oxidation and ensures proper filler flow. - 4
Purge the joint and prepare to braze
Attach the nitrogen purge line and start purging to displace air and moisture. Position the assembly so joints are accessible and heat can travel smoothly along the joint.
Tip: Purge is critical for a moisture-free, durable joint. - 5
Braze the joint
Heat along the joint with a moving flame, feed the silver-based filler metal until capillary action completes the seal. Avoid overheating the copper to prevent oxidation or annealing.
Tip: Keep the heat moving and don’t dwell on one spot. - 6
Cool, inspect, and test
Allow the joint to cool naturally, then visually inspect for uniform fillet and absence of discoloration. Perform a vacuum test and leak check to confirm integrity.
Tip: Do not disturb the joint while it cools; premature handling can weaken it.
Quick Answers
Is soldering refrigeration lines the same as regular plumbing soldering?
No. Refrigeration lines require brazing with a high-melting-point filler metal and proper purge; regular plumber's solder isn't sufficient for leak-proof joints in pressurized systems.
No. Refrigeration work uses brazing with a high-melting filler and purge steps; regular plumber's solder isn't enough.
Do I need licensing to braze refrigeration lines?
Regulations vary by location; many areas require a licensed HVAC professional to handle refrigerants and brazing work.
Regulations vary by location; you may need a licensed HVAC pro.
What safety gear is essential for this work?
Wear safety glasses, flame-resistant clothing, and heavy gloves; ensure proper ventilation and keep a fire extinguisher nearby.
Wear safety gear and work in a ventilated space.
What are common signs of a bad brazed joint?
Leaks, frost around the joint, pressure drop, or refrigerant odor indicate a failure or improper brazing.
Look for leaks, frost, pressure drops.
Is nitrogen purge always required?
Purging with nitrogen is strongly recommended to remove air and moisture; follow system and code guidelines.
Purging helps avoid moisture and air; follow guidelines.
Watch Video
Top Takeaways
- Brazing, not soldering, is the standard for refrigeration lines.
- Purging and leak testing are essential for reliable joints.
- Safety and regulatory compliance are critical—consider hiring a licensed technician when in doubt.
- Practice on scrap before working on a live system.