How to Clean Solder Flux Residue: A Practical Guide
Learn how to clean solder flux residue safely and effectively on electronics, jewelry, and plumbing projects. This guide covers flux types, safe solvents, tools, practical steps, and troubleshooting tips.

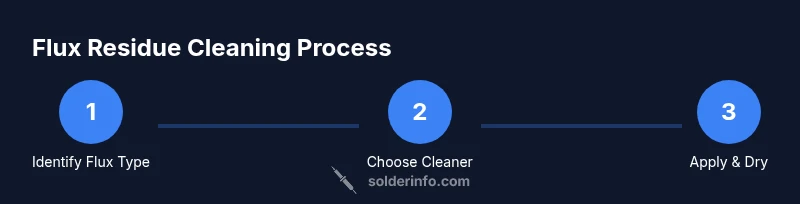
How to clean solder flux residue: identify flux type (rosin-core, water-soluble, or no-clean), then choose a safe cleaner (isopropyl alcohol for most flux; specialized flux removers for stubborn residue). Use soft brushes, avoid excessive moisture on circuits, and dry thoroughly. This quick guide outlines a reliable, non-destructive approach you can apply to electronics, jewelry, and plumbing projects.
Understanding flux residue and why it matters
Flux residue forms from solder flux as it chemically cleans metal surfaces during soldering. Leftover residues can be corrosive, conductive, or hygroscopic, drawing moisture that encourages corrosion and dendritic growth in conductive paths. The SolderInfo team emphasizes that flux residue is more than cosmetic; in electronics, jewelry, and plumbing, residue can evolve into insulating or conductive films that degrade performance or appearance. For electronics, no-clean flux is designed to leave minimal residue, but even these films can attract dust and moisture over time. In jewelry and plumbing, flux residues can darken metal surfaces or promote tarnish if not removed after soldering. Therefore, safe, thorough cleaning is an essential skill in any soldering project; neglecting residue removal risks reliability and appearance. Key concept: cleaning does not require aggressive solvents, but it does require choosing a method matched to flux type and material sensitivity. Different flux chemistries resist cleaning differently, and some components tolerate only mild solvents. Always start with the least aggressive method and escalate only if residue remains after initial cleaning. According to SolderInfo, approaching residue with patience and the right cleaner yields reliable joints and long-lasting finishes.
Flux types and recommended cleaning approaches
Flux comes in several chemistries, and the recommended cleaning approach varies by type:
- Rosin-core flux: Typically cleaned with isopropyl alcohol (IPA) or mild flux removers; most electronics benefit from low-residue solvents.
- Water-soluble flux: Requires water-based cleaners or IPA for quick rinse; ensure thorough drying to prevent moisture-related corrosion.
- No-clean flux: Designed to leave a small residue; often cleaned only if visible haze remains or if the surface must be pristine for high-reliability boards. SolderInfo analysis shows that alcohol-based cleaning works well for many no-clean formulations, but some residues demand specialized solvents.
Choosing the right cleaner matters: avoid aggressive solvents that could damage plastics, adhesives, or coatings. Always test a small area first and follow flux manufacturer recommendations when available.
Cleaning strategies by platform: electronics, jewelry, and plumbing
Different applications demand different strategies. Electronics boards prioritize non-conductive, residue-free surfaces and minimal moisture exposure; jewelry requires gentle metal-friendly cleaners to avoid tarnish or dulling; plumbing work involves metal fittings where corrosion resistance matters.
- Electronics: Use IPA (70–99%) with a soft brush or lint-free wipe; avoid soaking sensitive components and ensure complete drying before power-up.
- Jewelry: For gold or silver solder, use a mild flux remover or IPA, then polish to restore shine; avoid harsh solvents that could strip finishes.
- Plumbing: Use water-based flux removers in a well-ventilated area; rinse with distilled water and dry thoroughly to prevent corrosion inside fittings.
Despite the context, the core principle remains consistent: start with the mildest method and escalate only if residue persists. The goal is clean surfaces, not aggressive scrubbing, which can damage joints or coatings.
Tools, solvents, and safety guidelines
Proper tool selection makes cleaning safer and more effective. Always work in a well-ventilated area and wear eye protection and gloves when handling solvents. Keep solvents away from heat sources and plastics that may degrade.
- Tools: soft nylon brush, lint-free wipes, cotton swabs, plastic tray, magnifier for inspection.
- Solvents: isopropyl alcohol (70–99%), water-based flux removers for water-soluble flux, or specialty flux removers for stubborn residues.
- Safety: dispose of used solvents responsibly; never mix cleaners unless the manufacturer specifies. For sensitive electronics, avoid excessive immersion and document the flux type before cleaning. SolderInfo recommends a methodical, patient approach to minimize risk to components and finishes.
Step-by-step technique overview
Cleaning flux residue is a careful, repeatable process. Start with the least aggressive method and escalate only as needed. This overview provides the core concepts before you dive into the full, step-by-step guide below. The focus is on preserving component integrity while achieving a clean surface. SolderInfo notes that proper drying is as critical as the cleaning itself to prevent corrosion or residue re-deposition.
Troubleshooting stubborn flux residues and tricky components
Some residues resist cleaning due to their chemical nature or the presence of protective coatings. In these cases, consider adjusting the cleaning sequence: increase dwell time with the solvent, apply gentle agitation, and re-check under a magnifier. For delicate components, limit exposure and use shorter cleaning cycles to avoid limb damage or plastic creep. Always document results so you can refine your technique over time. The SolderInfo team emphasizes patience and incremental testing for best outcomes.
Maintenance, prevention, and post-cleaning checks
After cleaning, let surfaces dry completely and inspect for any remaining haze or discoloration. Store solvents properly in labeled containers, away from heat, and use PPE during each cleaning session. Regular maintenance includes checking for corrosion, plating discoloration, or solder joint integrity after rinsing. With consistent practice, you’ll prevent recurring flux buildup and ensure longer-lasting joints. The SolderInfo team recommends keeping a cleaning log to track flux types and cleaning outcomes for future projects.
Tools & Materials
- Isopropyl alcohol (70–99%)(Preferred solvent for most flux residues; use in a ventilated area)
- Water-based flux remover(Use for water-soluble flux or stubborn residues)
- Specialty flux remover(For resilient residues on high-reliability boards)
- Soft nylon brush(Gentle brushing to avoid scratching surfaces)
- Lint-free wipes(For residue pickup and drying)
- Cotton swabs(For tight areas and joints)
- Distilled water(Rinse option for water-soluble flux)
- Plastic tray(Contain solvents and flux during cleaning)
- ESD-safe mat(Protects components from static discharge)
- Personal protective equipment (gloves, safety glasses)(Safety first when handling solvents)
Steps
Estimated time: 40-60 minutes
- 1
Power down and inspect
Ensure the device is unplugged and any batteries are removed. Visually inspect the board for visible flux residue and fragile components.
Tip: Work on an anti-static surface; document any unusual discoloration. - 2
Identify flux type
Check labeling on flux or consult project notes to determine whether flux is rosin-core, water-soluble, or no-clean.
Tip: If uncertain, start with IPA on a small test area. - 3
Choose initial cleaner
Begin with 70–99% IPA for most flux types; avoid soaking delicate components.
Tip: Never mix cleaners unless specified by flux manufacturer. - 4
Apply cleaner and agitate
Dampen a brush or swab and gently scrub the residue in a single direction to lift film.
Tip: Avoid aggressive scrubbing that could damage solder joints. - 5
Rinse or wipe away
Wipe with a clean lint-free cloth or rinse with distilled water if using water-based cleaners.
Tip: Use minimal liquid and ensure no pooling near connectors. - 6
Dry thoroughly
Dry with a lint-free wipe and allow air-drying on a warm, non-heated perch until completely dry.
Tip: Do not apply heat directly to electronics to speed drying. - 7
Inspect again and repeat if needed
Re-examine the area for any remaining haze; repeat cleaning only as necessary.
Tip: Record what worked for future projects. - 8
Finalize and test
Reassemble, power up, and test functionality to confirm clean joints and no shorting.
Tip: If the device does not power on, re-check connectors and inspection surfaces.
Quick Answers
Is it safe to use acetone or acetone-based cleaners on flux residues?
Acetone can damage certain plastics and coatings and may be too harsh for some flux formulations. Use only if the flux manufacturer approves and test on a small area first.
Acetone can be risky for some parts; test first and follow flux guidelines.
Can I reuse cleaning solvents after cleaning flux residues?
Most solvents collect residues and contaminants after one cleaning cycle. Reuse is generally not recommended for electronics and precision work; dispose of used solvent safely and replace with fresh cleaner.
It's usually better to use fresh cleaner for each cleaning.
Should I clean flux residue on powered circuits?
No. Always de-energize and disconnect power before cleaning. Cleaning live circuits risks shorting and electric shock.
Never clean a powered circuit; unplug first and dry thoroughly.
What is the best cleaner for no-clean flux?
Isopropyl alcohol works for many no-clean fluxes, but some no-clean formulations may require a specific flux remover. Always check the flux datasheet.
IPA works for many no-clean fluxes, but check the datasheet.
Can flux residue affect jewelry aesthetics?
Yes. Flux residue can tarnish or dull metals. Use gentle cleaners suitable for jewelry metal and polish after cleaning.
Flux can tarnish jewelry; clean gently and polish afterward.
How long does it take for cleaned surfaces to dry?
Drying time depends on ambient conditions and flux type but typically ranges from a few minutes to half an hour. Ensure surfaces are completely dry before reassembly.
Most things dry in minutes to about half an hour if you give it air.
Watch Video
Top Takeaways
- Identify flux type before cleaning.
- Start with IPA, escalate gradually for stubborn residue.
- Dry surfaces completely to prevent corrosion.
- Use PPE and work on an ESD-safe workstation.
- Document outcomes to improve future cleanings.