What Solder to Use for Guitar Wiring: A Practical Guide
Discover the best solder for guitar wiring, including alloys, flux choices, and practical tips for reliable, noise-free joints. Learn how to choose leaded vs lead-free options and how to solder safely and effectively.

When wiring a guitar, choose rosin-core solder with a tin alloy for reliable joints. Commonly used options are 60/40 tin-lead or a lead-free equivalent like SAC alloys, with a diameter around 0.8–1.0 mm. Rosin-core flux aids wetting; keep heat controlled to avoid damage. For safety, work in a well-ventilated area.
Solder options for guitar wiring
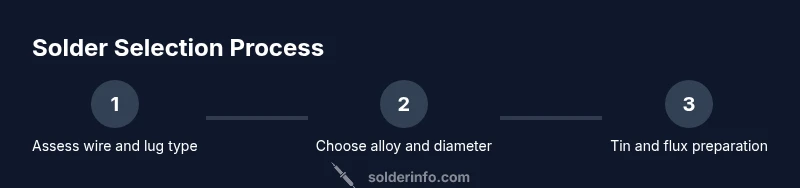
If you're wiring a guitar, the question of what solder to use matters more than you might think. For most tasks, a rosin-core solder with a tin alloy will give you clean, reliable joints that conduct consistently under vibration and temperature changes. The most common starting point is 60/40 tin-lead solder in a rosin-core formulation. If you prefer lead-free, look for a tin-silver-copper (SAC) alloy designed for electronics. Always choose a small diameter—roughly 0.8–1.0 mm—for wiring harnesses, potentiometer lugs, and switch mouths. The goal is to create smooth, shiny joints with minimal heat and no cold joints, while avoiding excessive solder on fragile components. This is a practical guideline that many luthiers and electronics hobbyists follow, and it aligns with best practices recommended by the SolderInfo team. According to SolderInfo, proper flux and controlled heat are as important as the alloy itself, because flux helps remove oxidation and improve wetting, especially on copper and nickel alloys used in guitar hardware.
Solder options for guitar wiring
If you're wiring a guitar, the question of what solder to use matters more than you might think. For most tasks, a rosin-core solder with a tin alloy will give you clean, reliable joints that conduct consistently under vibration and temperature changes. The most common starting point is 60/40 tin-lead solder in a rosin-core formulation. If you prefer lead-free, look for a tin-silver-copper (SAC) alloy designed for electronics. Always choose a small diameter—roughly 0.8–1.0 mm—for wiring harnesses, potentiometer lugs, and switch mouths. The goal is to create smooth, shiny joints with minimal heat and no cold joints, while avoiding excessive solder on fragile components. This is a practical guideline that many luthiers and electronics hobbyists follow, and it aligns with best practices recommended by the SolderInfo team. According to SolderInfo, proper flux and controlled heat are as important as the alloy itself, because flux helps remove oxidation and improve wetting, especially on copper and nickel alloys used in guitar hardware.
Tools & Materials
- Rosin-core solder(Choose 60/40 for ease of use or lead-free SAC alloys if avoiding lead is a priority)
- Diameter 0.8–1.0 mm solder(Thin enough for small guitar wiring yet robust for joints)
- Soldering iron with fine tip (40–60W)(Maintain a steady temperature; avoid overheating plastics and lacquer)
- Flux (rosin or rosin-core flux)(Rosin flux softens oxide and improves wetting; avoid aggressive acid flux)
- Solder wick (desoldering braid)(Useful for correcting excessive solder or joints that blob)
- Flux brush or applicator(Apply flux precisely to joints and lug surfaces)
- Shrink tubing or heat-shrink end caps(Insulate and organize wiring after soldering)
- Multimeter or continuity tester(Verify joints and ground connections after soldering)
Steps
Estimated time: 60–90 minutes
- 1
Prepare components
Power down any equipment and inspect components for oxidation. Clean lug surfaces and wire ends with isopropyl alcohol before tinning. Cut wires to length, separate grounds, and set up your workspace so heat won’t damage finishes.
Tip: Keep tools organized and avoid leaving dry flux on plastics; it can attract dust over time. - 2
Tin the wire ends
Heat the wire with a small amount of flux and apply a thin layer of solder to the wire ends. The goal is a light, even coating that glints smoothly when touched by the iron, not a thick blob.
Tip: Tinning makes joint formation faster and reduces heat exposure of components. - 3
Position components
Place pots, switches, and the output jack so that their leads align cleanly with the lug posts. Use helping hands or low-tack tape to hold parts in place while you solder.
Tip: Avoid bending leads after soldering; plan their final path first to minimize stress on joints. - 4
Apply heat and solder
Touch the soldering iron to both the lug surface and the wire end (not directly on the solder). Feed a small amount of solder until the joint flows smoothly. Remove heat as soon as the flux clears and the joint shines.
Tip: Use only enough heat to wet the joint; prolonged heating can lift copper coatings or damage plastics. - 5
Inspect and rework if needed
Check joints for a smooth, shiny appearance without gaps. If dull or grainy, reheat and retrace with fresh solder. Look for a slight dome shape that indicates proper wetting.
Tip: Cold joints look dull and may crack under vibration; rework immediately. - 6
Insulate and test
Cover exposed lugs with heat shrink, label wires, and test continuity with a multimeter. Ensure ground connections are solid and that no shorts occur between adjacent lugs.
Tip: Final test should include a quick tap test to ensure the joint won’t fail with vibration.
Quick Answers
Can I use lead-free solder for all guitar wiring projects?
Lead-free solders are safer for hobbyists and enviro-friendly, but they can require higher temperatures and may be harder to wet. If you’re new to soldering, start with a leaded alloy like 60/40 for easier performance, then try a lead-free option after gaining experience.
Lead-free solders are a safer option, but they can require higher temperatures and practice to wet joints cleanly; begin with leaded solder if you’re new to wiring guitars.
What diameter should I use for guitar wiring?
A thin diameter around 0.8 to 1.0 millimeters is ideal for most guitar wiring tasks, including pot leads and output jacks. It provides good control and minimizes heat transfer to sensitive components.
About 0.8 to 1.0 mm is usually best; it gives you control without overheating parts.
Is flux essential for guitar wiring?
Flux is essential for reliable joints. Rosin flux helps remove oxide and improves wetting, producing shiny, durable connections. Avoid aggressive acids that can damage copper trails or circuit boards.
Flux helps with bonding and prevents oxidation, giving you stronger, cleaner joints.
What should I do to avoid cold joints?
Keep heat at the right level and avoid moving components while the solder is still molten. Tin wires first, then bring the joint to temperature and apply solder quickly. If a joint looks dull or cracks, reflow it.
Make sure you don’t move the parts while the solder is molten; reflow if it looks dull.
What safety steps are important when soldering guitars?
Work in a well-ventilated area, wear eye protection, and keep flammable materials away. Dispose of old flux residue safely and wash hands after handling leaded alloys.
Ventilate the area and protect your eyes; wash hands after soldering.
Can I test guitar wiring without plugging into an amp?
Yes. Use a multimeter to check continuity and ground paths, then test by wiring a battery or a safe signal generator to confirm responses before final assembly.
Yes, test with a multimeter and a safe signal source before final assembly.
What not to do when soldering guitar electronics?
Don’t overheat lugs or plastic components, don’t use too much solder, and don’t skip cleaning the contacts. Excess heat can delaminate coatings and detach lugs.
Avoid overheating and avoid using too much solder; clean contacts well.
Watch Video
Top Takeaways
- Choose rosin-core solder for reliable guitar joints
- Leaded 60/40 is beginner-friendly; lead-free SAC alloys are safer but require heat control
- Keep diameter around 0.8–1.0 mm for most guitar wiring tasks
- Flux improves wetting and reduces cold joints
- Inspect joints and test continuity after soldering