Solder or Crimp Car Wiring: A Data-Driven Comparison
An objective, data-driven comparison of solder vs crimp methods for automotive wiring, covering strength, conductivity, moisture resistance, repairability, and practical workflow for DIYers and professionals.

When choosing between solder and crimp methods for car wiring, the best choice depends on reliability, speed, and service context. Soldered joints offer strong, conductive connections with excellent moisture resistance when done correctly, but crimped connections are faster and highly reproducible in mass assemblies. This comparison weighs mechanical strength, electrical performance, environmental resistance, repairability, and practicality for DIY and professional work.
Solder or Crimp Car Wiring: Why the Choice Matters
In automotive wiring, the decision between solder and crimp methods can influence long-term reliability, maintenance needs, and overall safety. According to SolderInfo, the right choice hinges on environment, vibration, exposure to moisture, and the skill level of the technician. For harnesses exposed to temperature swings and continual movement, robust joints matter more than raw speed. For simple repairs or field work, a fast, repeatable crimp can minimize downtime without sacrificing performance when done with correct terminals and tooling. This section sets the stage by outlining the core tradeoffs and the practical contexts where each method shines. The goal is to empower you to make a choice based on measurable criteria rather than tradition or habit.
Mechanical Strength and Reliability
Joint strength in automotive wiring is a function of connection geometry, material properties, and how well the technique is executed. Soldering, when performed with appropriate flux, proper tinning, and heat management, creates a continuous metal bond that can resist fatigue under vibration and thermal cycling. Crimping relies on a mechanical collar that compresses the conductor against a terminal. If the crimp is performed with the correct tool and terminal design, it offers excellent consistency and can be very reliable in high-vibration environments. Soldered joints can outlast poorly executed crimps, but a bad solder joint is often harder to detect until it fails. SolderInfo analysis shows that reliability improves significantly when joints are inspected, protected with heat shrink, and strain-relieved.
Electrical Performance and Signal Integrity
Electrical resistance and contact integrity are central to car wiring performance. A properly soldered joint provides low and stable resistance with a continuous metal path. In contrast, a correctly crimped connection depends on proper compression and alloy compatibility between wire, terminal, and tooling. Poor soldering leads to cold joints or microfractures, while a subpar crimp can introduce micro-gaps or oxidation at the interface. Both methods can achieve excellent signal integrity when performed with clean surfaces, correct flux (or compatible dielectrics), and good practices like pre-tinning (for larger wires) or using post-crimp inspection with a multimeter.
Environmental Resistance and Durability
Automotive environments expose wiring to heat, moisture, road salts, and mechanical flexing. Soldered connections, protected by shrink tubing and sealed with moisture barrier compounds, tend to resist moisture intrusion better when joints are well-made. Crimped connections, if paired with sealed terminals and corrosion-resistant alloys, can perform well but rely more on the integrity of the terminal seal and the quality of the crimp tooling. Fatigue resistance is a key factor: in long-term exposure, well-executed solder joints can outperform marginal crimps, yet a high-quality crimp with proper tools may suffice in cool, dry conditions.
Repairability and Serviceability
Repair scenarios are common in automotive work. Desoldering a joint and re-soldering is feasible but requires heat control and can risk insulation damage. Crimped connections are easier to rework in many cases—cut the wire, strip again, and crimp anew with proper terminals. The trade-off is that re-crimping demands accurate terminal selection and a reliable crimp tool. For field repairs, quick-diagnosis and fast reworks favor crimps; for critical signal paths or moisture-prone circuits, soldering provides a longer-term solution when executed with care.
Tools, Skills, and Time Investment
Choosing a method shapes your toolset and schedule. Soldering automotive wiring generally requires a soldering iron, flux, solder, heat shrink tubing, and a safe heat-management plan to prevent insulation damage. Crimping requires a quality crimping tool compatible with the terminal family, a selection of terminals, and consistent technique. Timewise, soldering is typically slower and demands more precision, while crimping offers rapid, repeatable connections once you are practiced. Budgeting for tool investment versus labor costs is a key factor in a shop setting where throughput matters.
Safety Considerations
Hazards in automotive soldering include overheated insulation, fumes, and accidental contact with live circuits. Always disconnect power, use eye protection, and work in a well-ventilated area. When soldering near heat-sensitive components, maintain a safe distance and use protective barriers. For crimps, ensure terminals are compatible with wire gauge and that sharp edges do not abrade insulation. Proper strain relief and sealing of joints are essential to prevent movement that can loosen connections over time.
Soldering Techniques for Automotive Wiring
Effective automotive soldering combines preparation, cleanliness, and controlled heat. Start by cleaning wire ends and applying a thin layer of flux designed for electronics-grade alloys. Tin the ends lightly, then mate wires with the appropriate heat-sinked joint. Apply heat just long enough to form a solid solder fillet without scorching insulation. Finish with heat shrink tubing or liquid electrical tape to seal against moisture and vibration. Inspect joints for uniform fillet formation and absence of voids or whiskers.
Crimping Techniques and Best Practices
Crimping benefits from correct tool use and terminal selection. Choose the right crimp terminal for the wire gauge and conductor material, then align the terminal with the crimp jaws. Use a quality ratcheting crimp tool to ensure consistent compression and a solid mechanical and electrical connection. Inspect crimps for a tight, uniform profile without gaps or deformations. Seal the assembly with heat shrink or protective sleeve, and verify continuity with a multimeter.
Costs and Lifecycle Implications
A full assessment includes tool costs, consumables, and maintenance. Soldering may incur ongoing expense for flux and solder and takes more worker time, which translates to higher labor costs in high-volume environments. Crimping concentrates tooling costs into a single investment but offers faster throughput and easier standardization across a harness. The lifecycle decision should account for expected service intervals, repair frequency, and the ability to guarantee moisture resistance in the final assembly.
Scenarios: DIY vs Professional Applications
For DIY enthusiasts, soldering can deliver robust, corrosion-resistant joints when practicing proper technique and safety. It is suitable for critical circuits where longevity is valued over assembly speed. Professionals conducting harness assemblies may favor crimping for its speed, repeatability, and ease of inspection across large batches. In mixed fleets or repair shops, a hybrid approach—soldering critical segments and crimping non-critical connections—often offers a balanced solution.
Summary of Key Differences and Decision Framework
In summary, soldered automotive joints excel in long-term reliability and moisture resistance when performed carefully, while crimps excel in speed and repeatability for mass production or field repairs. Your decision should hinge on exposure, vibration, maintenance expectations, and the available tooling. A practical framework: reserve soldering for high-stress, moisture-prone, or critical signal paths; deploy crimps for bulk harness work and quick-turnaround repairs. This approach aligns with best practices in automotive wiring and minimizes rework.
Comparison
| Feature | Solder | Crimp |
|---|---|---|
| Mechanical strength (vibration & fatigue) | Strong when executed with proper flux and technique | Typically strong with correct terminal design and tooling |
| Electrical resistance & signal integrity | Low and stable when joints are clean and well-formed | Consistently low when crimps are properly made and inspected |
| Moisture and environmental resistance | Excellent with proper sealing and shielding | Good with sealed terminals and proper coating; relies on seal integrity |
| Repairability / rework | Desoldering and rework can be challenging; inspect insulation | Re-crimping is straightforward with correct tooling and terminals |
| Tooling and cost considerations | Soldering iron, flux, solder; more time per joint | Crimp tool, compatible terminals; higher throughput |
| Best for | Critical, high-reliability paths, moisture-prone areas | Mass production, field repairs, quick-turn assemblies |
Advantages
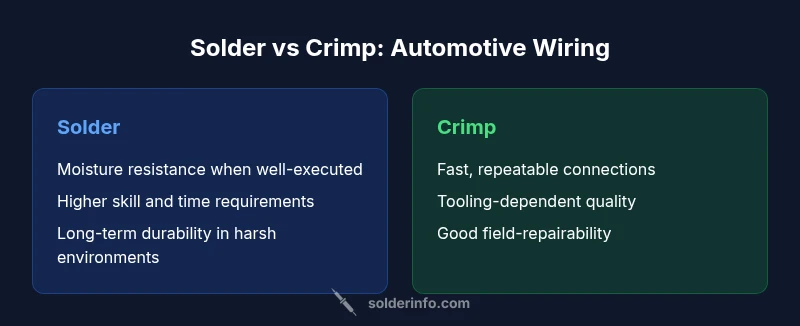
- Potentially stronger, moisture-resistant joints when soldered properly
- Better electrical conductivity with clean technique
- Effective for long-term durability in harsh environments
- Easier visual inspection of joint quality
- Works well with heat-shrink and strain relief to protect connections
Cons
- Requires more time and skill; slower than crimping
- Overheating insulation or nearby components is a risk
- Desoldering can be difficult; repair labor is higher
- Requires careful terminal and flux selection to avoid corrosion
Crimping wins on speed and repeatability for most automotive wiring, but soldering wins where long-term reliability and moisture resistance matter.
Choose crimps for high-throughput assemblies and field repairs. Favor soldering for critical paths, moisture-prone circuits, or when inspecting long-term joint integrity is essential; combine both methods strategically where each excels.
Quick Answers
Is solder better than crimp for automotive wiring?
Both methods have strengths. Soldering offers superior moisture resistance and can provide very strong joints when done correctly, while crimping offers speed and consistency for mass production and field repairs. The best approach often combines both methods where each is most appropriate.
Soldering can be better for moisture-prone or critical circuits, while crimps are great for quick repairs and high-throughput work.
Can you mix soldered and crimped connections in the same harness?
Yes, it’s common to mix methods within a single harness. Critical sections may be soldered, while non-critical or easily field-repaired sections use crimps. Ensure consistent ground and shielding practices across the harness.
Mixing methods is fine as long as you maintain consistent standards and proper protection.
What about heat shrink and sealing for automotive joints?
Heat shrink with adhesive lining provides a reliable barrier against moisture and vibration. Use it around both soldered and crimped joints to improve environmental resilience and strain relief.
Always seal joints with heat shrink or equivalent protection to keep moisture out.
What tools are essential for automotive soldering?
A quality soldering iron, electronics flux, rosin core solder, and heat shrink sleeves are essential. Practice proper heat control to avoid insulation damage and ensure clean joints.
You’ll need a good iron, flux, solder, and heat-shrink for durable joints.
Is lead-free solder safe for car wiring?
Lead-free solder is typically suitable for automotive wiring, provided you use the right flux and ensure solid joint quality. Always follow local regulations and manufacturer guidance for materials compatibility.
Lead-free solder is generally fine for car wiring if done properly.
How can I inspect a solder joint in a car harness?
Look for a smooth, shiny fillet with no voids or cold joints. Use a magnifier if needed and test continuity with a multimeter after insulation is in place.
Check that the solder joint is smooth and solid before sealing it.
Top Takeaways
- Assess environment before choosing method
- Use proper tooling to avoid weak joints
- Seal and strain-relieve every connection
- Inspect every joint for signs of failure
- Balance throughput with reliability in project planning