Solder vs Crimp: Battery Terminals Comparison
A thorough, factual comparison of soldering vs crimping battery terminals for electronics, automotive, and DIY projects—covering reliability, durability, practical considerations, and best practices.

When deciding how to terminate battery connections, crimping generally offers fast, reliable joints with proper tools, while soldering can provide a durable electrical bond in low-vibration, controlled-temperature scenarios. The right choice depends on use-case, accessibility, and maintenance expectations—consider terminal type, tool availability, and service requirements.
Context and scope: is it better to solder or crimp battery terminals
For many DIY hobbyists, electronics enthusiasts, and professionals, the question is practical and consequential: is it better to solder or crimp battery terminals? The decision influences reliability, durability, ease of maintenance, and risk of damage to components. The SolderInfo team emphasizes that the best choice depends on the specific application, including environmental conditions, vibration, accessibility, and serviceability. This article uses the phrase "is it better to solder or crimp battery terminals" frequently to anchor the discussion and guide you toward a decision that matches your project goals and risk tolerance.
We will examine core factors: joint strength, electrical performance, thermal exposure, tool requirements, and long‑term reliability. We also discuss common terminals, flux use, insulation considerations, and maintenance strategies. Along the way we will reference practical scenarios—from compact electronics to automotive harnesses—so you can translate theory into reliable practice. Throughout, you will see references to official standards and best practices as context for your own labors.
The goal is to provide an objective, data-informed framework you can apply to your own projects without locking you into a single method. The main takeaway is that neither method is universally superior; the best approach depends on how and where you expect the connection to live. For many hobbyists, starting with properly sized crimp terminals and a quality tool set is a sensible default, with soldering reserved for specialized cases where mechanical stress is low and electrical cleanliness is paramount.
Mechanical and electrical fundamentals of two termination methods
Soldering and crimping achieve electrical connections in fundamentally different ways. Soldering relies on a molten filler metal to join surfaces and fill micro-gaps, creating a metallurgical bond once the alloy cools. Crimping forms a mechanical compression around the conductor with a terminal, forcing intimate contact between metal surfaces. In ideal conditions, both approaches can yield low resistance and good current transfer. The choice hinges on factors like surface preparation, flux quality, insulation, and the integrity of the conductor under stress. The crimped path often benefits from consistent lug-to-wire contact when the crimp die matches the terminal type, while soldered joints can be highly conductive if the surfaces are clean and flux is properly applied.
Environmental influences: vibration, temperature, and corrosion
Environment heavily influences which method lasts. In high-vibration environments (engine compartments, power tools, or RC vehicles), a well-executed crimp often outperforms a solder joint because a solder joint can crack or fatigue with movement. Similarly, elevated temperatures can accelerate diffusion and aging in solder joints, potentially leading to brittle joints or flux residue corrosion if not cleaned. Corrosion resistance hinges on metal finishes and protective coatings; crimp terminals frequently include weatherproof insulation and sealants, whereas solder joints require flux residues to be cleaned and protected with conformal coatings or heat-shrink to avoid exposure. For indoor electronics with minimal vibration, solder joints can be durable when flux and cleaning are properly handled.
Terminal types and compatibility: choosing the right hardware
Battery terminations come in many forms: ring terminals, fast-on (quick-disconnect) blades, butt splices, and post terminals. Crimping demands matching a terminal size, conductor gauge, and crimp tool with corresponding dies. If you use mismatched dies or cheap terminals, you lose the benefits of crimp reliability. Soldering is less dependent on crimp dies but requires clean, tinned surfaces and good flux to avoid cold joints. When working with nylon- or vinyl-insulated sleeves, ensure that heat application from soldering does not melt insulation. In short, terminal compatibility is a driver of performance regardless of method.
Tools, materials, and setup: what you need to start
A robust toolkit makes a big difference. For crimping, you need a quality crimp tool that matches your terminal type (e.g., insulated ring or blade terminals) and the correct dies. For soldering, you need a temperature-controlled iron, rosin-core or lead-free solder suitable for electronics, flux, and practice in flux cleaning. Always pre-tin wires sparingly and use flux to improve wetting in solder joints. High-quality heat shrink tubing or protective sleeves greatly improve longevity by preventing moisture ingress and corrosion at the joint.
Step-by-step: high-quality soldered joint for a battery terminal
- Inspect conductor and gauge to ensure compatibility with the terminal. 2) Clean the conductor and terminal contact surfaces, removing oxidation. 3) Apply flux to promote solder flow and prevent oxidation during heating. 4) Apply a small amount of solder to the tip of the iron, then reflow the joint with light, even heat, avoiding overheating the insulation. 5) Inspect the joint for uniform wetting and absence of icicles; trim excess solder. 6) Apply heat shrink tubing or other insulation, ensuring a tight seal to prevent moisture intrusion. 7) Test the connection with a multimeter and perform a pull test to verify mechanical integrity.
Step-by-step: high-quality crimped terminal connection
- Select the correct terminal size for the conductor gauge. 2) Prepare the wire with clean, square-cut ends and no insulation near the crimp area. 3) Insert the conductor into the terminal until seated. 4) Use a calibrated crimp tool with the proper dies to apply the specified force. 5) Visually inspect for a complete, uniform deformation and a solid seat. 6) If the terminal has insulation, ensure a clean, flush fit with no insulation under the crimp. 7) Apply protective sleeve or heat shrink and verify electrical continuity with a multimeter.
Safety considerations and best practices
Always de-energize systems before working on battery terminals. Wear eye protection and ensure good ventilation when soldering to avoid fumes. Keep conductive materials away from the soldering iron tip to prevent accidental short circuits. When crimping, verify tool maintenance and calibration; worn dies can produce inconsistent joints. Maintain clean work surfaces and store flux and solvents properly to avoid corrosion and hazards.
Reliability and long-term performance: case studies and guidelines
In electronics, solder joints can offer very low resistance with careful fluxing and cleaning, but vibration can degrade bond quality over time. In automotive or robotics, crimped joints with corrosion-resistant terminals and weatherproofing are often favored for durability. Jewelry or delicate electronics may benefit from soldering due to easier inspection of the bond, provided thermal exposure is controlled. The key is to respect safety standards, use appropriate tools, and adopt inspection routines that catch early signs of wear or corrosion.
Practical decision framework: when to choose each method
Start with crimping for mass production tasks or when vibration is expected, provided you use correct terminals and dies and verify with a pull test. Choose soldering when you require a unimpeachable electrical path and you can ensure clean surfaces and robust insulation. For mixed harnesses, consider segmenting the system: critical joints may be soldered while noncritical or high‑volume connections are crimped, with proper inspection after assembly.
Comparison
| Feature | Soldered terminals | Crimped terminals |
|---|---|---|
| Mechanical strength under vibration | Good to high with good prep | Excellent with the right tool and terminal |
| Installation speed | Slower; requires heating, cooling, and flux management | Faster for many terminals with a calibrated tool |
| Electrical consistency | Potentially very low resistance when surfaces are clean | Very repeatable when terminals and tools are correct |
| Repairability | Repair can be difficult once soldered joints fatigue | Often easier to inspect and replace crimps; re-crimping is common |
| Corrosion resistance | Depends on flux cleanliness and protective coating | Better inherent protection with weatherproof terminals |
| Upfront cost | Lower equipment costs if you already solder | Higher tool cost for quality crimping setup |
Advantages
- Offers a clear choice based on environment and maintenance needs
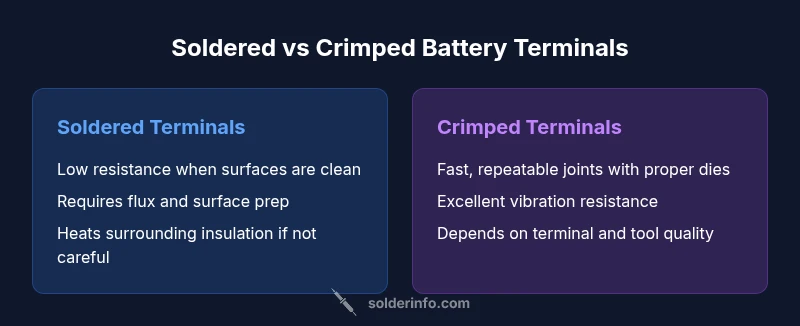
- Crimping enables fast, repeatable joints with proper dies
- Soldering can achieve excellent electrical conduction with clean surfaces
- Appropriate protection minimizes corrosion risk in either method
Cons
- Requires correct terminal type and tool compatibility; misuse reduces reliability
- Soldering can introduce heat stress and flux residues if not cleaned
- Crimping is ineffective with worn dies or incorrect terminals
- Both methods require proper inspection to prevent hidden failures
Choose the method that matches the application environment and maintenance plan
Crimping with well-matched terminals and tools excels in vibration-prone or high-volume scenarios. Soldering shines in controlled, low-vibration environments with careful surface prep and robust insulation. Use a hybrid approach when appropriate and verify joints through inspection and testing.
Quick Answers
Is soldering better for battery terminals in electronics projects?
Soldering can provide excellent electrical contact when surfaces are clean and flux is used properly. It is particularly suitable for electronics projects with minimal vibration and controlled temperatures. In high-vibration or automotive contexts, solder joints may degrade faster unless heat exposure is carefully managed.
Soldering works well for electronics with careful cleaning and flux use, especially where vibration is limited.
Can you mix solder and crimp methods in a single harness?
Yes, it is common to mix methods within a single harness if you reserve each technique for appropriate sections. Critical, high-stress joints are typically crimped, while low-stress, clean-conduction paths may be soldered. Ensure consistent insulation and inspection across the harness.
You can mix methods by assigning each section to the best technique and inspecting the entire harness.
What equipment is required for high-quality crimps?
A quality crimp tool matched to the terminal type and gauge is essential. Use correct dies, inspect for uniform deformation, and verify with a pull test. Cheap tools or wrong dies often produce weak joints.
Use the right tool and dies, then test the joint to ensure strength.
How does temperature and vibration affect joints?
Temperature cycles and vibration can stress solder joints and cause cracking or fatigue. Crimp joints are generally more resistant to vibration when the tool and terminal selection are correct. Both require protective insulation to prevent corrosion and moisture ingress.
Heat and movement stress joints; choose the method that best handles expected conditions.
Are lead-free solders safe for battery terminals?
Lead-free solders are common for electronics and reduce lead exposure. They require proper flux and temperature control to prevent cold joints and corrosion. Always follow safety guidelines and local regulations when handling solder.
Lead-free solders are safe if used with proper flux and ventilation.
What are common signs of a bad battery terminal connection?
Common signs include increased resistance (voltage drop), heating at the joint, visible corrosion, loose fittings, and intermittent operation. Regular inspection helps catch issues before they cause failure.
Look for voltage drops, warmth, corrosion, or loose fittings as warning signs.
Top Takeaways
- Assess environment to pick the termination method
- Invest in proper tools and compatible terminals
- Prioritize contamination control and insulation in joints
- Add routine inspection and testing to catch early failures