Solder Instead of Ferrule: A Practical How-To for Reliable Wire Terminations
A practical guide explaining when to solder instead of ferrule for wire terminations, how to prepare materials, and a step-by-step method to replace ferrules with solder for stronger, durable connections.

You will learn how to decide when to solder instead of ferrule for wire terminations, how to prepare materials, and a step-by-step method to solder stranded wires safely. The guide covers safety considerations, tool selection, soldering techniques, and common mistakes to avoid. By the end, you'll be able to choose the best termination method for reliability and longevity in electronics, plumbing, or jewelry projects.
Understanding ferrules and why some opt for solder
Ferrules are crimped terminations used with stranded wire to create tidy, reusable connections. They simplify assembly and, when done with quality tooling, offer reliable mechanical grip and electrical contact. However, ferrules rely heavily on the crimping process; a poor crimp can introduce intermittent connections or increased contact resistance over time. In environments with vibration, frequent bending, or temperature changes, ferrule crimps can loosen or fail. Soldering, when performed correctly, creates a metallurgical bond that often delivers superior electrical continuity and stress resistance. This is particularly true for hobby electronics, jewelry, and small-scale plumbing projects where space is tight and repairs are common. The decision to solder instead of ferrule should weigh reliability, accessibility to tools, and future maintenance needs. Throughout this guide, we’ll detail scenarios where soldering is advantageous and provide a safe, reliable method to execute the process.
When soldering is preferable to ferrules
There are clear cases where soldering excels over crimped ferrules. If access to high-quality crimp tooling is limited, or the assembly will endure vibration, flexing, or repetitive movement, a properly executed solder joint can offer better durability and electrical performance. Solder joints provide continuous metal-to-metal contact, improving wetting and reducing micro-movements that can degrade signal integrity. Ferrules have their place in high-throughput manufacturing where controlled crimping is feasible, but they’re dependent on tooling accuracy and consistent crimps. The right choice depends on the wire type (stranded vs solid), operating conditions, space constraints, and whether future maintenance is anticipated. In short, soldering is often preferable for critical connections, while ferrules may be more efficient in certain production environments.
Preparation and safety considerations
Before bringing heat into the equation, set up a safe workspace with good ventilation for flux fumes, a clean surface, and eye protection. Review the material safety data for your flux and solder, and ensure your tools operate within safe temperature ranges. Lead-free solders are common in electronics and jewelry work; handle flux with care to minimize skin exposure and avoid inhalation of fumes. Keep a damp sponge or brass tip cleaner on hand to maintain a clean soldering tip. Plan for proper insulation and strain relief from the outset, as this directly affects long-term joint integrity. Inspect the area for contaminants or moisture that could hinder wetting, and ensure there are no nearby components sensitive to heat. Safety first, because a hot iron can cause burns and flux residues can corrode if left on joints.
Wire preparation for soldering instead of ferrule
Choose the correct wire gauge for your task and prepare the ends carefully. Strip insulation cleanly without nicking the conductor, then align strands and gently twist to prevent fraying. Apply flux to the exposed surfaces and pre-tin the wire ends so solder flows more readily. If replacing an existing ferrule, remove it and clean the seating area so the solder can wet both surfaces effectively. Cut the wire to the exact length needed and ready heat-shrink tubing for immediate placement after the joint. The goal is a tidy, fully wetted joint with adequate clearance from the insulation to prevent insulation damage during soldering.
Soldering technique basics
Start with a clean, appropriately sized tip for the wire gauge and a stable heat source. Apply flux to the joint, then lightly tin the tip. Heat the joint and feed solder to the joint (not directly to the iron) so the solder flows smoothly along the conductor and onto the surface. Avoid moving the joint while the solder cools to prevent micro-movements that degrade the connection. A properly wetted joint appears bright and smooth; a dull joint indicates insufficient wetting and may require rework. For multi-strand wires, protect the insulation from overheating by limiting heat exposure and using a heat sink if needed. Allow the joint to cool undisturbed for a solid fillet formation.
Special cases: stranded copper, aluminum, heat management
Stranded copper generally solderes well when pre-tinned and fluxed. Aluminum conductors require special consideration because standard solders may not bond well without aluminum-compatible materials. Manage heat carefully to protect insulation and nearby components; use heat sinks and short heat pulses when possible. If the joint sits near plastics or heat-sensitive parts, test with scrap pieces first to determine suitability. For long runs or high-flex applications, consider additional strain relief and, if needed, a secondary pass of solder to ensure reliability.
Inspection, testing, and reliability checks
After soldering, visually inspect the joint for a bright, continuous fillet with full wetting along the conductor. Look for cold joints (dull, grainy surfaces) or bridging between conductors. Use a multimeter to verify continuity and check the resistance is within expected range for the length and gauge. Perform a gentle tug test to confirm mechanical integrity; if movement is observed, rework with fresh flux and solder. Clean flux residues to avoid corrosion and moisture buildup. Document the process and results to assist future maintenance and troubleshooting.
Maintenance, rework, and safety notes
Soldered joints benefit from periodic inspection, especially in dynamic usage. If a joint shows signs of corrosion, cracking, or loosening, rework it with clean flux and fresh solder. Keep the workspace clean and store materials properly to preserve solder quality. Avoid overheating joints during rework to prevent insulation damage, and ensure all flux residues are cleaned after finishing. Always follow safety practices: unplug tools when not in use, wear protective eyewear, and work in a ventilated area. Proper maintenance extends the life of soldered connections.
Common mistakes and how to avoid them
Common mistakes include overheating joints, applying solder too close to insulation, neglecting flux, and failing to clean joints after soldering. Another frequent error is attempting to solder through a dirty ferrule seating area, which prevents proper wetting. To avoid these issues, use the correct heat level, keep the tip clean, apply flux appropriately, and rework questionable joints. Always perform a light tug test and a continuity check to confirm electrical and mechanical integrity. Practice improves speed and reliability over time.
Choosing between soldering and ferrule in practice
Choosing between soldering and ferrule terminations depends on reliability goals, production speed, and maintenance needs. If you expect movement or vibration or require long-term reliability with low contact resistance, soldering is often preferable. For large-scale production with tight tolerances and strict throughput, ferrules may offer faster assembly with consistent crimps. A balanced approach is common: use ferrules where rapid assembly is feasible and reserve soldering for critical connections, prototypes, or maintenance scenarios. The key is to evaluate the environment, access for maintenance, and desired durability to select the best method for your project.
Tools & Materials
- Soldering iron with adjustable temperature control(Tip size suitable for small electronics; typical range 300-350°C for lead-free solder)
- Lead-free solder (rosin-core preferred)(Choose appropriate diameter for wire gauge; avoid lead-based alloys in electronics where possible)
- Flux pen or rosin-core flux(Facilitates wetting and reduces oxidation at the joint)
- Solder wick (desoldering braid)(For removing excess solder or correcting joints)
- Heat shrink tubing(Insulates and provides strain relief at the joint)
- Wire strippers(Cleanly expose conductor length, avoid nicking strands)
- Flush-cutters(Trim excess wire neatly without fraying)
- Safety glasses(Eye protection against hot solder and flux splashes)
- Isopropyl alcohol and lint-free wipes(Clean flux residues after finishing)
- Ventilation or fume extractor(Protect from flux fumes and soldering byproducts)
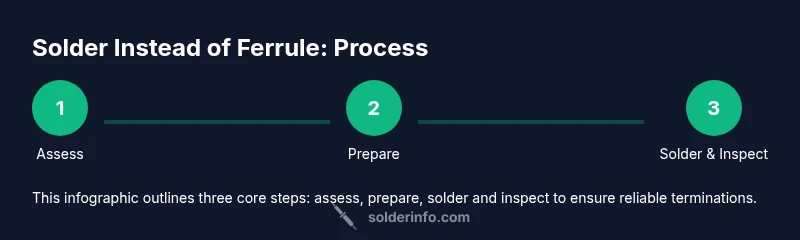
Steps
Estimated time: 40-60 minutes
- 1
Assess termination suitability
Examine the wire type, gauge, and operating conditions to determine if a soldered joint will meet reliability needs better than a ferrule. Consider vibration, temperature, moisture, and accessibility for future maintenance.
Tip: If unsure, default to soldering for critical, vibration-prone connections. - 2
Prepare wires
Strip insulation cleanly without nicking the conductor, then align strands and gently twist to prevent fraying. Prepare the length for a neat joint and ensure the seating area is clean.
Tip: Keep copper clean and bright; oxidation inhibits wetting. - 3
Flux and tin
Apply flux to the exposed surfaces and lightly tin the wire ends so solder flows more readily. Pre-tin helps create a strong initial contact for the joint.
Tip: Use fresh flux and avoid excessive flux that can burn. - 4
Position and heat joint
Hold the joint steady and heat with a tip appropriate for the wire gauge. Introduce solder at the joint, allowing it to flow smoothly along the conductor and onto the surface.
Tip: Always feed solder to the joint, not the iron, to prevent insulation damage. - 5
Inspect wetting and finish
Check that the solder wets the conductor fully with a bright, smooth fillet and no cold joints. If needed, reflow with a bit more flux and solder.
Tip: A dull or grainy surface indicates insufficient wetting. - 6
Insulate and relieve
Place heat-shrink tubing over the joint and apply heat evenly to form a tight seal. Add strain relief if the cable will bend frequently.
Tip: Choose tubing with a snug inner diameter for a secure fit. - 7
Test the connection
Continuity test the joint and perform a light tug test to verify mechanical integrity. Confirm insulation integrity with a visual check.
Tip: Verify signal integrity with a multimeter in continuity and resistance modes. - 8
Clean up and document
Wipe flux residues and record the procedure for future reference. Store materials properly to maintain performance.
Tip: Label the joint if maintenance will occur later. - 9
Evaluate results
Reassess the assembly in its operating environment and adjust technique if needed for long-term reliability.
Tip: Plan periodic checks for joints in dynamic applications.
Quick Answers
Is soldering always better than using ferrules?
Not always. Ferrules can be faster for mass production and provide reliable crimps when done with quality tools. Soldering offers durability in vibration-prone scenarios. Choose based on environment and maintenance plan.
Ferrules can be faster in production, but soldering offers durability in vibration-prone situations.
Can I solder directly to a ferrule-wired connection?
You can, but remove the ferrule if possible or heat carefully to avoid damaging the ferrule or insulation. The joint should wet the conductor cleanly and avoid overheating.
You can solder after removing the ferrule; ensure the wire is clean.
What wires are best for soldering instead of ferrule?
Stranded copper wires of common gauges are well-suited to soldering with proper flux and tin. Avoid attempting to solder aluminum without special adapters or connectors.
Copper wire is ideal for soldering with proper technique; aluminum needs special care.
What protection should I use after soldering?
Use heat-shrink tubing or electrical tape to insulate the joint and provide strain relief. Inspect for any flux residue and clean as needed.
Insulate the joint with heat shrink and clean flux afterward.
Are there safety concerns when soldering around ferrules?
Soldering involves hot equipment and fumes. Work in a ventilated area, wear protective gear, and keep liquids away from the workspace to prevent burns.
Soldering safety matters; ventilate area and protect yourself.
Watch Video
Top Takeaways
- Prepare wires and surface properly before soldering.
- Tin both conductor and solder for better wetting.
- Inspect joints visually and test continuity.
- Use heat shrink to provide insulation and strain relief.