Solder for Electrical Wires: A Practical DIY Guide
A practical, step-by-step guide to soldering electrical wires safely. Learn solder types, flux, tinning, joint formation, insulation, and testing for electronics, plumbing, and jewelry projects. Build durable, corrosion-resistant wire joints with confidence.

With this guide, you will learn how to solder for electrical wires safely and reliably. You’ll choose the right solder and flux, properly prepare wire ends, and create strong, conductive joints. The steps cover tinning, making a clean solder fillet, and protecting joints with heat shrink or tape to prevent corrosion and short circuits.
Why solder for electrical wires matters
Soldering provides a reliable, conductive path while preserving insulation and mechanical stability. For hobbyists and professionals, proper technique reduces resistance, prevents intermittent connections, and minimizes heat damage to jackets. According to SolderInfo, using the right solder and flux alongside clean, prepared wire ends is essential for durable joints in electronics, plumbing, and jewelry projects. When you solder wires correctly, you create joints that resist corrosion and movement better than twisted, taped, or crimped connections. The following sections explain how to choose materials, prepare safely, and execute clean, long-lasting joints that you can trust in real-world wiring tasks.
Choosing the right solder and flux for electrical wiring
For most electrical work, lead-free rosin-core solder offers good wetting, easy flow, and safer handling. Rosin-core flux helps remove oxides as heat is applied, improving the bond between copper conductors and the solder. Avoid bare fluxless solders for connections that will be exposed to vibration or moisture; flux keeps joints conductive and long-lasting. When selecting solder diameter, smaller diameters are easier for fine wire, while thicker wire benefits from a slightly larger strand for quicker build-up. As a rule, keep flux fresh and avoid excessive flux that can wick into insulation.
Preparation and safety
Before you begin, work in a ventilated area and wear eye protection. Gather your tools, clean and dry the wires, and remove the jacket only where you need to reach the conductor. Clean copper surfaces improve wetting and ensure a strong bond. Use a suitable stripper and avoid nicking strands; damaged copper can create weak joints. Have heat-shrink tubing ready to seal the joint after soldering, and keep a damp sponge nearby to clean the iron tip.
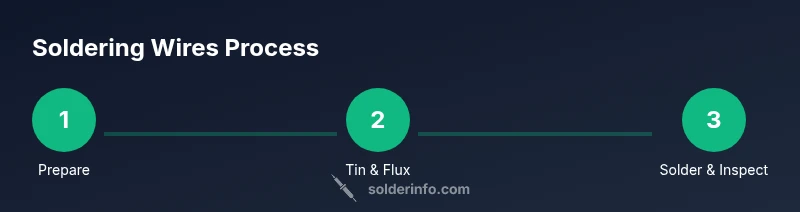
Step-by-step techniques for wire soldering
A concise set of techniques that align with the dedicated STEP-BY-STEP instructions is provided below. Start by preparing and tinning the wires, then join with flux and heat, and finally inspect. Tinning reduces the amount of heat transferred to the insulation during soldering and ensures reliable diffusion of solder into the joint. When you feed solder, touch the joint with the tip and let the solder wick in; avoid feeding solder directly into the iron tip, which creates excess blobs.
Troubleshooting common issues and best practices
Cold joints show a dull, rough appearance and may crack under stress. If you see a grey or matte finish, rework with fresh flux and heat. Use proper heat control; too much heat can burn insulation. Solder bridges create unintended connections; fix by re-p addition of flux and wick away excess. Test joints with a multimeter; verify continuity and insulation resistance. Regularly clean your iron tip to maintain consistent heat transfer.
Soldering for different wire types and applications
Solid wires from electronics differ from stranded wires used in harnesses. Stranded wires benefit from tinning to create a stable contact before joining. Thicker jacket insulation requires careful heat management and, when appropriate, the use of heat shrink tubing for moisture protection. For delicate tasks, consider a helping hand tool to hold pieces steady while you work. Always finish with an insulated, secure joint to prevent shorts.
Tools & Materials
- Lead-free rosin-core solder(Diameter about 0.8–1.0 mm; rosin core preferred for electronics)
- Flux (rosin-based or flux pen)(Use with care; apply sparingly)
- Soldering iron with fine tip(Tip clean; temperature moderate)
- Wire strippers(Remove insulation cleanly; avoid nicking strands)
- Heat shrink tubing(Preferred over tape for moisture protection)
- Solder wick (desoldering braid)(Optional for corrections)
- Electrical tape(Extra insulation if needed)
- Safety goggles(Eye protection from flux and splatter)
- Isopropyl alcohol(For cleaning wires before tinning)
Steps
Estimated time: 30-40 minutes
- 1
Prepare workspace and gather materials
Set up a well-ventilated area with a heat-resistant mat. Gather all tools and materials so you can work steadily without interruptions.
Tip: Ventilation is essential; fumes can irritate eyes and lungs. - 2
Strip and twist wire ends
Cut wires to the desired length. Use wire strippers to remove insulation; twist strands to a neat braid for good contact.
Tip: Keep stripping length uniform to ensure consistent joints. - 3
Tin the wire ends
Apply a small amount of flux, then heat the wire end and apply solder until it coats the strands evenly. Let it cool briefly before joining.
Tip: Tinning helps wetting and reduces joint time. - 4
Position and flux the joint
Align the wires and apply a light flux to the joint area to improve solder flow and prevent oxidation.
Tip: Avoid excessive flux; too much can cause solder to wick away. - 5
Heat and apply solder to the joint
Heat the joint, not the solder, and feed solder into the joint until a smooth fillet forms. Remove heat promptly once the joint is filled.
Tip: Do not overheat; excessive heat can melt insulation. - 6
Inspect and insulate
Inspect for a shiny, smooth fillet with no gaps. Cover with heat shrink or electrical tape; test continuity and insulation.
Tip: Check for cold joints by gently tugging and testing resistance.
Quick Answers
What solder should I use for electrical wires?
Use lead-free rosin-core solder for most wire work. It provides good wetting and clean joints with proper flux. Avoid non-fluxed solders for electronics since they may air-oxidize quickly.
Lead-free rosin-core solder is the safest default for wires; use flux to help wetting and a clean joint.
Can I solder copper wire without flux?
Flux is strongly recommended. It prevents oxidation, improves wetting, and reduces the time the joint is exposed to heat which helps preserve insulation.
Flux is essential for a durable, clean joint.
How do I fix a cold solder joint?
Reheat the joint with fresh flux and solder, ensuring the joint remains heated evenly until the fillet forms a shiny dome.
Reheat with flux and add a touch more solder to improve the joint.
Is it safe to solder through plastic-insulated wires?
Soldering through plastic insulation can burn the jacket if overheated. Use wires with exposed ends or re-route to prevent direct heat on insulation.
Don't heat through plastic insulation; trim back to exposed conductors when possible.
How can I test a soldered joint?
Visually inspect for shininess and no gaps; perform a continuity test with a multimeter and check for insulation integrity with a resistance test.
Check for a solid, shiny joint and no shorts.
Watch Video
Top Takeaways
- Prepare a clean, ventilated workspace.
- Tin wire ends before joining for reliable joints.
- Use flux judiciously to improve wetting.
- Insulate every joint to prevent shorts.