Soldering a 9V Battery Connector: A Practical Guide
Learn to solder a 9V battery connector safely with a practical, step-by-step approach. This guide covers tools, prep, technique, testing, and common pitfalls for electronics hobbyists and professionals.

Learn to solder a 9V battery connector safely with a practical, step-by-step approach. This guide emphasizes heat control, prep, and testing to ensure a reliable, insulated connection. Expect to gather basic tools, tin wires, and follow a clear sequence. It’s ideal for electronics hobbyists and professionals.
Understanding the 9V battery connector and why soldering requires care
According to SolderInfo, the 9V battery connector (the snap-style clip used on small rectangular 9V batteries) is designed for quick connections but sensitive to heat. Soldering this type of connector requires controlling heat to avoid melting plastic housings or damaging internal conductors. A solid solder joint should be shiny, filleted, and mechanically strong without excessive solder bridging the contacts. In practice, choose the correct wire gauge, keep the tip clean, and work on a heat-resistant surface. When done, inspect visually for smooth, continuous fillets and ensure no loose strands remain exposed. This approach minimizes the risk of short circuits and mechanical failure in powered applications.
Safety considerations and materials overview
Safety first: work in a well-ventilated area, wear safety glasses, and keep flammable materials away from the soldering iron. Select rosin-core solder (lead-free where possible), a flux pen, and a temperature-controlled iron to minimize heat exposure. Keep a damp sponge handy to clean the tip. Use a heat-resistant mat and tie back hair or clothing. Proper ventilation reduces fume inhalation and coughing; never heat batteries directly over the iron and avoid sparks. Handling the 9V battery connector with care preserves insulation and prolongs joint life.
Preparing wires and the connector
Use 22-24 AWG wire, with red and black conductors for polarity. Cut to length, strip 3-5 mm of insulation, and twist strands to prevent frays. Lightly coat the stripped ends with flux, then tin them with a small amount of solder. This makes the actual soldering faster and more reliable. Inspect for nicks or stray strands before proceeding. The goal is clean, ready-to-wet joints that heat evenly and minimize solder wandering.
Step-by-step soldering process
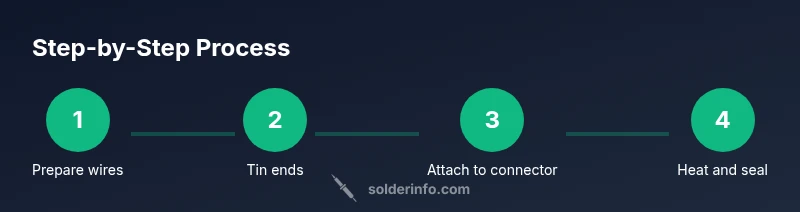
Follow a careful sequence to avoid cold joints or shorts: 1) Secure the connector in a helping hand or clamp. 2) Tin the connector pins lightly if applicable. 3) Place the red wire on the positive terminal and the black wire on the negative terminal. 4) Apply heat to the joint and feed a small amount of solder until the fillet forms. 5) Remove heat promptly and inspect the joint for a shiny, concave fillet. 6) Slide heat shrink over each joint and seal. Do not rush decorative or cosmetic steps; stability equals reliability.
Testing the connection and troubleshooting tips
Test with a multimeter for continuity between the wires and connector. Look for a solid resistance close to zero and confirm there is no short between the positive and negative conductors. If joints look dull or brittle, reflow the solder with a brief touch of heat. Clean the area with isopropyl alcohol to remove flux residue. If you notice intermittent performance, re-check wire stripping length, tinning, and wire strain relief. A properly tested connector ensures safe operation in low-voltage circuits.
Tools & Materials
- Soldering iron (60-80W or temperature-controlled)(Tip clean; set to a electronics-friendly range.)
- Rosin-core solder (lead-free preferred)(Diameter 0.8-1.0 mm; flux for clean joints.)
- 22-24 AWG wires (red and black)(At least 20-30 cm length per lead.)
- 9V battery snap connector(Standard rectangular 9V snap style.)
- Flux pen or flux paste(Helps the solder flow and wetting.)
- Heat shrink tubing(Optional for insulation.)
- Diagonal cutters / wire snips(For clean wire ends.)
- Helping hands or third-hand tool(Stabilizes parts.)
- Safety goggles(Protect eyes from splashes.)
Steps
Estimated time: 25-40 minutes
- 1
Set up workspace and safety
Prepare a clean, well-lit area with a heat-resistant mat. Put on safety glasses and ensure good ventilation. Clamp the connector to prevent movement while soldering, and keep the battery unplugged from any circuit to avoid accidental discharge.
Tip: Use a helping hand or clip to stabilize the connector before heating. - 2
Strip and tin wires
Cut wires to length, strip 3-5 mm of insulation, twist strands, and lightly tin with flux. Tin the exposed wire ends with a small amount of solder to improve wetting and minimize the time the iron touches the copper.
Tip: Keep the iron clean and avoid overheating the wire insulation. - 3
Prepare the connector pins
If your connector pins are exposed, tin them lightly to promote solder flow. Ensure correct polarity (red to positive, black to negative) and orient the wires for a neat, short path to the terminals.
Tip: Double-check polarity before applying heat. - 4
Solder the wires to the terminals
Apply heat to the joint and feed a small amount of solder until the fillet forms. Avoid long contact times to minimize heat creep into the connector housing. Do not let solder flow onto adjacent terminals or into the battery contacts.
Tip: Use a damp sponge to wipe the tip between joints. - 5
Inspect and reflow if needed
Look for shiny, concave fillets and absence of cold joints. If dull or cracked, reheat briefly and apply a little more solder. Remove flux residue after cooling with isopropyl alcohol.
Tip: Check for any short circuits across the two terminals. - 6
Insulate and test
Slip heat shrink over each joint, shrink with heat, and perform a continuity test. Confirm resistance is minimal and no short circuits exist. Finally, test the finished connector with a low-voltage supply in a controlled setup.
Tip: Label the wires to prevent reversing polarity in future use.
Quick Answers
What tools do I need to solder a 9V battery connector?
You’ll want a temperature-controlled soldering iron, rosin-core solder, flux, wire strippers, and a pair of diagonal cutters. A helping hand and safety gear improve accuracy and safety.
You’ll need a soldering iron, flux, solder, wire strippers, and safety gear; a helping hand helps too.
Is it safe to solder directly to a 9V battery?
Soldering directly to a battery can heat the cells and cause damage or leakage. Always disconnect the battery from any circuit and avoid prolonged heat exposure near the battery. If possible, test with a dummy load first.
Avoid soldering directly to the battery; disconnect it and test with caution.
How should I prepare the wires before soldering?
Cut the wires to length, strip insulation cleanly, twist strands, and tin the ends lightly. This reduces fraying and ensures a fast, reliable solder joint.
Strip, twist, and lightly tin the wires for better solder flow.
What if I bridge the terminals?
If solder bridges the terminals, rework the joint quickly. Use a desoldering braid to remove excess solder and reflow the joint with proper separation.
Bridge? Rework with desoldering wick and reflow carefully.
Can I use lead-free solder for this task?
Lead-free solder is acceptable and recommended for safety. It may require slightly different flux and temperatures; adjust your iron accordingly.
Yes, lead-free solder works fine; adjust temperature as needed.
Watch Video
Top Takeaways
- Prepare workspace and safety gear
- Tin wires for easy wetting
- Solder with controlled heat to avoid damage
- Test continuity and insulation after assembly