Soldering on Battery Terminals: Safe Step-by-Step Guide
Learn safe, practical methods for soldering on battery terminals, with step-by-step guidance, safety tips, and safer alternatives that protect battery packs during DIY electronics projects.

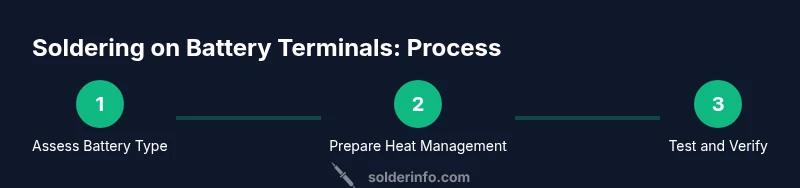
Soldering on battery terminals is sometimes necessary to reinforce connections or extend wiring, but it carries real safety risks, especially with Li-ion cells. Before you start, identify the battery type, prepare heat-sinking methods, and limit heat exposure. Whenever possible, use pre-tabbed terminals or mechanical connectors instead of direct soldering.
Safety first with battery terminals
Soldering on battery terminals requires careful risk management. Battery packs, especially lithium-based chemistries, can vent, overheat, or catch fire if exposed to excessive heat or solder flux residues. According to SolderInfo, practical hobbyists often underestimate the heat exposure that soldering can transfer to a battery surface. That miscalculation can lead to permanent damage or hazardous conditions. Begin every project with a risk assessment: know the cell chemistry, the pack configuration, and the intended electrical load. Equip yourself with PPE such as safety glasses and heat-resistant gloves, and work in a well-ventilated area. Keep a Class C or ABC fire extinguisher nearby as a precaution. This preparation aligns with general battery safety guidance from recognized safety authorities and industry best practices.
Understanding battery terminals and why heat matters
Battery terminals come in varied forms: snap connections on small cells, threaded studs on larger packs, and copper tabs on modular packs. Heat affects the metal coatings, sealants, and protective films that keep terminals corrosion-free. In many batteries, overheating can degrade internal separators or cause insulation damage—leading to short circuits. Soldering stresses also risk creating a weak mechanical joint if the solder wicks into the wrong area. The goal is to make a robust, low-resistance connection without compromising the cell’s integrity or thermal management. When in doubt, refer to the battery manufacturer’s datasheet and safety recommendations from respected sources such as OSHA.
Tools & Materials
- Soldering iron with temperature control(Set to a low-to-moderate temperature (about 350–400°C) to minimize heat transfer to the battery)
- Heat sink or clamp(Attach to the terminal area to draw heat away from the cell during soldering)
- Rosin-core lead-free solder(Diameter around 0.5 mm for precise control; avoid excessive solder on tiny terminals)
- Solder flux (rosin-based)(Use mildly active flux to improve flow and protect metal surfaces)
- Desoldering braid (braid wick)(Useful for correcting mistakes without overheating the terminal)
- Alcohol wipes or isopropyl alcohol (IPA)(Clean terminal surfaces before and after soldering, avoid moisture)
- Wire cutters/stripper(Prepare wires and terminals for clean tinning)
- Sandpaper or a fine file (grit 320–600)(Lightly roughen metal surfaces for better solder adhesion)
- Safety equipment (goggles, gloves)(Protect eyes and skin from hot solder and flux fumes)
- Multimeter(Verify continuity and proper voltage after soldering)
- Pre-tabbed terminals or connector kit(Safer alternative to direct soldering on battery terminals)
Steps
Estimated time: 1 hour 30 minutes
- 1
Power down and isolate
Before any work, power down the device and unplug it from any power source. If dealing with a pack, disconnect it from the chassis and remove it from any charging environment. Identify the exact terminal type and check for signs of damage or swelling before proceeding.
Tip: Isolation minimizes the risk of short circuits during heat application. - 2
Prepare workspace and heat management
Set up in a well-ventilated area. Place the battery on a non-flammable mat and attach a heat sink to the terminal area before you heat any metal. This helps protect the cell surface and limits heat transfer to internal components.
Tip: A calm, dry workspace reduces the chance of accidents. - 3
Clean and inspect the terminals
Wipe terminals with IPA to remove oil or oxidation. If corrosion is present, lightly abrade with fine sandpaper and re-clean. Ensure there is a shiny, bare metal surface for the best solder adhesion.
Tip: Cleanliness is critical for a strong, reliable joint. - 4
Tin the wires and prepare the joint
Apply a small amount of flux and tin the wire leads you intend to attach. Keep tinned portions short and avoid creating long tails that could bridge to adjacent contacts.
Tip: Tinning reduces heat required during final soldering and promotes a solid joint. - 5
Apply heat and form the joint
Place the heat sink on the terminal, apply the soldering iron to the terminal edge briefly, and feed solder into the joint, not directly onto the terminal surface. Remove heat as soon as the solder flows to form a smooth fillet.
Tip: Limit heat exposure to prevent insulation damage; use short, controlled pauses. - 6
Inspect, test insulation, and clean up
Check for cold joints, bridging, or excess solder. Use IPA to wipe away flux residues and verify continuity with a multimeter. Confirm there is no short circuit path created by stray solder.
Tip: A visual and continuity check catches issues early. - 7
Final safety check and reassembly
If the battery shows any swelling, overheating, or unusual odor after soldering, stop and isolate the pack. Reattach connectors as required and ensure all protective encasements are intact before powering the device.
Tip: Never reuse damaged packs; replace them as needed.
Quick Answers
Is it safe to solder directly on lithium-ion battery terminals?
Direct soldering on Li-ion terminals carries significant safety risks and should be avoided when possible. If you must do it, use strong heat control, a heat sink, and protective protocols.
Direct soldering on Li-ion terminals is risky; avoid it if you can and follow strict safety steps if unavoidable.
What battery types are more forgiving for soldering?
Non-rechargeable or very old battery types may tolerate soldering better than modern Li-ion packs. Always verify manufacturer guidelines and use safe alternatives whenever possible.
Some older or non-rechargeable batteries tolerate soldering better, but always follow the manufacturer’s guidance.
What are safer alternatives to soldering battery terminals?
Use pre-tabbed terminals, crimp connectors, or solder tabs designed for battery packs. These methods reduce heat exposure and provide robust, reliable connections without directly soldering to sensitive cells.
Pre-tabbed terminals or crimp connectors avoid exposing the battery to heat.
How do I know if I caused damage during soldering?
Look for swelling, odor, overheating, or loss of capacity. If any signs appear, disconnect the battery and replace it if needed; do not continue using a suspect pack.
Swelling, strange odors, or overheating are red flags—stop and assess.
Can I test a soldered joint with a multimeter safely?
Yes. Check continuity and resistance across the joint; a smooth, low-resistance path indicates a good connection, while high resistance or intermittent readings suggest a problem.
You can test with a multimeter to confirm a solid connection.
Should I use flux-core solder for battery work?
Rosin-core flux helps improve flow and protection. Avoid aggressive fluxes that can leave conductive residues; clean thoroughly after soldering.
Rosin-core flux is typically suitable; cleanup is important.
Watch Video
Top Takeaways
- Assess battery type before soldering
- Use heat sinks and minimal heat exposure
- Keep terminals clean for reliable joints
- Prefer mechanical connectors when feasible
- Always verify with a multimeter after soldering