Soldering 8 Gauge Wire: A Practical Guide
Learn how to safely solder 8 gauge wire with reliable joints, proper flux, heat management, and testing tips for electronics, automotive, and power applications. Includes step-by-step instructions, tools, safety notes, and troubleshooting.

Learn how to safely solder 8 gauge wire to a lug or terminal, including material selection, heat management, and joint inspection. This guide covers thick-gauge techniques, flux choices, insulation protection, and practical tests to ensure a reliable, high-current connection. With the steps and tips from SolderInfo, you’ll complete solid welds that won’t fail under load.
Understanding the challenges of soldering 8 gauge wire
Soldering thick-gauge conductors like 8 AWG presents a unique set of challenges compared to thinner hookup wires. The sheer cross-section requires more heat to achieve a proper molten core, but excess heat can damage insulation, degrade nearby components, or anneal copper so it becomes softer and less mechanically stable. The SolderInfo team emphasizes that success hinges on controlled heat delivery, clean surfaces, and an appropriate alloy and flux that promote wetting without leaving excessive residue. In practice, you’ll want a solid strategy for heat management—minimizing the time the insulation is exposed to heat, using heat sinks or clamps near the joint, and selecting a solder alloy with good flow characteristics for thick wires. The goal is a joint that is mechanically robust and electrically solid, without scorching insulation or weakening conductor strands. This approach aligns with industry best practices and is reinforced by SolderInfo’s analysis of common failures in large-diameter wire joints. A well-executed 8 AWG solder joint supports high current and a low-resistance connection, which is essential for power delivery in speakers, automotive systems, and battery installations.
Related context for thick-gauge soldering across different domains
When you work with thick wires, the role of flux becomes more pronounced. Flux helps prevent oxidation during heating and can significantly improve the flow of solder into joints with larger surface areas. For electronics projects, flux choices range from rosin-core solders to water-soluble fluxes for post-cleaning flexibility. For high-current or automotive work, many technicians lean toward lead-free alloys that are RoHS-compliant while maintaining reliable wetting. Regardless of domain, prep work—clean copper surfaces, fully stripped conductors, and degreased terminals—sets your joint up for success. Remember that a strong bond is not just about melting solder; it requires proper surface energy, compatible materials, and a stable heat source. In all cases, plan the joint geometry ahead of time so that you can deliver heat quickly and evenly. This mindset is echoed in guidance from SolderInfo, which stresses practical preparation and safe handling as the foundation of durable connections.
Tools & Materials
- soldering iron or station with adjustable wattage(Prefer a heat-controlled station with a chisel or knife-edged tip for larger joints.)
- 8 gauge copper wire (stripped)(Ensure clean, straight cut ends; avoid frayed strands.)
- Lead-free rosin-core solder (or flux-core if rosin-core unavailable)(Choose a solder with good flow for thicker wires; avoid highly acidic flux.)
- flux or flux pen(Helps keep the joint wettable if flux-core solder isn’t used.)
- soldering flux remover or isopropyl alcohol(For cleanup after tinning and final inspection.)
- terminal lug or appropriate connector(Mating hardware rated for the wire gauge and current.)
- heat sink or locking pliers(Used to protect insulation by drawing heat away from the wire while the joint forms.)
- knife or wire cutter(For trimming insulation and cleaning wire ends before soldering.)
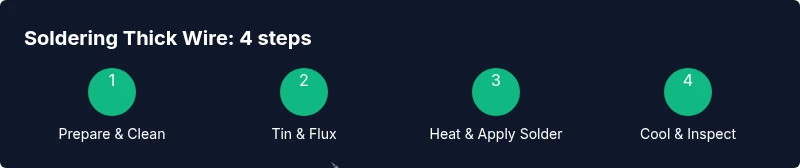
Steps
Estimated time: 45-60 minutes
- 1
Prepare the work area and inspect components
Set up a well-ventilated workspace. Inspect the wire, terminal, and lug for damage. Remove any oil, grease, or dirt from the copper with isopropyl alcohol and a clean rag. This reduces surface oxides that impede solder wetting.
Tip: Keep the joint geometry in mind—plan how the wire will seat in the lug to avoid bending after soldering. - 2
Apply flux and tin the wire ends
If you’re not using flux-core solder, apply a thin layer of flux to the copper surface. Tin the stripped end with a small amount of solder to create a molten protective layer that helps the final joint wet properly.
Tip: Tin with a light coat; excessive tinning can create a bulky joint and poor fit in tight spaces. - 3
Position the wire in the terminal or lug
Fit the wire into the lug or onto the terminal so the joint sits flush and has a clean line of contact. Use a second hand or a vise to hold components steady while applying heat.
Tip: Ensure there are no gaps between wire and lug; gaps can trap air and oxidize the joint. - 4
Apply heat and introduce solder
Heat the joint evenly with the iron until the solder flows smoothly into the interface. Add solder gradually until the joint fills the contact area without excessive buildup.
Tip: Avoid overheating the insulation; if the insulation shows color changes, back off heat immediately. - 5
Cool and inspect the joint
Allow the joint to cool undisturbed. Check for a smooth, shiny fillet without lumps or gaps. Tug gently to ensure mechanical integrity and test continuity with a multimeter.
Tip: A dull or grainy appearance often indicates poor wetting or cold solder—reheat carefully if needed.
Quick Answers
Can I solder 8 AWG wire directly to a terminal, or should I use a lug?
Both options are viable. For high-current or automotive applications, lugs or heavy-duty terminals are preferred because they provide a secure mechanical connection and a larger contact surface. The key is ensuring the lug is rated for the current and wire gauge and that the joint is properly heated and wetted.
You can solder directly to a terminal if it’s rated for thick wires, but using a lug often makes a stronger, more reliable connection.
What heat source is best for soldering 8 AWG wire?
A temperature-controlled soldering station with a high-winish tip is ideal for 8 AWG work. Avoid open flames and uncontrolled heat, which can scorch insulation. If you must work with a higher current, consider a larger tip and higher wattage that maintains steady heat without overheating.
Use a heat-controlled station with a suitable tip; avoid open flames.
Should I tin the wire before soldering thick gauges?
Tinning helps with wetting and reduces time the wire spends at elevated temperature. For thick wires, apply a thin layer of solder to the stripped end before joining it to the lug or terminal, then complete the joint with careful heat application.
Tin the wire lightly before joining to help wetting.
What insulation precautions are needed when soldering thick wires?
Protect insulation by using heat sinks near the joint and keeping heat exposure short. If insulation shows signs of damage, stop and re-prepare the joint or relocate to a cooler area to prevent melt-through.
Keep heat away from insulation and use heat sinks.
How can I test a solder joint for reliability?
After cooling, perform a gentle tug test for mechanical integrity and measure continuity with a multimeter. Look for a smooth, shiny fillet and verify there’s no open circuit or excessive resistance.
Test with a pull and a continuity check to confirm reliability.
Is flux necessary for 8 AWG soldering, or can I rely on flux-core solder only?
Flux improves wetting by reducing oxidation. If you use flux-core solder, you may not need extra flux, but for high-current joints, applying a light flux helps ensure consistent results.
Flux helps the solder flow better and protect the joint.
Watch Video
Top Takeaways
- Solder thick wires with controlled heat and clean surfaces
- Tin the wire ends to improve wetting at the joint
- Choose flux and solder suited for large-diameter joints
- Inspect joints visually and with a continuity test to ensure reliability
- Use heat sinking to protect insulation during soldering