Soldering 6 Gauge Wire: Safe, Strong Joints for Thick Conductors
A comprehensive, practical guide to soldering 6 gauge wire safely and reliably. Learn material choices, preparation, heat management, joint design, testing, and maintenance for thick conductors.

Assessing when to solder thick gauge wire and what you’ll accomplish
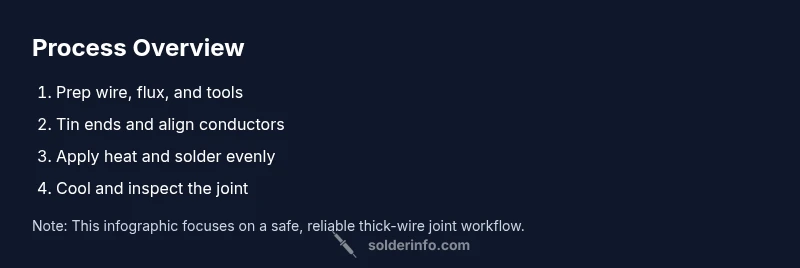
Soldering 6 gauge wire isn’t a one-size-fits-all task. It’s about creating a joint that can carry current reliably without overheating the insulation or weakening the conductor. Scenarios like automotive power leads, battery connections, or heavy-duty DIY harnesses demand joints that tolerate vibration and temperature changes. According to SolderInfo, thick-conductor soldering requires tight heat control and clean preparation to prevent insulation damage and poor wetting. In this block we outline the goals: a mechanically secure connection, the lowest practical resistance path, and a joint design that remains robust under stress. You’ll decide on splice, butt, or lug configurations, choose compatible solder and flux, and lay the groundwork for a safe, long-lasting electrical connection. The emphasis is on planning, material compatibility, and best practices to minimize overheating and maximize reliable wetting and flow for solder 6 gauge wire.
Material choices: solder and flux options for thick gauge wire
For soldering thick wires, material selection is as important as technique. When working on electronics-focused projects, a lead-free tin-silver-copper alloy with rosin-core flux offers dependable wetting and safer handling. In heavier-duty or non-critical environments, a traditional lead-containing alloy may be acceptable, provided you work in a well-ventilated area and observe safety precautions. Flux choices vary: rosin-core flux helps prevent oxidation during heating, while water-soluble flux can simplify cleanup after cooling. The goal is to match solder and flux to the insulation material and operating temperatures to minimize insulation damage or brittleness. Always lightly tin the conductor beforehand to improve wetting, and avoid leaving flux residues that could attract contaminants over time. The right combo balances ease of use with long-term reliability.
Wire prep: cleaning, stripping, and tinning thick conductors
Preparation sets the stage for a solid joint. Begin by cleaning the wire to remove oils, oxidation, and residues that hinder solder flow. Use proper stripping tools to expose a clean, uniform conductor length without nicking copper strands. For 6 gauge wire, leave enough exposed conductor for a full bend-free joint, then lightly abrade the copper surface to improve adhesion. After cleaning, apply a thin layer of flux and lightly tin the exposed wire end. Tinning ensures better heat transfer and reduces the risk of cold joints during the actual soldering process. Handling thick wires requires patience and steady hands to maintain alignment and avoid insulation damage.
Heat management: choosing the right iron and heat control
Heat control is critical when soldering large wires with thick insulation. Use a high-wattage, temperature-controlled iron or station capable of delivering steady heat without excessive overshoot. Set temperatures to balance solder flow with insulation safety, and use heat sinks or clamps to protect nearby insulation from scorching. Work in a clean, well-ventilated area and avoid touching flux-coated areas with bare skin. Keeping the tip clean and avoiding prolonged direct contact with the insulation helps prevent damage or scorching. This stage prioritizes consistent heat delivery, stable joints, and operator safety.
Joint designs for durability: butt joints, splices, and lugs
Thick-gauge joints demand thoughtful mechanical design. A properly executed butt joint provides a straight path for current, while a splice can extend the contact area for lower resistance. Lugs or terminal blocks offer robust mechanical support, especially in harnesses or automotive applications. For 6 gauge wire, ensure the joint geometry allows full solder coverage and avoids sharp bends that can stress the insulation. Use clamps or a third-hand tool to hold parts in alignment while you apply heat and solder. The aim is to reduce mechanical stress, improve heat distribution, and create a joint that remains strong under vibration and flexing.
Flux application and masking to prevent solder bleed
Flux is your ally against oxidation and cold joints. Apply flux precisely where heat will concentrate, and avoid excessive flux that can spread onto insulation. If you’re using flux pens or syringes, a thin, even layer helps control solder flow and reduces the risk of solder bridges between adjacent conductors. Masking tape or heat-resistant tape can protect nearby insulation from accidental solder bleed during the heating phase. Clean up any residue after cooling to prevent long-term corrosion or insulation damage. The goal is controlled wetting, clean joints, and environmental safety.
Soldering technique for 6 gauge wire: sequence and timing
A reliable thick-wire joint follows a disciplined sequence: heat the joint area evenly, bring the solder to the joint rather than the iron to the wire, and monitor the wetting action closely. Move heat slowly along the conductor to avoid overheating insulation. Once you see solder flow wick into the conductor and fill the joint, withdraw the solder and heat source together to prevent freezing or cold joints. Allow the joint to cool undisturbed for a few seconds to set. If you notice dull or grainy surfaces, reheat briefly and apply a small amount of solder to repair wetting. This technique reduces the likelihood of joint failure due to poor solder spread or overheating.
Troubleshooting common issues with 6 gauge solder joints
Common problems include cold joints, oxidation, and overheating insulation. A cold joint appears dull and may crack; to fix, reheat with a small amount of fresh flux and solder until the joint flows smoothly. Oxidation on thick conductors can inhibit wetting, so ensure flux coverage and cleanliness before heating. Overheating insulation may cause softening or melting; to prevent this, use heat sinks and avoid direct heat for too long on the insulation. If solder beads are found outside the joint, carefully remove excess solder and reflow the joint with proper heat control. Regular inspection during and after soldering helps catch issues early.
Working in confined spaces: equipment and safety
Soldering thick gauge wire in tight panels requires careful planning. Use long-handled tools, heat-resistant gloves, and a secure work surface. A low-visibility or cramped space increases the risk of accidental contact with hot surfaces, so maintain clear paths and keep flammables away. If you must work near other electrical components, shield them from stray heat with small heat sinks and partitioned insulation. Finally, ensure all power sources are disconnected during preparation and testing to prevent accidental shocks. This section emphasizes safe, controlled work in challenging environments.
Testing and inspecting the completed joint
Verification combines visual inspection and functional testing. Look for a smooth, continuous solder fillet with no gaps or voids. Use a multimeter to check continuity and, if applicable, insulation resistance to confirm the joint’s integrity. Gentle mechanical testing should not reveal wobble or movement at the joint. If a joint fails either electrical or mechanical tests, revisit cleaning, tinning, heat application, or field-shielding. Thorough inspection confirms reliability and safety before the final installation.
Maintenance, rework, and best practices for reliability
Keep joints clean and protected from moisture, dust, and vibration. Periodic inspection can catch early signs of degradation, especially in high-current or outdoor environments. If rework is necessary, re-clean the joint, reapply flux, and reflow with controlled heat. Use protective sleeves or heat-shrink tubing to reduce mechanical stress on the joint and insulate exposed conductors. Establish a routine for checking connections, tightening clamps, and replacing degraded components to extend the life of the wiring harness.