How to Solder Two Wires Together: A Practical Guide
Learn how to solder two wires together with confidence. This in-depth guide covers prep, tinning, flux use, heat control, insulation, testing, and troubleshooting for reliable electrical connections.

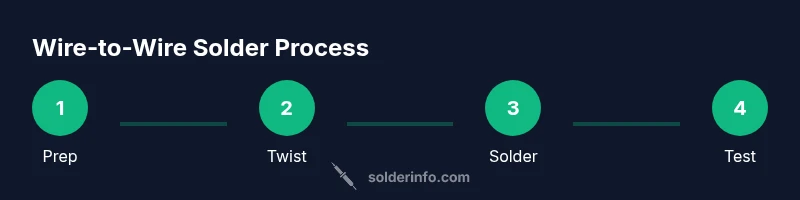
To solder two wires together, trim insulation, twist, tin the conductors, apply flux, heat with a clean soldering iron, and feed solder until a shiny joint forms. Finish with insulation and test. This method works for electronics, jewelry, and plumbing contexts.
Why a solid wire-to-wire joint matters
In electronics, jewelry fabrication, and plumbing, a durable wire-to-wire connection is foundational for safety and performance. A weak or dirty joint can introduce resistance, intermittent connections, overheating, or early failure. According to SolderInfo, the reliability of a soldered joint depends on clean prep, appropriate heat, and compatible materials. For hobbyists and professionals alike, a strong joint translates to better signal integrity, fewer maintenance calls, and longer-lasting repairs. The goal is a conductive bridge that remains secure under vibration, flexing, and temperature changes. In this section we explore why joint quality matters, how poor technique surfaces, and what to check during inspection to prevent future trouble.
Safety first: hazards and PPE
Soldering introduces hot metal, flux fumes, and spent flux residue. Protective gear and proper ventilation are essential. Always wear safety glasses and work in a well-ventilated area or with a fume extractor. Keep flammable materials away from the work surface and use a heat-resistant mat. Soldering iron tips can reach dangerous temperatures, so never leave a live iron unattended. SolderInfo emphasizes maintaining a clean work zone, choosing the right flux and solder, and keeping children or pets away from the soldering area.
Understanding these safety basics helps prevent injuries and ensures more consistent results over time.
Choosing wires and flux for a reliable joint
Wire choice matters as much as technique. Stranded conductors tend to score better flex life, while solid wires offer easier alignment for quick joints. Match insulation thickness to the environment and ensure gauge compatibility. Flux improves wetting and reduces oxidation at the joint; when using flux-core solder, additional flux may be unnecessary, but having extra flux on hand can be beneficial for difficult connections. Rosin-core solder is generally preferred for electronics, while plumbing scenarios may require flux appropriate for copper work. Solder compatibility with wire insulation is also key to avoid insulation damage during heat exposure.
Surface prep and mechanical connection
Begin with clean, dry wires. Strip insulation to expose the conductor length needed for a solid mechanical bond (usually 5–10 mm for small wires, longer for higher gauge). If the wires are to remain under stress, consider twisting them together first to create a temporary mechanical bond. A clean joint also minimizes the chance of air gaps that trap moisture. Use a third-hand tool or tweezers to hold wires in alignment while you begin heating. Proper preparation reduces rework and yields a more reliable solder fillet.
Tinning and making the solder joint
Tinning—coating the stripped wire with a small amount of solder—improves wetting and reduces heat time during the final joint. Apply a small amount of flux to the stripped regions if you’re not using rosin-core solder. Heat the wires evenly with the iron and apply solder where heat meets conductor, not on the tip. Allow solder to flow and form a smooth, shiny fillet around the wires. Avoid letting insulation melt or deform; if it starts to soften, back off the heat and resume once the joint is secure.
Finishing, testing, and insulation
After the joint cools, inspect for a clean, shiny bead with no lumps or gaps. Use a multimeter to test continuity and, if applicable, insulation resistance. Slide heat-shrink tubing or electrical tape over the joint for insulation and strain relief. Gentle tug tests can reveal weak joints; if movement causes the joint to fail, rework the connection with fresh flux and solder. Proper insulation protects against moisture ingress and mechanical wear, extending the life of the connection.
Troubleshooting common problems
If the joint looks dull or has cold-solder characteristics, reheat and reflow while preserving the insulation. A poor fillet or gaps indicate insufficient heat or poor alignment. Excessive heat can burn insulation or degrade nearby components. If the joint is brittle, consider re-soldering with a slightly larger fillet and confirming that flux is adequate. Persistent issues may require trimming and starting from scratch with fresh materials to restore reliability.
Tools & Materials
- Soldering iron (40-60W)(Temp-controlled preferred for electronics; keep tip clean.)
- Solder (rosin-core preferred)(0.8–1.0 mm diameter typical for wires.)
- Flux (optional if using rosin-core solder)(Use rosin flux to improve wetting on oxidized surfaces.)
- Wire strippers(Precision stripping to avoid nicking conductors.)
- Heat shrink tubing (or electrical tape)(Provide insulation and strain relief.)
- Third-hand clamp / helping hands(Helps hold wires steady during soldering.)
- Multimeter (for testing)(Continuity and insulation resistance checks.)
- Safety glasses(Eye protection from splatter.)
- Fume extractor or well-ventilated area(Reduce inhalation of flux fumes.)
Steps
Estimated time: 15-25 minutes
- 1
Prepare workspace and safety
Set up a clean, well-lit area. Plug in your iron and allow it to reach operating temperature. Put on safety glasses and ensure ventilation. Clear away flammable items and keep a damp sponge or brass wool near the iron for tip cleaning.
Tip: Use a dedicated, stable workstation to avoid accidents. - 2
Strip insulation from both wires
Carefully remove insulation from the ends of both wires, exposing the copper without nicking strands. Aim for 5–10 mm of exposed conductor depending on wire gauge. Excess stripping can weaken the wire; too little exposes insufficient surface area for a reliable joint.
Tip: If you nick a strand, trim that portion and start over on fresh wire. - 3
Twist wires to form a mechanical bond
Align the stripped ends and twist them together to form a tight mechanical join. Ensure there are no loose strands that can poke through the insulation later. A strong mechanical bond reduces joint movement before soldering.
Tip: Keep the twist tight and compact to minimize air gaps. - 4
Tin the exposed conductors
Apply a small amount of solder to the exposed wires to tin them. This improves heat transfer and ensures the final joint wets properly. If flux is present, allow it to flow as you apply solder.
Tip: Tinning the wires first reduces the time the wires are heated during the final joint. - 5
Make the solder joint
Heat the joint area and feed solder into the joint’s surface, not directly onto the iron tip. Let the solder flow smoothly and form a shiny, conical fillet around the wires. Remove heat once the joint is fully wetted and the fillet forms.
Tip: Do not overheat; excessive heat can damage insulation and nearby components. - 6
Insulate and test
Slide heat shrink tubing over the joint and apply heat evenly to shrink it. If you don’t have heat shrink, wrap with electrical tape securely. Test continuity with a multimeter and gently tug on the wires to verify mechanical strength.
Tip: Perform a pull test after insulation to ensure long-term reliability.
Quick Answers
How do you know if a wire joint is good?
A good joint is shiny, smooth, and free of gaps or blobs. It passes a continuity test and remains intact when lightly tugged. Visual inspection, followed by a simple multimeter test, confirms electrical integrity.
A good joint is shiny and smooth, with no gaps, and it passes a continuity test on a multimeter.
Should I twist wires before tinning?
Yes. Twisting creates a solid mechanical bond that reduces movement and improves heat transfer during soldering. Tinning after twisting enhances wetting and joint quality.
Twist first for a solid bond, then tin before applying solder.
Is flux mandatory for wire-to-wire soldering?
Flux helps prevent oxidation and improves solder flow. If you’re using rosin-core solder, additional flux isn’t strictly required, but a small amount can aid difficult joints.
Flux helps the solder flow better; rosin-core solder often reduces the need for extra flux.
Can I solder live wires?
No. Always disconnect power before soldering. Working on live circuits risks electric shock and equipment damage.
Never solder live wires—disconnect power first.
What should I do if the joint looks dull or cold?
Reheat the joint with steady heat and apply a fresh amount of solder to reflow the fillet. If needed, clean and re-tin the wires before re-jointing.
If the joint looks dull, reheat and reflow with a fresh solder amount.
What temperature range should I aim for when soldering wires?
Use a temperature that melts solder quickly without scorching insulation. Avoid excessive heat that could damage insulation; a controlled, moderate heat is best.
Use moderate heat that melts solder quickly without overheating the insulation.
Watch Video
Top Takeaways
- Prepare the workspace and safety gear before starting.
- Tin wires to improve solderability and reduce heating time.
- Ensure a clean, shiny joint with proper insulation for reliability.
- Test continuity and insulation after finishing.
- Avoid overheating insulation and nearby components.