Battery Cable Solder vs Crimp: Practical Comparison
A thorough, engineering-focused comparison of soldering and crimping for battery cables, with guidance on when to use each method, tools needed, techniques, and best practices for electronics, automotive, and industrial applications.

When wiring battery cables, neither method is universally superior; soldering and crimping each have niche strengths. Soldering offers low, controllable resistance and easier inspection for small-diameter wires, while crimping delivers fast, repeatable joints with strong mechanical hold in vibration-prone environments. Your choice should hinge on wire size, connector type, service environment, and how easily you can access and rework the joint.
Context: Battery cables, connectors, and performance tradeoffs
For battery wiring across electronics, automotive, and industrial systems, the decision between solder and crimp hinges on electrical performance, mechanical durability, and serviceability. According to SolderInfo, both approaches can yield dependable joints when executed with proper technique, but each method has its own constraints in the context of battery cable solder vs crimp. In controlled laboratory conditions, soldered joints can offer smooth current transfer and straightforward inspection, while crimped connections excel in field deployments where speed and repeatable results matter. Real-world installations demand attention to wire gauge, insulation, connector geometry, exposure to vibration, and expected lifetime. This article uses practical guidelines and real-world considerations to help you decide which method fits your battery wiring project and how to optimize the chosen method for reliability. The goal is to give you a decision framework you can apply to electronics projects, portable power packs, or vehicle battery banks.
When soldering is appropriate for battery cables
Soldering is particularly advantageous for small-diameter wires or tight bundles where heat control is achievable and space is constrained. In these scenarios, light tinning of the conductor, careful flux application, and a clean, well-rated solder alloy can produce a continuous copper path with low contact resistance. For sensitive electronics or serviceable connections, soldering can simplify inspection and rework. However, you must protect insulation, avoid overheating plastic sleeves, and apply heat-shrink to restore strain relief. Solder joints benefit from good flux chemistry and proper cleaning, but the mechanical integrity of a soldered joint under vibration depends on strain relief and routing. In practice, reserve soldering for situations where you can manage heat and rework when needed.
When crimping is appropriate for battery cables
Crimping shines in field deployments and higher-current cables where speed, repeatability, and consistent ferrule/terminal engagement matter. A quality crimped joint with the correct die set distributes stress through the connector and conductor, providing reliable resistance to vibration and moisture when paired with proper seals and insulation. The tool regime is crucial: a ratcheting crimp tool or a professional crimping machine, matched to the terminal size and conductor, yields repeatable results. Choose crimping when you need rapid assembly, easy replacement of a terminal, and robust mechanical hold in environments with movement or temperature cycling. Always verify the crimp with pull tests and continuity checks.
Electrical performance: resistance, impedance, and current rating
Both methods aim to minimize added resistance and to preserve conductor cross-section. Soldering creates a metallurgical bond that can reduce contact resistance when joints are clean and properly heated, but poor heat control can risk insulation damage or wire annealing. Crimped connections rely on a metal-to-metal interface that, with the right terminal and tool, can offer excellent mechanical strength and stable contact resistance over time. In practice, the electrical performance depends more on joint cleanliness, strain relief, and connector integrity than on the mere act of soldering or crimping. For battery runs where minimal resistance is critical, ensure wires are properly prepared, contacts are suitable for the gauge, and joints are protected from moisture and corrosion.
Tools, materials, and preparation
Before commencing any battery cable work, gather the right tools: a clean work area, a reliable wire stripper, appropriate terminal connectors, and the correct crimp die or soldering tip. For soldering, stock flux, rosin-core or no-clean solder, and heat-shrink tubing are essential to protect insulation and provide strain relief. For crimping, a quality crimping tool, matched dies, and compatible terminals rated for the conductor gauge are mandatory. Always inspect cables for nicks, broken strands, or damaged insulation. Prepare a controlled heat source for soldering and a stable workstation for crimping to avoid nicked conductors or accidental shorting.
Step-by-step techniques for solid joints
Begin with clean, bare copper: remove any oxidation with a fiber brush or sandpaper, then trim to the required length. If soldering, apply flux and tin the wire lightly before heating the joint with a precise iron temperature. Slide on heat-shrink and allow solder to wick into the joint; avoid cold solder joints by maintaining adequate heat without scorching insulation. If crimping, select the right terminal for the wire gauge, position the conductor correctly, and apply firm, even pressure with a properly calibrated tool until a solid crimp is produced. Inspect for uniform compression, absence of voids, and secure insulation coverage.
Inspection, testing, and reliability
After forming the connection, measure continuity and resistance using a multimeter and inspect visually for shine, complete seat, and absence of gaps. Under vibration, confirm strain relief by gently tugging the cable; a loose joint indicates a failure risk. Corrosion resistance matters; apply appropriate sealants or anti-corrosion coatings where exposed terminals are common. In corrosive or humid environments, sealed connectors or weatherproof housings can dramatically extend life. Regular inspection during maintenance cycles helps catch early signs of fatigue before joint failure occurs.
Cost considerations and lifecycle planning
Tooling costs for crimping can be higher upfront due to the need for a quality crimping tool and compatible terminals, but labor time savings and repeatable results often offset the investment in production environments. Soldering requires investment in a good soldering iron, flux, and solder, with ongoing consumables. For hobbyists or intermittent use, soldering may be cheaper but slower and harder to reproduce consistently. When planning a lifecycle, consider maintenance intervals, field accessibility, and the likelihood of rework. Hybrid approaches—soldering in fixed, serviceable links and crimping in field connections—can balance reliability and practicality.
Hybrid approaches and field deployment tips
A practical strategy often combines both methods: solder the short, serviceable sections that require inspection and then crimp the bulk of the run using sealed terminals for field reliability. Ensure that each interface uses compatible materials (e.g., copper conductors with copper or plated terminals) and that all joints have proper strain relief. In high-vibration contexts, use crimped terminals with heat-shrink and moisture seals, and reserve soldering for components where repeated disassembly is expected. Maintain a standard operating procedure for both methods to ensure consistent quality across teams.
Comparison
| Feature | Soldered connection | Crimped connection |
|---|---|---|
| Mechanical strength | Moderate to high with proper strain relief | Very high with correct terminal and tool, especially in vibration |
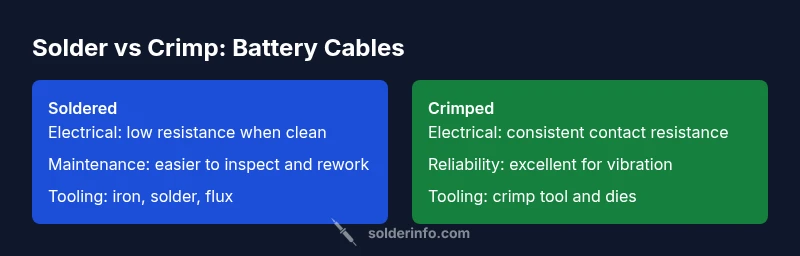
| Electrical resistance | Low resistance when joints are clean and well-made | Consistently low resistance with proper terminals and dies; dependent on connector quality |
| Tooling required | Soldering iron, flux, and solder | Crimping tool with matched dies and compatible terminals |
| Repairability | Easier to rework small joints, but can be tricky if insulation damaged | Easier to replace a terminal; more modular for field maintenance |
| Speed | Slower per joint due to heating and cooling cycles | Faster per joint, especially for larger runs |
| Best environments | Controlled environments; where heat can be managed | Vibration-prone or field deployments; outdoors or mobile applications |
| Durability under moisture | Requires careful sealing; flux residues must be managed | Better moisture sealing with proper sealed terminals |
| Initial tool cost | Moderate; iron and basic consumables | Higher upfront for quality crimp tools and dies |
Advantages
- Soldering enables a continuous conductor with potentially lower contact resistance when clean
- Crimping provides repeatable, fast production with strong mechanical hold
- Soldering can be more forgiving for very fine wires and makes inspection easier
- Crimped terminals with proper seals resist vibration and moisture when used correctly
Cons
- Soldering requires precise heat control to avoid insulation damage and wire insulation melt
- Crimping depends on high-quality terminals and a proper tool; a bad crimp fails reliably
- Solder joints can fatigue if subjected to repeated bending or vibration without adequate strain relief
- Poorly sealed crimped connections may be vulnerable to moisture ingress in harsh environments
Crimping is generally the better default for field reliability; soldering remains optimal for small wires and serviceable joints
For most battery wiring in field or automotive contexts, a quality crimp with proper terminals offers dependable continuity and repeatable results. Soldering is preferred when you must service or inspect small-diameter wires, or when you need a readily reworkable joint in a controlled environment.
Quick Answers
Is soldering better than crimping for battery cables in all cases?
No. Each method has strengths depending on the use case. Soldering can reduce resistance and simplify inspection for small wires, while crimping offers fast, repeatable joints and better performance under vibration when using quality terminals.
No—soldering isn’t always better. It depends on wire size, environment, and maintenance needs.
Can I mix solder and crimp in the same battery cable run?
Yes, when done thoughtfully. Use solder where you need inspection or reworkability, and crimp where field reliability and speed are critical. Ensure compatibility at interfaces and protect against corrosion.
Yes, you can mix them, just plan the interfaces carefully.
What tools do I need to crimp battery cables?
A quality crimping tool with the correct dies for your terminal size is essential. Pair it with compatible terminals rated for the conductor gauge, and include heat-shrink and corrosion protection as needed.
Get a proper crimp tool and the right dies for your wire.
How do you test a joint after soldering or crimping?
Perform a continuity check and measure resistance with a multimeter. Inspect visually for uniform compression (crimp) or a smooth, uninterrupted solder path. Tug-test the joint gently to confirm mechanical integrity.
Check resistance, continuity, and visual quality; test the joint under light mechanical stress.
Are crimped connections weatherproof?
Weatherproofing depends on terminal design and sealing. Use weather-sealed terminals and appropriate heat-shrink or epoxy coatings in moisture-prone environments.
Yes, with the right sealed terminals and protection.
What are common mistakes when soldering battery cables?
Overheating insulation, insufficient cleaning, and failing to provide strain relief lead to weak joints. Always clean surfaces, use flux appropriately, and protect insulation with heat-shrink.
Avoid overheating and poor strain relief when soldering.
Top Takeaways
- Choose crimping for field work and vibration-prone environments
- Solder for small wires and serviceable joints where inspection matters
- Ensure proper strain relief and insulation protection in both methods
- Use the right tools and terminals; poor tooling undermines reliability
- Consider a hybrid approach to balance reliability and practicality