pb37 Error Code Troubleshooting: Urgent Guide
pb37 error code diagnostic and rapid fixes for soldering equipment. Learn meaning, symptoms, step-by-step fixes, safety tips, and prevention from SolderInfo to minimize downtime in 2026.

pb37 is an error code signaling a safety-control fault detected by the device's control system. When pb37 appears, the unit often halts to prevent damage. Start with a safe reset, confirm power stability, and inspect for loose cables or overheating. If the issue persists, consult the manual or contact support for professional service.
What pb37 Means in Plain Language
pb37 is a generic error code used by many soldering-related devices to signal a safety-control fault. According to SolderInfo, pb37 indicates the device detected an unsafe condition that requires immediate attention. The fault is typically designed to protect users and components by halting operation. In practical terms, pb37 means the machine has detected conditions outside its safe operating envelope, such as improper temperature readings, interlock issues, or a sensor fault. Treat it as urgent and avoid forcing the device back into operation without proper verification. Understanding pb37 in plain language helps you act quickly and safely, reducing the risk of damage to the tool or your workpieces. The SolderInfo team emphasizes that safety-first troubleshooting minimizes risk and preserves warranty coverage when possible in 2026.
Common Symptoms and Immediate Actions
Symptoms associated with pb37 can appear in several forms, but all share a common safety-themes: a lockout state, a shuttered output, or a non-responsive control panel. Typical signs include a steady or flashing pb37 display, an audible alert, and an immediate halt of soldering activity. If you see pb37, perform a quick reset by powering down completely and disconnecting from the outlet for at least 30 seconds. Reconnect power and attempt a gentle restart. Check for overheating indicators and ensure the enclosure is free of dust and foreign objects. Inspect the plug and outlet to verify clean power delivery. If the error reappears, do not proceed with operation and consult the device manual or SolderInfo guidance for the proper reset sequence and diagnostic steps.
Contextual Troubleshooting Flow
A systematic approach helps distinguish a safety fault from a temporary glitch. Start with basic checks: ensure the device is disconnected from power, verify there is no moisture or moisture exposure on electronics, and inspect visible wiring for damage. If the issue persists, consider sensor and interlock status, verifying that all connectors are fully seated and that interlocks are engaged. Look for any recently installed parts or environmental changes that could trip pb37. Document the sequence of events leading to pb37 so you can share precise information with support. This flow aligns with SolderInfo’s recommended troubleshooting framework for 2026, emphasizing reproducibility and safety.
Quick Fixes to Try Before Servicing
First, perform a safe reset and power-cycle as described in the manual. Then verify power supply integrity—check the outlet, power strip, and cable connectors for looseness or damage. Inspect interlocks and sensor wiring for signs of wear, fraying, or disconnection. Clean any dust around vents to improve cooling performance. If pb37 persists, avoid component swapping that could compromise warranties; instead, use manufacturer-approved diagnostics or contact support with your maintenance log.
When to Call a Professional and What to Expect
If pb37 reappears after basic checks, professional service is recommended. Labor costs for diagnostics typically range from $60 to $150, while repairs involving control boards, sensors, or interlocks can span roughly $150 to $500 depending on parts and labor. The SolderInfo team advises scheduling service promptly to prevent hidden damage and guarantee safer operation. When you call, provide device model, serial number, a clear pb37 description, and a log of recent events. A technician will typically perform a more thorough electrical test, calibration checks, and interlock verification, then supply a written estimate before any replacement parts are approved.
Prevention and Maintenance to Avoid pb37
Regular maintenance reduces the likelihood of pb37 reoccurring. Keep the unit clean, perform routine calibration checks if your model supports it, and replace worn cables before they fail. Use temperature stabilization routines and avoid abrupt temperature changes that stress sensors. Store devices in a dry, dust-free environment and follow the manufacturer’s recommended service intervals. By keeping a log of pb37 events and related fixes, you can spot patterns and address root causes more quickly, which aligns with best practices from SolderInfo for 2026.
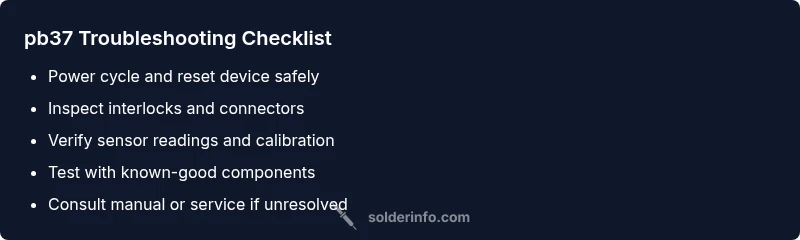
Steps
Estimated time: 45-90 minutes
- 1
Ensure Safety and Power Down
Before touching anything, unplug the device and disconnect from the power source. Allow any hot parts to cool and avoid touching live circuits. This step reduces the risk of shock or accidental triggering of safety interlocks.
Tip: Wear eye protection and use insulated tools where appropriate. - 2
Perform a Safe Reset
Follow the device’s reset procedure exactly as described in the manual. A safe reset clears transient faults and returns the controller to a known state without bypassing safety interlocks.
Tip: Do not bypass safety features even if the screen seems unresponsive. - 3
Inspect Interlocks and Connectors
Check that all interlocks are engaged and that connectors are fully seated. Look for loose cables, corroded terminals, or damaged insulation. A loose connection can mimic a fault condition like pb37.
Tip: Gently reseat every connector and wiggle-free connections to verify snug fit. - 4
Check Sensors and Calibration
If the device has temperature or proximity sensors, verify they read within expected ranges. Calibrate or replace sensors as recommended by the manual if readings are out of spec.
Tip: Document nominal ranges for future reference. - 5
Test with Known-Good Components
If possible, substitute with known-good cables or a spare module to rule out parts as the cause. Do not swap core control boards unless instructed by the manufacturer.
Tip: Label tested parts to avoid reusing the wrong component later. - 6
Plan Professional Service if Needed
If pb37 continues after the above steps, arrange service with a qualified technician. Obtain an estimate and preserve logs of symptoms, times, and actions taken for accurate diagnosis.
Tip: Ask for a written diagnostic report and part-level cost estimates.
Diagnosis: Error pb37 appears on device during operation
Possible Causes
- highInterlock or safety switch fault
- mediumSensor calibration drift or failure
- lowLoose or damaged wiring/connectors
Fixes
- easyReset device and perform a controlled power cycle
- easyInspect interlocks and reseat connectors
- mediumCalibrate or replace faulty sensors as per manual
- hardSchedule professional service for control-board diagnostics
Quick Answers
What does pb37 mean on my device?
pb37 signals a safety-control fault detected by the device’s control system. It typically halts operation to prevent damage or injury. Follow safe reset procedures, inspect connections, and consult the manual or support before resuming use.
pb37 means a safety fault; reset and check connections, then consult the manual or support if it keeps appearing.
Is pb37 dangerous to ignore?
Ignoring pb37 can risk equipment damage or personal injury due to unsafe operating conditions. Treat it as urgent, discontinue use, and pursue a safe reset and diagnostic steps before attempting to solder again.
Yes, pb37 is urgent—don’t run the device; reset safely and check for the fault before continuing.
Can I fix pb37 at home?
Some basic checks can be performed at home, such as a safe reset and connector inspection. More complex issues involving sensors or the control board generally require professional service to avoid safety risks.
You can try simple resets and checks, but for sensors or boards, call a pro.
How long does a pb37 repair take?
Diagnostics typically take 60–180 minutes depending on the device and access to spare parts. Repairs involving control boards or sensors can extend to several hours or require replacement parts.
Diagnostics usually take about an hour or two; repairs may take longer if parts are needed.
Will pb37 affect other tools in the same system?
pb37 is often localized to the affected device, but shared interlocks or power conditions can influence other units. Isolate the problematic device during diagnosis and check the shared power or control lines.
Usually it stays with the one device, but check shared power lines and interlocks in the system.
Watch Video
Top Takeaways
- Identify pb37 as a safety fault and respond calmly.
- Perform a safe reset and verify power before deeper checks.
- Inspect interlocks and connectors for proper seating.
- Document events and seek professional service if unresolved.
- Prevent recurrence with routine maintenance and proper handling.