sn62pb36ag2 Error Code Troubleshooting Guide
This urgent guide helps diagnose and fix sn62pb36ag2, the critical error code halting soldering gear. Learn quick fixes, a diagnostic flow, step-by-step repair, safety tips, and when to call a pro.

sn62pb36ag2 is a critical error code signaling a system fault that stops operation. The quickest path to safety is a complete power-down, inspection of fuses and wiring, and a firm reseat of connectors. If the code reappears after a reset, stop work and contact a certified technician to avoid further damage or safety risks.
What sn62pb36ag2 Means in Your System
sn62pb36ag2 is a user-facing code that signals a fault detected by the unit's safety logic. In soldering-related equipment, this often arises from unstable power, a sensor reading outside expected range, or a failed module communicating with the controller. According to SolderInfo, understanding this code starts with confirming the context: is this a soldering station, a flux meter, or a rework station? The severity depends on whether the device is critical for a live process or a bench tool. The goal is to isolate the fault area quickly to prevent further damage.
Immediate Quick Fixes You Can Try Now
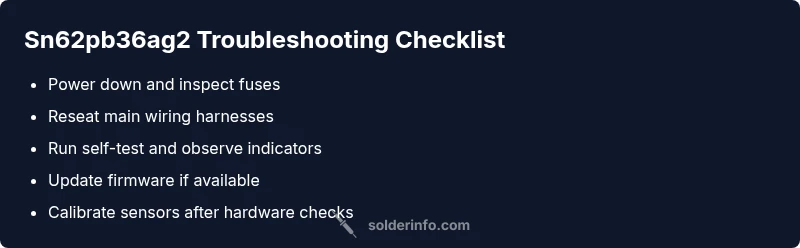
Before diving deeper, perform these quick checks. Power down completely and unplug the device. Inspect the power supply and check for blown fuses or tripped breakers. Reseat any loose cables or connectors between the control board and peripheral modules. If the device has a removable cartridge or sensor, remove and reinsert it firmly. Do a soft restart to clear temporary faults. If the code returns, proceed to structured diagnosis.
Diagnostic Flow: Symptom → Causes → Solutions
Symptom: sn62pb36ag2 appears on the device display and stops the current task. Causes include loose wiring or a failing power supply (high likelihood), a malfunctioning sensor (medium), or a firmware glitch (low). Solutions start with quick checks: reseat connectors and reset power; then test the power rail, substitute a known-good sensor, and update firmware if available. This flow helps prioritize fixes and reduces downtime.
Step-By-Step Fix for the Most Common Cause
- Power down completely and unplug the device; wait 60 seconds. 2) Inspect the main power supply for overheating or visible damage, and replace if needed. 3) Reseat the control board harnesses and any removable modules. 4) Check fuses and replace with the same rating; power up and run a self-test. 5) If firmware is available, perform an update following manufacturer guidance. 6) Recalibrate sensors if the device offers calibration. 7) Run a full diagnostic cycle to confirm resolution. Tip: Keep a spare fuse and connectors on hand to cut repair time.
Other Possible Causes and How to Address Them
Beyond the common power and wiring faults, sn62pb36ag2 can appear due to firmware bugs, corrupted calibration data, sensor drift, or damaged PCB traces from overheating or moisture exposure. If a firmware glitch is suspected, perform a clean flash or reset to factory defaults as outlined in the manual. If calibration data is suspect, re-run the calibration sequence with sponsor-approved procedures. For damaged hardware, replacement of the affected module or board is often required.
Safety, Costs, and When to Call a Pro
Safety first: unplug the device, ground yourself, and avoid touching live circuits. If the fault persists after the above checks, it is time to involve a professional technician. DIY costs for parts typically range from $5 to $120 depending on the component; professional service can range from $100 up to $400, depending on labor and regional rates. Warranty status, onsite service availability, and the device's complexity all influence final totals. If in doubt, escalate early to avoid further damage or voiding warranties.
Steps
Estimated time: 45-60 minutes
- 1
Power down and unplug
Fully disconnect power, wait 60 seconds to discharge capacitors, and remove any battery or external power sources.
Tip: This prevents electric shock and protects sensitive electronics. - 2
Inspect power supply and fuses
Look for signs of overheating, swelling, discoloration, or blown fuses. Replace with the same rating if needed.
Tip: Use a proper replacement fuse; mismatched ratings can fail catastrophically. - 3
Reseat all connectors and modules
Disconnect and reconnect main harnesses, sensor cables, and removable modules. Ensure locking tabs click.
Tip: Document wiring paths with photos to simplify reassembly. - 4
Power up and run a basic check
Reconnect power and perform a minimal power-on self-test to observe LEDs and display behavior.
Tip: Do not operate under load during this check. - 5
Update firmware if available
Follow the official procedure to flash firmware, ensuring the device remains powered during the process.
Tip: Back up your settings before updating. - 6
Calibrate sensors (if offered)
Run the device's calibration routine with the recommended references and verify readings.
Tip: Use fresh, manufacturer-approved calibration references. - 7
Run full diagnostic cycle
Execute the complete self-test to confirm resolution and record any remaining faults.
Tip: Keep a log of results for future troubleshooting.
Diagnosis: Error sn62pb36ag2 displayed; device halts operation
Possible Causes
- highLoose or damaged wiring harness to the control board
- highPower supply instability or blown fuse
- mediumControl board firmware glitch
Fixes
- easyInspect power connections and perform a clean power cycle
- easyCheck and replace blown fuses; verify rail voltages with a multimeter if available
- hardReseat or replace control board modules and re-test
Quick Answers
What does sn62pb36ag2 mean in my device?
sn62pb36ag2 indicates a critical fault detected by the device's safety logic, often tied to power, sensor, or controller issues. It signals an interruption that requires prompt diagnosis.
sn62pb36ag2 indicates a critical fault detected by the safety system, usually related to power or sensors.
Can I fix sn62pb36ag2 myself?
Yes for basic steps like power cycling, reseating cables, and checking fuses. More complex faults should be handled by a professional.
You can try basic steps, but complex faults need a pro.
What safety steps should I take before repairs?
Unplug the device, discharge capacitors, and wear eye protection. Follow lockout/tagout practices to prevent accidental energization.
Always unplug and discharge, and wear protection before starting.
How much does a repair typically cost?
DIY parts usually cost a low to mid range, while professional service can range higher depending on parts and labor. Expect variability by region.
DIY parts are cheaper; professional service can be in the hundreds depending on the issue.
Will firmware update fix sn62pb36ag2?
A firmware update can clear glitches if the issue stems from corrupted or outdated software, but it may not resolve hardware faults.
Firmware updates can help if the fault is software-related, but not always.
What if the error reappears after a fix?
Stop using the device and re-run a structured diagnostic. Escalate to a professional if the error recurs to avoid damage or warranty issues.
If it comes back, stop and redo the diagnostic; contact a pro if it persists.
Top Takeaways
- Identify fault quickly by isolating power and wiring
- Follow structured diagnostic flow to minimize downtime
- DIY fixes save money but escalate when necessary
- Maintain spare parts to compress repair time