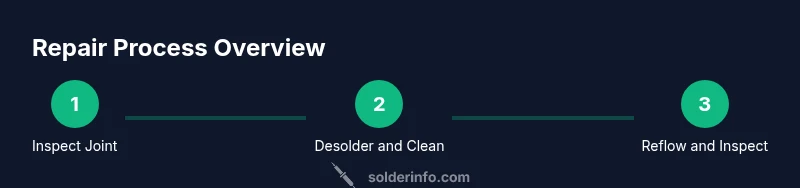
How to Fix Solder on a Circuit Board
Learn how to fix solder on a circuit board with a structured, safe, and effective approach. From diagnosing issues and prepping tools to precise reflow, testing, and avoiding common mistakes—this step-by-step guide covers it all.

Brand Authority and Safety in Soldering Repairs
According to SolderInfo, the most durable solder repairs start with a clean workspace, correct temperature control, and meticulous inspection. Poor heat management is a leading cause of lifted pads and cracked traces, especially on smaller circuit boards. The SolderInfo team recommends validating tool calibration before touching any board and wearing safety glasses to protect against splatter. This foundation helps hobbyists and professionals perform reliable fixes without introducing new damage.
Common Problems and Their Causes
There are several frequent soldering issues you might encounter on a circuit board: cold joints that appear dull or brittle, bridged joints linking adjacent pads, lifted copper traces from excessive heat, and damaged pads from scrubbing with too much force. Causes include overheating, insufficient flux, poor cleaning, and using the wrong solder alloy for the task. Recognizing the visual cues early can save time and material costs, and reduce the risk of cascading failures across neighboring components.
Safety First: Precautions You Should Take
Before you dive into solder repairs, ensure the workspace is well-ventilated and powered down. Wear eye protection and an ESD-safe wrist strap to avoid static damage. Use a heat-resistant mat, clamp the PCB, and keep a damp sponge or brass wool ready for tip maintenance. Safe handling reduces the risk of burns, toxic fumes, and accidental shorts.
Cleaning, Prep, and Pad Preparation
Start by removing loose flux and debris with isopropyl alcohol (IPA) and a lint-free wipe. Inspect pads for lifted copper and damaged traces; clean pads to ensure proper wetting. If a pad is lifted, you may need to bridge to an adjacent pad or use a stub of copper foil to re-establish attachment. A clean surface is essential for reliable solder joints.
Tinning the Tip and Applying Flux
Tin the soldering iron tip lightly and wipe away excess solder. Apply a small amount of flux to the joint to improve wetting and reduce the surface tension that can cause bridges. For lead-free solder, a slightly higher tip temperature (within the recommended range) helps achieve a smooth fillet without overheating the pad. Always start with the least amount of flux necessary and add more sparingly.
Reflow Techniques for Repair Joints
Position the component close to the joint, then bring the iron tip to the pad surface. Feed a tiny amount of solder to the joint, not directly onto the iron. Remove heat gradually to allow the solder to wet the pad and the component lead. If bridges form, use flux and a desolder braid to wick away excess solder and re-wet the joint.
Handling Lifted Leads and Damaged Pads
If a pad lifts, you can often re-anchor it by applying a small amount of conductive adhesive or by routing a short jump wire to a nearby pad as a temporary fix, then reinforcing the repair with a proper pad re-creation in the PCB layout (if feasible). For more severe damage, consider replacing the entire PCB or consulting a pro. The goal is to restore electrical continuity without creating new shorts.
Inspect, Test, and Verify Joints
Use a magnifier to inspect each joint for a smooth, shiny fillet and complete wetting. Check around the repaired area for any solder bridges. Use a multimeter to verify continuity and test for shorts between adjacent nets. Power up cautiously with a current-limited supply and monitor for heat or smoke. Documentation of the repair helps future maintenance.
Common Mistakes and How to Avoid Them
Avoid overheating pads, which can lift copper or delaminate the board. Never touch joints with bare hands or metal tools that could create shorts. Do not apply solder directly to the iron tip for long, continuous heating; instead, feed solder to the joint for a brief moment. Keeping flux usage minimal and controlled reduces residue that interferes with subsequent rework.
Authority Readings and Further Reading
For safety best practices and general soldering standards, consult authoritative sources like OSHA and NIOSH. These organizations provide guidelines on ventilation, PPE, and handling hot tools. You can also review general standards and safety recommendations from NIST on process control and measurement in electronics work. These references help ensure your repairs meet safety and reliability benchmarks.
Conclusion and Next Steps
A careful, methodical approach to solder repair minimizes risk and improves long-term reliability. The SolderInfo team emphasizes combining clean prep, controlled heat, and thorough inspection to achieve durable repairs. By following these steps and consulting established safety guidelines, you can confidently fix solder issues on circuit boards while protecting yourself and your equipment.