Do You Need to Remove Old Solder? A Practical Desoldering Guide
Learn when to remove old solder, the best desoldering methods, essential tools, and step-by-step techniques for clean, reliable joints in electronics repair.

Yes. In most electronics repairs, you should remove old solder before replacing components or reworking joints. Old solder can trap contaminants, form cold joints, or create bridging. Use desoldering wick or a solder sucker, clean the pad, and re-tin with fresh solder for a reliable connection. This guide explains safe, effective desoldering techniques.
Do you need to remove old solder? Why it matters
Do you need to remove old solder? In practice, yes—especially when you’re reworking a joint or replacing a component on a printed circuit board. Old solder can oxidize, lose flow, and trap flux residues, which reduces wetting and makes it harder for fresh solder to form a solid bond. Leftover solder can also bridge adjacent pads, creating shorts or intermittent connections. According to SolderInfo, removing old solder before major rework improves reliability by restoring clean copper surfaces and enabling proper heat transfer with fresh flux. Before you start, inspect the area with a good light and magnification, checking for lifted pads, broken vias, or heatsink interference. If you find damage, plan a repair strategy rather than rushing to desolder. The goal is a clean slate where new solder can wet copper evenly and form a dependable joint that lasts. This approach minimizes rework and reduces the chance of hidden defects.
keyTakeaways
Tools & Materials
- Soldering iron (fine-tipped or temperature-controlled)(Set to appropriate temperature for lead-free or leaded solder; avoid overheating nearby components)
- Desoldering braid (solder wick)(Copper braid with flux core; cut to manageable lengths)
- Desoldering pump (solder sucker)(Low-profile nozzle preferred for tight gaps; practice with scrap joints first)
- Rosin-core solder (lead-free preferred)(For re-tinning after desoldering)
- Flux (liquid or paste)(Improves heat transfer and wetting; use fresh flux for best results)
- Isopropyl alcohol (70–99%)(Cleans pads after desoldering; dries quickly)
- Magnification aid (loupe or microscope)(Essential for inspecting fine-pitch joints and bridges)
- Fine-point tweezers(For picking up and positioning small components safely)
- Heat-resistant mat and holder(Protects your work surface and stabilizes the board)
Steps
Estimated time: 30-45 minutes
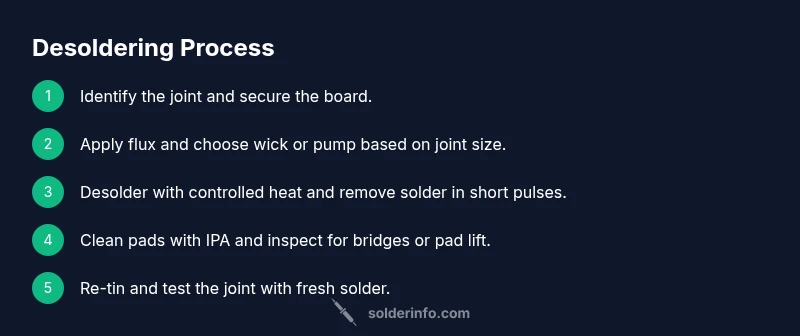
- 1
Prepare the workspace and identify the joint
Power down the device, unplug it, and secure the board to a heat-resistant mat. Inspect the target joint with magnification to determine whether pads are intact and whether there is any pad lift or trace damage. Decide whether to desolder using wick or pump based on joint size and pitch.
Tip: Place the board on a stable holder to prevent movement during heating. - 2
Tin and test your tools
Pre-tin the tip of the soldering iron with a small amount of fresh solder. Test the iron on scrap copper to confirm heat transfer and adjust temperature for lead-free or leaded solder. Clean the tip with a damp sponge before starting.
Tip: A clean, properly tinned tip transfers heat more efficiently and reduces oxidation on the joint. - 3
Apply flux and heat the joint
Apply a small amount of flux to the joint. Heat the joint from the underside of the pin or pad with a steady, controlled motion until the solder becomes fluid. Do not overheat, which can lift pads or damage components.
Tip: Keep the iron tip close to the solder for efficient heat transfer and avoid heating adjacent parts. - 4
Desolder with wick or pump
For wick: place the braid over the joint and apply iron; solder will wick into the braid. For pump: position the nozzle over the joint and trigger suction while applying heat. Work in short bursts to prevent overheating.
Tip: Wick is better for tight spaces; pump is faster for larger joints, but monitor heat carefully. - 5
Clean the pad and inspect
Wipe the pad with IPA to remove flux residue and check for any remaining solder bridges. If bridges remain, repeat wick or pump as needed. Ensure the pad surface looks clean and flat.
Tip: Use a magnifier to verify no bridging remains between closely spaced pins. - 6
Re-tin and test the joint
Apply a thin layer of fresh solder to the pad or pin to re-tin the surface. Test continuity or resistance with a multimeter and verify that the joint wets properly when reflowed with fresh solder.
Tip: Reflow small areas with a touch of flux before applying the new solder for best wetting.
Quick Answers
Do I always need to remove old solder before reworking?
In most cases, yes, especially when replacing components or repairing joints. Removing old solder reduces oxidation and ensures fresh solder wets properly, leading to a stronger, more reliable joint.
Usually yes, especially for component replacements. Old solder can hinder wetting, so removing it helps ensure a solid joint.
What tools are best for desoldering old solder?
A combination of desoldering wick and a soldering pump works well. Flux improves heat transfer and reduces oxidation. A temperature-controlled iron helps you avoid heat damage.
Desoldering wick and a solder pump are your main tools; add flux and a temperature-controlled iron for best results.
Can I reuse old solder after desoldering?
It's generally better to use fresh solder for re-tinning and rejoining. Old solder can be oxidized and may not wet well, leading to weak joints.
Reusing solder is usually not recommended; fresh solder wetting gives you a stronger joint.
What is the difference between wick and pump for desoldering?
Wick uses capillary action to draw molten solder into braided copper; pumps suck away solder quickly but can pull heat from the joint if misused. Choose based on joint size and accessibility.
Wick pulls solder into braid, pump sucks solder away. Use wick for tight spots and pump for larger joints.
Is lead-free solder harder to desolder?
Lead-free solder melts at a higher temperature and can form stronger joints. Desoldering requires careful heat control and adequate flux to avoid cold joints.
Lead-free solder needs a bit more heat and careful control, along with proper flux, to desolder effectively.
Watch Video
Top Takeaways
- Assess the joint area before desoldering to protect pads.
- Choose wick or pump based on pad density and joint size.
- Maintain heat control for reliable wetting and minimal damage.
- Re-tin pads and re-check with a multimeter after rework.