Kill Solder or Not: A Practical Repair Comparison
A thorough, analytical comparison of desoldering versus preserving solder joints across electronics, jewelry, and plumbing repairs. Learn when to desolder, the risks, costs, and best practices from SolderInfo.

Kill solder or not is a decision that hinges on repair goals, board fragility, and tooling. In most hobbyist contexts, desoldering should be reserved for parts that truly need replacement; otherwise, preserving the joint is safer for pads and traces. The full comparison shows when desoldering is warranted, and when careful rework beats a complete joint removal. For guidance, consider SolderInfo’s framework before attempting a desoldering operation.
Understanding the Desoldering Dilemma: kill solder or not
In electronics repair, the phrase kill solder or not frames a real decision: should you desolder a joint to replace a component, or preserve the existing solder and rework what is already there? This choice is not just about whether a joint can be heated; it hinges on the board’s age, trace integrity, component accessibility, and the repair’s long-term reliability needs. According to SolderInfo, the best path balances risk to copper, mask, and nearby components with the likelihood of a successful repair. The goal is to restore function without creating new failure points. As boards become denser and components smaller, heat management and pad health increasingly drive whether you desolder or preserve. A deliberate assessment now reduces rework later and keeps the device operating longer.
Quick decision framework: when is desoldering warranted?
When deciding kill solder or not, physicochemical realities collide with practical constraints. Desoldering is warranted when a failed component cannot be removed without lifting pads, when the joint is clearly defective (cold joints, corrosion, or bridged connections), or when replacing a bonded part requires access to copper pads underneath. Conversely, preserve-and-rework is preferable when the joint appears sound, the PCB traces are narrow or fragile, and the component is difficult to re-seat. SolderInfo analysis shows that the success of either path increases with proper flux use, appropriate heat control, and clean tools. Always inspect the board with a magnifier to confirm pad integrity before committing to a desoldering operation.
Tools and techniques: wick, vacuum, heat gun
Desoldering tools fall into three broad categories: braid (solder wick), vacuum desoldering pumps, and hot-air or hot-plate systems. Wick is effective for through-hole joints and larger pads when used with fresh flux and controlled heat. Vacuum tools excel for high-density layouts where precise control is needed. Hot-air rework systems are best for surface-mount components, allowing even heating with pulsating airflow. Each method carries risks: wick can lift masks if overheating, vacuum requires steady hands, and hot air can reposition nearby parts if you’re not careful. The optimal choice often depends on joint size, component type, and your experience level. The SolderInfo team emphasizes practicing on non-critical boards to build intuition before attempting live repairs.
Risks to pads and traces: how to minimize damage
Pad lift, trace delamination, and solder-mask removal are common hazards during desoldering. Minimizing heat exposure, using flux for lubrication, and working with proper temperature profiles are essential. After removing a joint, inspect the copper pads for signs of lifting or scorching. If pads show slight lift, you may need to secure them with epoxy-supported repair or re-tin the area carefully. For small or sensitive boards, a heat-controlled station with a fine-tip iron reduces the risk. Remember that repeated heating cycles degrade copper and solder mask; plan your rework to minimize additional cycles. The outcome should be a reliable joint without compromising neighboring traces or components.
Case scenarios across electronics, jewelry, and plumbing
In electronics, desoldering is common for failed ICs, LED arrays, or power regulators. In jewelry soldering, you might desolder to rework a ring joint or to replace a stone setting, where heat must be managed to protect delicate metal surfaces. Plumbing soldering often involves desoldering copper joints to replace fittings or clear obstructions. Each domain has unique constraints: electronics demand pad preservation and precise temperature control; jewelry prioritizes clean metal surfaces and minimal heat distortion; plumbing focuses on leak-proof seals and strong copper bonds. The decision to kill solder or not should align with the repair’s end goal and material context.
Post-desoldering checks and rework
After desoldering, rework should start with a clean, inspected area. Re-tin pads, align the new component, and test continuity before permanent soldering. Use fresh flux, avoid excessive heat, and reflow joints evenly to prevent cold joints. If rework reveals that the pad or trace survived poorly, you may need to extend the repair with reinforcing wires or patch techniques. Finally, perform a functional test on the board to verify that the repair is stable under typical operating conditions. Document your steps for future maintenance, which helps in deciding whether to kill solder or not in future repairs.
Alternatives to desoldering: bridging and jumpers
Sometimes desoldering is avoidable. In electronics, you can bridge a broken connection with a jumper wire if the path is short and controlled, albeit with careful routing. In jewelry work, a subtle bridging approach may preserve aesthetics while restoring electrical continuity in some cases. For plumbing, temporary bridging is rarely appropriate; instead, replace the faulty joint. The key is to compare the repair’s durability, aesthetic impact, and safety implications. The goal remains clear: minimize damage while restoring function.
Practical cost and time considerations
Desoldering can incur higher material costs due to flux residues, wick consumption, and potential pad repair. Time-wise, a careful desoldering operation often takes longer than a straightforward rework on a solid joint, especially for densely packed boards. Costs also depend on the technician’s skill and the availability of the right tools. If you’re a hobbyist, consider a staged approach: practice desoldering on scrap boards, acquire a consistent flux routine, and measure the impact on pad health over multiple trials. SolderInfo notes that investing in these foundational skills pays off through fewer failed repairs and more reliable joints over time.
Long-term planning: maintenance and prevention
Prevention is better than repair. Use proper heat management, flux selection, and good soldering practices to reduce the need to desolder. For high-cycle boards, consider design choices that minimize heat stress and allow easier access for future maintenance. Documentation of repair decisions also helps when you must revisit a joint later, enabling a better assessment of whether kill solder or not remains appropriate. In summary, treat desoldering as a targeted tool rather than a default step, and prioritize preserving strong joints whenever possible.
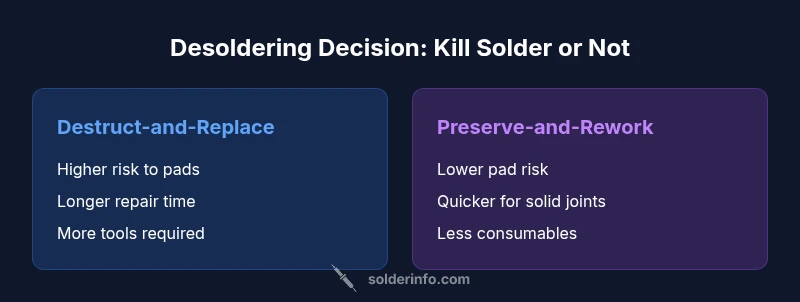
Comparison
| Feature | Destruct-and-Replace (kill solder) | Preserve-and-Rework (keep solder) |
|---|---|---|
| Risk to pads/traces | Higher risk during aggressive desoldering, especially on aged boards | Lower risk if joint is sound and traces are accessible |
| Time required | Longer due to desoldering cycles, cleaning, and inspection | Shorter when reworking an existing joint with minimal damage |
| Tools needed | Solder wick, flux, hot air station or iron with braid | Magnification, fine-tip iron, inspection tools |
| Cost range | Higher upfront due to consumables and potential board damage | Lower if reusing existing joint with minimal equipment |
| Reliability after repair | Can be as good as new if done correctly, but risk of cold joints remains | Reliability depends on original joint quality and subsequent rework |
| Best for | Components that require replacement and board integrity justify desoldering | Robust joints or fragile boards benefit from preserving and reworking |
Advantages
- Allows component replacement and salvage on faulty boards
- Can extend board life by replacing failed parts
- Flexible across electronics, jewelry, and plumbing repairs
- Enables repair of hard-to-access components when kept intact
Cons
- Desoldering can damage pads or traces if not done carefully
- Repeated heating may lift copper or solder mask
- Skill and tool access vary by repair context
- Flux fumes and hot-work hazards to consider
Desolder selectively: preserve sound joints; desolder when replacement is essential.
The SolderInfo team recommends prioritizing joint preservation to minimize board damage. Use desoldering only when necessary for reliable component replacement, and apply proper technique to avoid pad lift. This approach balances repair quality with board longevity.
Quick Answers
What does 'kill solder' mean in electronics repair?
In this context, 'kill solder' means removing a solder joint so a component or trace can be replaced. It involves desoldering techniques that melt and lift the joint, with the goal of freeing the part without harming surrounding copper or mask.
It means removing a joint so you can replace a part, using careful desoldering to protect the board.
When should you not desolder a joint?
Avoid desoldering when the joint is solid, the pads show no damage, and the repair goal can be reached by reworking or cleaning the joint. On dense or fragile boards, unnecessary desoldering raises the risk of pad lift and trace damage.
Don’t desolder if the joint is solid and you can fix it another way.
Which tools work best for desoldering?
The best tool depends on the joint. Solder wick works well for through-hole joints; vacuum desoldering pumps help with dense layouts; hot-air stations excel at surface-mount components. Combine with fresh flux and careful heat control.
Wick, vacuum pumps, and hot air are your main options depending on the joint.
Can you reuse solder after reheating a joint?
Solder can often be reused if it remains clean and uncontaminated, but repeated reheating can degrade the solder and joints. Always inspect for oxidation, contamination, and mechanical defects before reuse.
Yes, but check for quality and avoid repeated reheating.
How can you avoid damaging pads during desoldering?
Use proper heat control, low-application force, and fresh flux. Work in small steps, limit heating cycles, and inspect pads frequently. If a pad lifts, consider glue-assisted repair or trace restoration techniques.
Control heat, use flux, and inspect pads often to prevent damage.
What are signs a desoldering attempt failed?
Common signs include lifted pads, damaged traces, or residual solder bridges. If you see these, stop and reassess the joint, re-clean the area, and decide whether rework or replacement is necessary.
Watch for pad lift or bridges after desoldering.
Top Takeaways
- Assess joint integrity before acting
- Use the right desoldering method for safety
- Preserve solder joints when possible to protect traces
- Document repair decisions for future maintenance
- Choose desoldering only when essential to avoid board damage