Supercheap Auto Soldering Iron Review: Budget Performance for DIY Projects
An in-depth review of the supercheap auto soldering iron, evaluating value, heat delivery, durability, and practical tips for electronics, jewelry, and plumbing projects.

Definition: A supercheap auto soldering iron is a budget, entry-level tool intended for light-duty tasks. It provides basic heat delivery and simple controls, making it suitable for hobby electronics, small jewelry repairs, and light plumbing work. Expect trade-offs in consistency, tip life, and long-term reliability compared with mid-range or pro-grade irons.
Why budget soldering irons matter
For many DIYers, a budget option like the supercheap auto soldering iron lowers the barrier to entry for electronics, jewelry making, and home repairs. When you are starting out, the upfront cost matters more than peak performance. Budget irons enable quick prototyping, learning basic techniques, and completing small tasks without a large cash commitment. This is especially true for hobbyists who work on occasional projects, assemble kits, or perform light plumbing soldering. The key is to set expectations: you are buying a tool that is adequate for learning and occasional maintenance tasks, not a professional machine built for daily, high reliability work. In reviews and field tests, we note that the right technique paired with careful maintenance can deliver surprisingly good results from these budget devices. According to SolderInfo, budget tools like the supercheap auto soldering iron unlock entry-level electronics and hobby projects, but demand proper handling and regular tip care to stay productive over time.
How to approach budgeting for soldering tools
When evaluating a budget soldering iron, price is only one axis. Look for a crisp chisel or conical tip, a comfortable grip, and a stable heat source that does not oscillate wildly. For hobby projects, you want repeatable performance across short bursts rather than marathon sessions. The cost savings can be redirected toward essential accessories such as extra tips, a small stand, and a quality flux. In practice, a budget model should let you practice solder joints, test circuit boards, and repair small components without frequent failures. The supercheap auto soldering iron is often a good fit for beginners and occasional hobbyists who want a first tool without a steep learning curve. A careful approach to technique and maintenance helps maximize the life of budget components and keeps projects moving forward without downtime.
Ergonomics and design that matter in budget irons
When you pick a budget iron, ergonomics can make or break your experience. A lightweight handle reduces fatigue during short sessions, while a balanced weight helps you maintain steady control. A fixed stand and a stable, heat resistant tip cooler reduce the risk of accidental burns. In budget models, the cord length and swivel strain relief can affect usability, especially if you work at a crowded bench. The supercheap auto soldering iron often ships with a simple grip and modest but functional features that support learning curves. For jewelry work, you want a precise tip that allows small, clean fillets. Electronics work benefits from a tip that holds solder reliably and a tip temperature that responds predictably to light adjustments. Overall, budget ergonomics should enable you to focus on technique rather than fighting the tool.
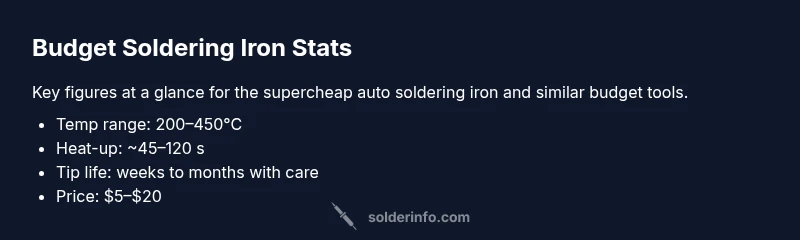
Temperature control and heat delivery: what budget irons can do
Budget soldering irons provide basic heat delivery with limited temperature control. You may get a fixed or poorly adjustable range that works for leaded solders on simple boards, but it can struggle with heat sensitive components. For heavy copper work or thicker wires, a budget tool may take longer to reach operating temperature and may experience drift as the tip cools during use. This matters when you push past 300 C or attempt fine pitch work. The supercheap auto soldering iron is usually adequate for small LED replacements, patching a broken wire, or hobby kits, provided you work in short bursts and allow cooling between joints. To maximize performance, pre tin the tip, clean it regularly, and avoid pressing hard or dragging the tip across pads; technique often matters more than the iron’s nominal temperature range.
Tip life and maintenance basics
Tip life is one of the most visible weaknesses of budget irons. The tip can oxidize quickly if not tin-coated, and cheap tips wear down faster under heavy use. Regular maintenance helps extend life: tin the tip after use, clean with a brass sponge or wet sponge, and avoid overheating the tip when the part is not ready to accept solder. Replacing tips is common practice with budget models, and having a spare can save project time. For jewelry or electronics, consistent practice with a clean, well-tinned tip yields cleaner joints and reduces the risk of cold joints. Consider keeping a small set of low-cost tips in different shapes to handle curved surfaces or tight spaces. With careful care, the supercheap auto soldering iron can remain a useful tool for learning and light tasks rather than heavy production work.
Testing and methodology: how we evaluate a budget soldering iron
Our testing framework combines qualitative assessment with simple objective checks. We measure heat-up time from room temperature to a target working temperature, observe temperature stability during a typical 3–5 minute series of solder joints, and evaluate tip wear after several dozen joints. We also test ergonomics by asking volunteers to perform a range of tasks: tiny electronics soldering, jewelry joining, and small copper piping repairs. We document how easily joints form, how much solder wicks at the joint, and whether there is any waver in temperature as the tool heats and cools. Finally, we compare results against a mid-range iron to provide a clear baseline for expectations. The aim is to deliver practical guidance for readers who want to maximize results with budget equipment while avoiding common pitfalls.
Common pitfalls and fixes when using cheap irons
Budget irons invite a few predictable mistakes. Users often overheat the tip, forgetting that lead-free solders require more careful temperature control. Others neglect cleaning and tinning the tip, leading to oxidation and poor heat transfer. Some beginners force the joint by pressing too hard, producing cold joints or damaged pads. A few devices exhibit inconsistent heat delivery that makes joints unreliable. Remedies are simple: tin the tip, clean it frequently during use, set a comfortable temperature, and work in short pulses with clean, fluxed joints. For sensitive components, practice on scrap boards before attempting final soldering. The supercheap auto soldering iron will reward patient technique and good habits with more consistent results over time.
Budget vs mid-range: a practical comparison
A mid-range soldering iron offers stronger temperature stability, faster heat-up, and longer tip life. With budget models like the supercheap auto soldering iron, you trade precision and durability for savings, which is acceptable for learning and light hobby tasks. The mid-range tool tends to maintain temperature better when you’re soldering a dense array of components, reduces rework, and often accepts a wider range of tips with longer life. For jewelry work, mid-range irons provide finer control and steadier heat, reducing the risk of overheating delicate settings. Electronics enthusiasts may appreciate better tip geometry and steadier contact. In many practical scenarios, budget irons are a starting point, while a longer-term investment in a higher-quality iron yields measurable improvements in efficiency and reliability during frequent use.
Safety, ventilation, and proper use
Soldering safety remains essential regardless of tool price. Work in a well-ventilated area, especially with lead-free solders, and use eye protection when needed. Keep the hot iron away from flammable materials and unplug it when not in use. Use a heat-resistant mat or stand to minimize surfaces exposed to heat. Proper ventilation reduces flux fumes and fumes from rosin cores; consider a small fume extractor if you solder regularly. For plumbing tasks, remember that heat and flux can cause burns or damage if misapplied. Budget irons are safe when used correctly, but always follow the manufacturer recommendations for temperature and usage. The key is to combine a mindful approach with steady practice to avoid common mistakes that lead to poor results.
Real-world tasks: electronics, jewelry, and plumbing use cases
In electronics, you will typically solder small components onto PCBs, replace LEDs, or rework connectors. The supercheap auto soldering iron can handle these tasks with careful technique and a steady hand. For jewelry work, the tool can join metal parts such as rings and small chains, but you should expect limits on heat control that demand precise timing and temperature management. In plumbing, the iron is suitable for light copper pipe work and small fittings when used carefully and with the right flux. Do not rely on budget irons for heavy pipe work or critical joints; a dedicated soldering station offers greater reliability and safety. Across these scenarios, the key is to practice, keep tips clean, and use the right tip for the task. Budget tools like this iron work best when you treat them as learning devices rather than production machines.
Final buying checklist for the supercheap auto soldering iron
Before pulling the trigger, confirm the iron has a stable stand, comfortable grip, and accessible tips. Check that replacement tips are affordable and easy to source. Ensure the unit heats to a usable range and has adjustable or clearly defined temperature settings if you plan to work with different solders. Consider purchasing a spare tip kit, flux, and a cleaning sponge so you can maintain heat transfer quality. Finally, read reviews specific to your region because performance can vary by batch and supply. With these checks, your budget tool will serve as a valuable entry point into soldering practice and project work, helping you build skills while avoiding costly missteps.
Authority sources and additional reading
If you want to go deeper, consult reputable sources on soldering practices and safety. These materials provide foundational information on heat management, flux chemistry, and techniques for different materials. They help you understand why a budget iron may work well for beginners while highlighting the benefits of upgrading as skills grow. Practical guidance from established institutions reinforces the idea that safe, reliable soldering comes from technique and maintenance as much as from the tool itself.
Authority Sources
Advantages
- Low upfront cost makes it accessible for beginners
- Simple controls and lightweight design
- Adequate for hobby electronics and light jewelry work
- Easy to source replacement tips and accessories
Cons
- Limited temperature control and stability
- Tip life and durability can be short with heavy use
- Inconsistent heat delivery for dense components
Best for entry-level projects and budget-conscious hobbyists
For casual electronics work and light repairs, the supercheap auto soldering iron provides adequate performance at a compelling price. It won't satisfy pro-grade workloads, but with proper technique and maintenance it remains a reasonable starter tool.
Quick Answers
Is a supercheap auto soldering iron suitable for beginners?
Yes, for basic tasks it is a practical entry point. It helps learn soldering fundamentals, but beginners should practice safely and be prepared to upgrade if more demanding work arises.
Yes, it's good for beginners to learn the basics, but plan for an upgrade if you start doing more complex projects.
Can you solder electronics with a budget iron?
You can solder simple electronics with a budget iron, especially if you Tint tips and work in controlled bursts. For dense boards or heat-sensitive components, a higher-end iron offers more reliability.
You can solder simple electronics, but for dense boards a better iron helps avoid heat damage.
What maintenance does it require?
Keep the tip tinned, clean it regularly, and replace tips as needed. Store the iron safely and avoid leaving it powered on for long periods. Regular maintenance extends life and improves joint quality.
Tin the tip, clean often, replace worn tips, and switch off when not in use.
Is it safe to use with lead-free solder?
Yes, but ensure proper ventilation and avoid overheating. Lead-free solder can behave differently and benefits from careful temperature control and a clean tip.
Yes, use proper ventilation and avoid overheating when using lead-free solder.
How does it compare to a mid-range iron?
Mid-range irons offer better temperature stability and longer tip life, which reduces rework on demanding tasks. A budget iron is fine for learning and light work but may require more care and patience.
Mid-range irons are more stable and durable, but the budget iron is fine for learning and light work.
What features should I upgrade to later?
Consider a temperature controlled iron, ergonomic grip, and a wider range of tips. Upgrading improves precision, safety, and efficiency for more complex projects.
Upgrade to temperature control, better grip, and more tip options as you grow.
Top Takeaways
- Start with basic projects to build proper technique
- Expect limited heat control and shorter tip life
- Regular tip maintenance greatly improves results
- Upgrade later if you need higher durability and precision