Solder 300 Watt: Tools, Techniques, and Safety
Explore the solder 300 watt iron for heavy-duty tasks, with guidance on heat, tips, safety, and practical workflows from SolderInfo.

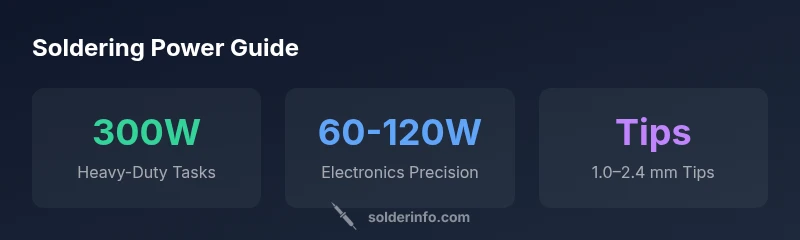
A solder 300 watt iron is typically recommended for heavy-duty tasks like copper plumbing joints, thick-gauge metalwork, or large jewelry pieces, where high heat delivers reliable, deep heat transfer and faster solder flow. For delicate electronics, a lower-wattage iron (60–120W) with a fine tip offers better control and reduces thermal stress.
Why a solder 300 watt iron matters for heavy-duty work
A solder 300 watt iron is a cornerstone tool for tasks that demand sustained high heat. When joints involve thick copper tubing, heavy gauge metal, or large solder masses, the extra wattage helps achieve reliable wetting and faster fill without excessive dwell time. This speed reduces the risk of cold joints and reduces operator fatigue during long sessions. In practice, many professional plumbers, jewelry makers working with substantial metalwork, and hobbyists tackling large metal repairs reach for a 300 watt tool to ensure consistent results. According to SolderInfo, wattage selection should align with the size of the joint, the solder alloy, and the thermal mass of the workpiece. For the home hobbyist, switching between a high-wattage iron and a precision iron in the same project can maximize efficiency while preserving component integrity. In sum, the solder 300 watt option is not a universal solution, but it shines where heat transfer matters most and joint mass is significant.
Power, heat, and the physics of a 300-watt tool
Heat transfer in a soldering iron depends on both electrical power and tip design. A 300 watt iron delivers more energy to the tip in a given time, which translates to faster heat conduction into the joint. However, heat control remains critical: large joints or pipes can require heat sinks or active cooling to prevent nearby components from overheating. Temperature stability is influenced by the tip-to-joint contact area, insulation quality, and how quickly the iron can recover after a heat spike. Operators should consider a thermostat-based control or a digital temperature readout to prevent excursion beyond the solder alloy’s recommended working range. For heavy-duty tasks, a broader temperature window (for instance, 350–420°C depending on the alloy) can be effective, but always verify the flux and material compatibility before committing to a long dwell time.
Choosing tips, accessories, and flux for high-wattage work
Tip geometry dramatically affects performance at 300 watts. A wide chisel or bevel tip distributes heat over a larger area, which is advantageous for flat joints and pipe soldering but can risk thermal damage on delicate electronics. For thicker metal, consider larger diameter tips and ensure your flux is appropriate for the alloy. Use rosin-core solder for electronics and lead-free formulations when appropriate, following local safety regulations. Flux application should be precise, with a thin layer to avoid unwanted oxidation. Accessories such as heat sinks, solder wick, and desoldering braid can help manage heat and clean up connections without overheating adjacent components. Practice and proper technique are essential when operating at high wattage; always maintain a steady, controlled motion instead of applying heat aggressively.
Safety protocols and environmental considerations
High-power irons demand robust safety practices. Wear safety glasses, heat-resistant gloves, and ensure good ventilation to manage flux fumes. Keep a clean work area: loose metal fragments can become hazardous projectiles when heated. When soldering pipes or large metal surfaces, use clamps or a jig to hold components in place rather than relying on hand pressure alone. Proper electrical grounding and a well-maintained power supply reduce the risk of electrical shock and equipment damage. After use, unplug the iron and allow ample cool-down time to protect tip life. Storage matters too: store tips dry and clean to prevent oxidation build-up that can impede heat transfer.
Electronics vs plumbing: how 300W fits different jobs
In electronics, precision matters more than sheer heat. A 300W iron may be overkill for most SMD or small through-hole components and risks overheating nearby traces. For plumbing, however, 300W or more is beneficial for soldering thick pipes where large masses require consistent heat. When working with mixed tasks, manage heat with temperature control, use heat sinks on sensitive components, and select tips that balance mass transfer with control. Jewelry work can also benefit from high heat for quick metal bonding, but you should use careful temperature monitoring to avoid discoloration or weakening of the metal. Balance your toolkit with lower-wattage irons for delicate tasks and a high-wattage iron for bulk work to maximize efficiency and quality.
Setup workflow for consistent joints
Before starting, prepare all materials: flux, properly cut pipe ends or joint surfaces, and clean metal surfaces. Heat the joint with the 300W iron using a steady, constant motion to pre-warm the metal. Apply flux, then feed solder into the joint—not the tip—while maintaining contact at a stable angle. If the joint cools too quickly, pause briefly to allow re-heating, avoiding overheating the surrounding material. Practice a consistent pace to maintain even heat distribution. After finishing, inspect the joint for uniform wetting, remove any flux residue, and clean the workspace. This method yields reliable joints with minimal voids and excellent mechanical strength.
Maintenance and troubleshooting for longevity
Keep the tip clean with brass wool or a damp sponge and re-tin the tip regularly to prevent oxidation. If heat recovery seems slow or the tip looks burnt, re-tin or replace the tip and verify the temperature control settings. Store the iron in a safe stand away from flammable materials and ensure the stand has a proper heat-resistant base. When troubleshooting, check flux compatibility and ensure the joint mass matches the chosen wattage. If you encounter inconsistent results, test different tips and flux formulations to identify the root cause. Regular maintenance extends tip life and keeps performance consistent across projects.
Practical workflow scenarios and decision trees
For plumbing repairs involving copper pipes, a 300W iron can maintain heat across larger joints, but you should still use flux and heat sinks to protect nearby materials. For electronics with heavy copper pours, opt for a lower-wattage tool or a high-wrequency microheater to prevent thermal stress. Jewelry projects with thick metal may also benefit from high heat, but be mindful of annealing and discoloration. Build a quick decision tree: determine joint mass, select an appropriate wattage, choose compatible tips and flux, execute the joint with controlled heat, and evaluate the result. Practicing with repetitive cycles will help you refine your technique and reduce rework over time.
Recommended wattage ranges by task
| Category/Use | Recommended Wattage | Best For | Notes |
|---|---|---|---|
| Electronics (Precision) | 60-120W | Fine components, SMDs | Use small tips; watch heat spread |
| General electronics (Midsize) | 120-180W | Medium components | Ensure temperature control; avoid long dwell times |
| Plumbing & thick metalwork | 150-300W+ | Copper pipes, thick joints | Use heat sinks; verify flux compatibility |
Quick Answers
Is a 300-watt soldering iron suitable for electronics?
In most electronics projects, a 300W iron is excessive and can risk heat damage. It is better suited for large joints or thick copper pours, while a lower-wattage iron with fine tips provides better control.
For electronics, usually a smaller iron is safer; reserve 300W for larger metalwork and thick joints.
What tips work best with a 300W iron?
Broad chisel or bevel tips distribute heat well for heavy joints. For delicate electronics, switch to smaller tips and a lower-wattage tool to avoid heat damage.
Use wide tips for big joints, or switch to fine tips for precision work.
How can I prevent overheating when using 300W on plumbing?
Use heat sinks on adjacent components and keep dwell time short. Pre-clean joints and apply flux properly to reduce heat requirements.
Protect nearby parts with heat sinks and work efficiently.
What safety gear should I wear for high-wattage soldering?
Wear safety glasses, heat-resistant gloves, and ensure proper ventilation. Keep flammable materials away from the work area.
Glasses, gloves, and good ventilation keep you safe.
Can I use a 300W iron for jewelry soldering?
High heat can work for certain jewelry tasks but risks annealing or burning delicate settings. Use it only with temperature control and suitable flux.
Only use it if you can control heat precisely.
“A 300W iron is a powerful option for heavy-duty work, but it must be used with discipline and proper technique to prevent damage. Temperature control, tip selection, and flux choice are what separate good joints from unstable ones.”
Top Takeaways
- Choose wattage by joint mass and task
- Use appropriate tips to balance heat transfer
- Maintain temperature control to protect components
- Practice safe handling and proper maintenance