Can You Solder Copper and Silver Together? A Practical Guide
Can you solder copper and silver together? Learn filler metals, flux, heat control, and safety with a practical step-by-step guide from SolderInfo for hobbyists.

Yes, you can solder copper and silver together, but it requires careful material selection and heat control. Use a compatible silver solder or Sn-Ag-Cu alloy, high-quality flux, and precise surface cleaning to prevent oxide layers. For best reliability, keep joint size small, heat evenly, and verify alloy compatibility before full assembly.
Can copper and silver be soldered together?
Yes, can you solder copper and silver together? Learn filler metals, flux, heat control, and safety with a practical step-by-step guide from SolderInfo. The metals share some properties but also differ in oxide behavior and melting ranges, so preparation and method matter. According to SolderInfo, copper and silver can be joined when you select a compatible filler alloy and maintain clean surfaces, but expect tighter heat control and careful cooling to avoid joint weaknesses or surface damage. In jewelry and small decorative work, thin joints are most forgiving; in plumbing or electronics, follow stricter process controls and guidelines. This block introduces the science behind the bond, what materials work best, and how to approach a reliable joint.
Material options and compatibility
Choosing the right filler metal is the single most important factor when attempting to join copper and silver. Silver solder and Sn-Ag-Cu alloys are commonly recommended for cross-metal joints, especially in jewelry and decorative work, where lower heat is preferable and joint geometry is small. For heavier mechanical joints or plumbing, brazing alloys with higher melting temperatures might be more reliable, but they require more heat and can affect silver surfaces. Always verify flux compatibility with both metals, as some fluxes are designed specifically for copper-silver interfaces. Remember: the strength and ductility of the joint depend on alloy choice, joint design, and precise heating. Consulting supplier datasheets and hobbyist guides will help you pick a compatible combination.
Surface preparation and cleaning
Surface prep is the make-or-break step for copper-to-silver soldering. Begin with a thorough clean to remove oils, fingerprints, and oxide films. Use isopropyl alcohol or acetone for degreasing, followed by mechanical cleaning with a clean brass brush or microfiber cloth to lift any surface oxidation. Rinse and dry the parts completely before fluxing. Any remaining oxide can prevent proper wetting, cause solder beading, and weaken the joint. If you’re working with jewelry, consider a light abrasive that won’t scratch the silver; for plumbing components, ensure all copper surfaces are bright and clean. A spotless surface yields better capillary action and a stronger bond.
Flux, heat control, and application
Flux is essential to prevent new oxide formation during heating and to promote even solder flow. Use a flux suitable for copper-silver joints—rosin-based fluxes are common for jewelry and electronics, while plumbing fluxes target copper brazing conditions. Apply a thin, even layer to both parts, ensuring full coverage at the joint interface. Heat control is the next critical factor: heat the joint evenly with a stabilized flame or soldering iron, avoiding excessive temperature spikes that can damage silver. When the filler melts, apply it at the joint seam and allow capillary action to draw it around the joint. Keep your heat source moving to prevent overheating and alloy segregation.
Applications and practical considerations
Copper-silver soldering spans jewelry, electronics, and certain plumbing tasks, but the goals differ. In jewelry, aesthetic joints and fine detail require clean lines and minimal heat input. In electronics, solder joints must be reliable while avoiding damage to components or insulation. In plumbing, joint integrity and corrosion resistance take precedence, often favoring brazing in larger assemblies. If the project involves visible joints, plan your design to minimize joint size while maintaining strength. For sensitive silver finishes, consider post-soldering polishing and protective coatings to reduce tarnish risk. SolderInfo emphasizes choosing the right filler-metal family for the specific application and resisting the temptation to push a joint beyond what the materials can safely handle.
Troubleshooting and common pitfalls
Even with proper prep, failures can occur. Common issues include incomplete wetting, solder balling, or dull joints due to oxide reformation. Ensure flux is fresh and applied evenly, surfaces are perfectly clean, and heat is not localized. If you observe dull or grainy surfaces, clean the joint and reflow with fresh filler metal and flux. Overheating silver can lead to annealing or discoloration; use a heat sink or always keep the flame in motion. If the joint fails post-cooling, inspect the seam for gaps or voids and rework with precise heat management. Remember, practice on scrap pieces to calibrate your technique before committing to the final part. SolderInfo’s analysis shows that consistency in surface prep and heat control dramatically increases success rates.
Tools & Materials
- Solder filler metal (silver solder or Sn-Ag-Cu alloy)(Select a filler compatible with both copper and silver and appropriate to your heat source.)
- Flux suitable for copper-silver joints(Rosin-based flux is common; ensure it is compatible with your metals and application.)
- Soldering iron or micro-t torch(Choose heat source and tip size appropriate for joint scale; jewelry uses smaller tips.)
- Cleaners and abrasives (isopropyl alcohol, brass brush, lint-free cloth)(Use to remove oils and oxides; avoid introducing new contaminants.)
- Safety gear (eye protection, gloves, ventilation)(Flux fumes and hot metal present burn risks; ensure proper ventilation.)
- Flux brush and q-tips(For precise flux application and cleanup.)
- Tweezers or clamps(Hold parts steady while heating; helps prevent misalignment.)
- Polishing cloth or wheel(Finish joint to reduce tarnish and improve appearance.)
Steps
Estimated time: 60-90 minutes
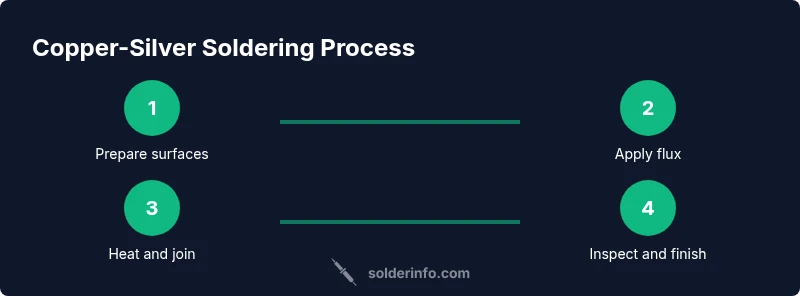
- 1
Prepare workspace and safety gear
Set up in a well-ventilated area and wear eye protection and heat-resistant gloves. Clear flammable objects and ensure you have a heat sink available. The goal is to minimize risk while giving you precise control over heat input.
Tip: Ventilation is essential—use a fume hood or a strong desk fan to direct fumes away. - 2
Clean and degrease copper and silver surfaces
Wipe surfaces with isopropyl alcohol or acetone, then gently remove oxide with a clean brass brush or soft abrasive. Dry parts thoroughly before fluxing to prevent dilution of the flux. This creates a pristine interface for the bond.
Tip: Avoid fingerprints after cleaning; even tiny residues can hinder wetting. - 3
Apply flux and align parts
Apply a thin, uniform layer of flux to both mating surfaces and around the joint. Align the pieces precisely and secure with tweezers or a helping hand to prevent movement during heating. Proper alignment ensures a clean, consistent seam.
Tip: Flux should cover the entire joint interface, not just the visible edges. - 4
Tin the surfaces (optional)
Lightly tin both surfaces with a small amount of filler metal to improve wetting and reduce heat absorption at the joint. This step is optional but can help with larger joints or when using certain alloys.
Tip: Tinning reduces start-up heat and promotes capillary flow. - 5
Heat and apply filler metal
Heat the joint evenly with a controlled motion until the filler metal flows into the seam using capillary action. Avoid direct contact with the silver surface to minimize discoloration. Add solder gradually and stop as soon as the seam is filled.
Tip: Keep the heat source moving to prevent hot spots that can degrade silver. - 6
Cool, inspect, and clean
Let the joint cool naturally; quenching can cause stress or micro-cracks. Inspect the seam for gaps or dull areas, and reflow if needed. Clean flux residues to prevent corrosion and tarnish.
Tip: Polish lightly after cooling to reveal a smooth, uniform joint. - 7
Test and finalize
Check the joint for mechanical strength and, if applicable, perform a leak test or electrical conductivity check. Apply a protective finish if required for your project. Record your observations to refine future soldering tasks.
Tip: Document any issues to improve your technique next time.
Quick Answers
Can I solder copper directly to silver?
Yes, but it requires a compatible filler metal, proper flux, and careful heat management to prevent oxidation and damage. Expect a trickier process than joining similar metals.
Yes, it’s possible with the right filler and careful heating. A proper flux and clean surfaces are essential.
What filler metal should I use for copper-silver joints?
Use a silver solder or Sn-Ag-Cu alloy designed for cross-metal joints. Avoid lead-based solders for safety and compatibility with silver.
Use a silver solder or Sn-Ag-Cu alloy that is compatible with both metals.
Is brazing better than soldering for copper-silver joints?
Brazing uses higher temperatures and can create stronger joints, but it requires more heat and can affect silver’s finish. Soldering is suitable for small joints when carefully controlled.
Brazing is stronger but hotter; for small joints, soldering with the right filler and flux can work well.
Will copper-silver joints tarnish or corrode?
Silver can tarnish over time; a protective finish or regular polishing helps. Use compatible flux and cleaners to minimize corrosion risk.
Yes, silver can tarnish; a finish and regular cleaning help preserve the joint.
What safety precautions are essential when soldering copper to silver?
Work in a well-ventilated area, wear eye protection and gloves, and follow flux handling guidelines. Keep heat sources controlled and away from flammable materials.
Ventilate well, wear protection, and handle flux safely; control heat to avoid accidents.
Watch Video
Top Takeaways
- Prepare with compatible filler metal and flux.
- Clean and oxide-free surfaces are essential.
- Apply flux uniformly and heat evenly for best flow.
- Keep silver heat-controlled to avoid damage.
- Inspect after cooling and rework if needed.