When to Solder Wires: Timing and Best Practices
A practical guide on deciding the right time to solder wires across electronics, plumbing, and jewelry projects. Learn prep, safety, heat management, and inspection for durable, reliable joints.

You will learn how to decide the right moment to solder wires, with practical checks for mechanical stability, heat sensitivity, and insulation integrity. The guide covers electronics, plumbing, and jewelry contexts and stresses prep, timing, and safe heat management. According to SolderInfo, planning the joint before applying heat reduces failures and improves durability. Expect clear steps, real-world examples, and safety notes that apply across disciplines.
Understanding When to Solder Wires
Deciding when to solder wires isn't just a matter of melting metal. It requires evaluating mechanical stress, heat exposure, and the intended use of the connection. In practice, you solder wires when the joint will be electrically active and must remain secure under anticipated use, while ensuring insulation and mechanical strain relief are feasible in the surrounding assembly. According to SolderInfo, timing and preparation are as critical as the solder itself. In electronics projects, you typically plan the joint after routing wires and confirming there will be minimal movement once the joint is formed. In plumbing and jewelry contexts, the decision often hinges on flux availability, insulation requirements, and avoiding damage to nearby seals or materials. By recognizing these cues, you avoid weak joints and costly rework, boosting long-term reliability.
The choice to solder should also factor in future maintenance. If a joint is likely to be disassembled for repair, consider how easily the joint can be reworked. If disassembly is frequent, a solder connection may become less desirable than a mechanical connector. In contrast, if the joint will stay in place for years, a properly executed solder joint tends to provide superior electrical continuity and robustness. This broader view helps you decide not only whether to solder, but how to design the joint for durability across time.
Mechanical Preparation Before Soldering
Mechanical prep is the foundation of a durable solder joint. Start by selecting conductors that match the intended connection and planned current. For wire ends, strip insulation cleanly to expose the copper, leaving enough bare conductor for reliable wetting but not so much that frayed strands become a problem. For stranded wire, twist the strands gently to organize them and prevent mangling during heat. Pre-fit heat-shrink tubing or protective sleeves so they can slide into place after the joint forms. Consider tinning the exposed ends of stranded wire to reduce whiskers and improve wetting, especially on oxidized surfaces. Soldering without thorough prep invites gaps, corrosion, and weak mechanical grip, increasing failure risk under vibration or flexing. A careful prep sequence saves time and yields a more predictable joint.
Heat Management and Soldering Technique
Heat control is the other half of a reliable joint. Use a temperature-controlled iron set to an appropriate range for your solder alloy—lower temperatures for leaded alloys and higher for many lead-free formulations. Apply heat to the joint itself rather than the wire tip, and introduce solder at the joint tip to form a smooth, uniform fillet. Avoid excessive dwell time, which can soften insulation or damage nearby components. If oxidation is present, flux helps the solder wet the surface and reduce resistance. A well-managed heat process yields a shiny, uniform fillet with minimal spatter and little risk of cold joints. In SolderInfo's experience, poor heat control is a leading cause of joints that fail under load or vibration.
Scenarios You Might Encounter
Wiring a power supply, a motor controller, or a high-current feed demands different handling than shielding a signal line. For high-current connections, ensure good heat distribution and consider heat sinks or wider joints to prevent insulation damage. For signal wires, precision and cleanliness are paramount; tinning helps with fast, reliable junctions. In jewelry or plumbing contexts, material compatibility and insulation are even more critical, as heat may affect non-metal components or seals. Regardless of context, ensure there is no risk of cross-contact between adjacent conductors and that insulation remains intact after soldering. A thoughtful assessment of each scenario reduces surprises during testing and service life.
Soldering vs. Mechanical Alternatives
Often, you will encounter situations where a mechanical connection is preferable to soldering every wire. Crimp connectors, screw terminals, or Ferrule-based crimps can provide reliable, vibration-resistant joints with easier future disassembly. However, soldering remains superior for certain electronics tasks, offering lower resistance and a tighter electrical path when done correctly. The choice depends on service conditions, accessibility for maintenance, and design goals. For hobby projects, a hybrid approach—soldered joints where space and heat allow, plus crimps where movement is expected—often delivers the best balance of reliability and serviceability.
Step-By-Step Approach to a Reliable Wire Joint
Implementing a robust wire joint starts with a clear plan. Begin by assessing the environment and confirming the joint’s electrical role and mechanical demands. Then prepare the conductors, including correct stripping, alignment, and optional pre-fit of insulation. Tin ends if needed to improve wetting, apply flux as appropriate, and position the wires securely. Heat the joint evenly, apply solder, and remove heat promptly to avoid overheating insulation. Finally, inspect the joint for a smooth fillet, test continuity, and apply insulation and strain relief to prevent movement. This approach minimizes rework and ensures reliability across cycles of use.
Common Mistakes and How to Avoid Them
Rushed prep, uneven heating, and insufficient insulation are common culprits in failing wire joints. Avoid under-stripping, which leaves insufficient copper for a solid bond, and over-twisting, which weakens strands. Never apply solder to a moving joint or to insulation; heat should wet the copper only. Skipping flux or neglecting insulation can lead to oxidation and short circuits. Always test joints after cooling and verify that mechanical stress will not crack the fillet. By adopting a structured workflow, you reduce the likelihood of recurring failures.
Long-Term Reliability: Insulation, Strain Relief, and Documentation
Durability is built through proper insulation and strain relief, not just a clean fillet. After soldering, slide heat-shrink tubing into place and apply heat evenly to form a tight seal. Add strain relief to protect the junction from flexing or vibration, which can crack joints over time. Keep a simple record of wire types, solder alloy, temperatures used, and inspection notes. Documentation helps with future maintenance and repairs, particularly in complex assemblies. The result is a joint that remains robust under real-world conditions.
Tools & Materials
- Soldering iron, temperature-controlled(Choose a tool with adjustable temperature; typical range 250-350°C for leaded solder, 320-380°C for lead-free.)
- Solder (rosin-core, lead-free)(Diameter about 0.8-1.0 mm; flux included preferred.)
- Flux pen or liquid flux(Rosin-based flux helps prevent oxidation and improves wetting.)
- Wire strippers/cutters(For 22-18 AWG, remove insulation cleanly without nicking copper.)
- Heat shrink tubing(Pre-fit to match wire gauge; 2:1 shrink ratio recommended.)
- Helping hands/third-hand tool(Optional but helps keep joints steady.)
- Safety glasses(Eye protection from molten solder and fumes.)
- Desoldering braid(Optional for corrections.)
- Soldering iron stand(Safe storage between steps.)
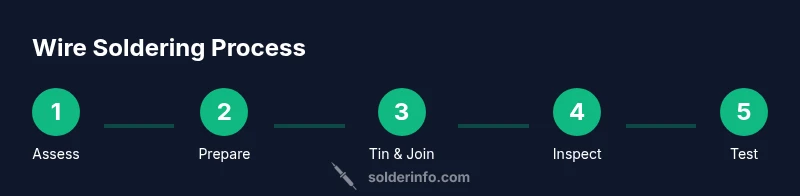
Steps
Estimated time: 15-30 minutes
- 1
Assess the joint requirements
Identify the environment, anticipated mechanical stress, and electrical demands. Decide if soldering is the best method, or if a mechanical joint would be safer or more repairable in this context.
Tip: Document constraints (voltage, current, temperature) before heating. - 2
Prepare the conductors
Cut wires to length, strip insulation evenly, twist strands to neat bundles, and align for soldering. Pre-fit heat-shrink tubing so it can be positioned after the joint forms.
Tip: Keep stripped length consistent and avoid nicking copper. - 3
Tin the ends
Apply a thin layer of solder to the wire ends to improve wetting and reduce whiskers. Use flux if the copper surface shows oxidation.
Tip: A light coat of tin is enough for a reliable bond. - 4
Position and solder
Place wires together, apply heat to the joint, and feed solder to the joint fillet. Remove heat once the fillet forms and the joint wets properly.
Tip: Aim for a clean, shiny fillet with no dull spots. - 5
Inspect and insulate
Check for gaps, bridges, or oxidation. Slide heat-shrink tubing over the joint and apply heat evenly to seal and strain-relieve.
Tip: Use a magnifier if available to catch fine defects. - 6
Test and finalize
Test continuity and insulation resistance; gently flex the joint to confirm durability. Rework if gaps or intermittent contact appear.
Tip: If issues are found, rework with fresh surfaces and re-tin.
Quick Answers
What is the best solder for wires?
Rosin-core solder with a lead-free alloy in the 0.8-1.0 mm range is a solid default for most wires. Use a temperature-controlled iron to prevent overheating.
Rosin-core lead-free solder in the right diameter, with a temp-controlled iron, is a good default for most wires.
Should wires be soldered inside enclosures?
Soldering inside enclosures is fine if heat won't damage nearby parts and there is space for insulation. If heat is a concern, consider alternative methods or removing components temporarily.
Soldering in enclosures is okay when heat is controlled.
Is flux required for soldering wires?
Flux improves wetting and reduces oxidation, especially on oxidized or dirty surfaces. Many solders include flux, but applying additional flux can improve reliability.
Flux helps with wetting and corrosion control.
What are signs of a good solder joint?
A good joint is shiny, smooth, and free of gaps or bridges. It should form a clean fillet that adheres to both wire and pad.
Shiny, smooth, and solid-looking joint.
When should I avoid soldering and use a crimp?
If the installation experiences heavy vibration, frequent flexing, or needs easy disassembly, consider using crimp connectors instead of soldering.
For high-movement or repair-friendly setups, crimping may be better.
Watch Video
Top Takeaways
- Plan the joint context before heating
- Prep wires thoroughly for consistent wetting
- Control heat to protect insulation
- Insulate and provide strain relief for durability
- Test joint integrity after cooling