What to Solder Aluminum With: A Practical Guide
Learn when to braze, which filler metals and flux to use, and how to prep aluminum joints for reliable, strong connections. Practical tips for beginners and seasoned makers.

To join aluminum, you generally don’t solder it with standard solders. Use aluminum brazing alloys (Al-Si or Al-Cu) with a compatible flux, or consider mechanical fasteners or epoxy for non-structural joints. When soldering aluminum, focus on surface prep, clean flux, and controlled heat to avoid oxide formation and metal distortion.
Why aluminum is not friendly to conventional soldering
Aluminum forms a persistent oxide layer that resists wetting by ordinary solders. When you try to solder with standard tin-lead or lead-free solders, the joint tends to fail as the molten metal can’t flow and bond evenly to the surface. This is true even for small jewelry, electronics, or repair projects. The SolderInfo team emphasizes that most reliable aluminum joints come from methods designed for aluminum, not “regular” soldering. This section lays the groundwork for understanding why specialized approaches are needed and what options exist for different kinds of joints.
- Oxide management is critical for any aluminum joint.
- Mechanical strength and thermal expansion must be considered.
- Preparation and surface cleanliness drive success more than raw heat alone.
When to choose soldering vs brazing vs mechanical joints
For aluminum, soldering with typical solders is rarely the best route, especially for load-bearing parts or thick sections. Brazing with aluminum-compatible filler metals or specialized aluminum solders is usually preferred for metal-to-metal joints. If the joint is non-structural or requires quick disassembly, mechanical fasteners, rivets, or epoxy-based adhesives can be suitable alternatives. This section helps you decide the best technique based on joint type, environment, and required strength, and it highlights how the choice changes for plumbing, automotive, or electronics applications.
Surface preparation essentials
Successful aluminum joints hinge on surface prep. Begin by degreasing and cleaning the parts, then remove the oxide layer mechanically with a stainless steel brush and light sanding. Rinse and dry thoroughly to prevent residue from interfering with flux. Any fingerprints, oils, or moisture can ruin capillary action and wetting. The goal is a clean, oxide-free surface that invites the filler metal to flow and bond evenly.
Aluminum brazing alloys and flux options
Unlike copper, aluminum requires specialized brazing alloys and flux designed for oxide-rich surfaces. The common approach is to use aluminum-brazing filler metals and flux that promote wetting and capillary action. Choose an alloy compatible with your base metal (e.g., Al-Si or Al-Cu) and ensure the flux is suitable for aluminum joints. Remember that the flux is as important as the filler metal for achieving a solid bond, especially on thicker parts where heat distribution matters.
Flux selection and application techniques
Flux for aluminum brazing serves two purposes: it protects the joint from oxidation during heating and helps the filler metal flow into the gap. Apply flux thinly and evenly along the joint before heating. Do not saturate the area with flux to avoid excessive spatter or flux residue after cooling. A clean, controlled application reduces the chance of inclusions or porosity in the joint.
Cleaning and oxide removal techniques
Even after degreasing, a light oxide layer may reform if you don’t work quickly. Use a stainless steel brush or abrasive pad to scrub the joint surface just before applying flux. For more stubborn oxide, a brief mechanical scuffing with fine-grit paper can help, but avoid deep scratches that can weaken the joint. Always re-clean with a solvent like acetone after scuffing to remove metal particles and oils.
The right tools and workspace setup
Set up in a well-ventilated area with a stable work surface. Essential tools include a propane or MAP-gas torch, aluminum brazing filler rods, flux formulated for aluminum, a stainless steel brush, degreaser, and heat-resistant gloves. Use clamps or a heat sink to manage heat input and protect thicker areas from warping. Organize parts so you can maintain a steady, controllable heat flow during brazing.
Step-by-step overview for a typical aluminum joint
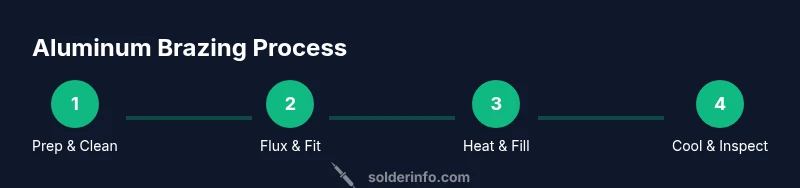
A successful aluminum joint blends proper prep, flux application, and controlled heating with consistent filler distribution. Start with clean parts, apply flux, align the joint, gradually heat to brazing temperature, feed the filler metal to the joint, and then allow it to cool slowly. Inspect for a continuous, glossy bond with minimal discoloration. This overview sets the stage for the more detailed, step-by-step process in the dedicated section.
Common mistakes and how to avoid them
Avoid overheating; aluminum conducts heat quickly and can warp if exposed to too much heat or dwell time. Don’t skip degreasing or oxide removal, which can prevent wetting. Use the correct filler alloy for your base metal and ensure the flux is appropriate for aluminum. If a joint fails, re-clean, re-flux, and reattempt with adjusted heat control rather than applying more solder blindly.
Alternatives for electronics, thin sections, or non-structural joints
For delicate electronics or thin aluminum pieces, mechanical approaches or conductive adhesives may be preferable to brazing. If the joint carries low loads, an epoxy with good thermal conductivity can be a viable choice. For ever-changing temperatures, consider using flexible adhesives or fasteners designed for aluminum to avoid brittle joints and repetitive heating stress.
Safety, ventilation, and personal protective equipment
Always work in a ventilated area and wear eye protection, gloves, and a protective apron. Aluminum brazing generates flux fumes and metal vapors, so ensure adequate exhaust and, if needed, use a respirator. Keep a fire extinguisher nearby and maintain a clutter-free workspace to prevent accidental contact with hot tools. Safe practices protect you and improve joint quality.
Tools & Materials
- Propane or MAP-gas brazing torch(Steady flame and heat control; prefer adjustable regulator)
- Aluminum brazing filler metal (Al-Si or Al-Cu alloy)(Choose alloy compatible with your base metal)
- Flux for aluminum brazing(Flux is essential for oxide removal and wetting)
- Stainless steel brush(Use to scrub oxide away before fluxing)
- Degreaser or acetone(Remove oils and fingerprints from surfaces)
- Sandpaper or abrasive pad (grit 180-320)(Provide light surface profile for better bonding)
- Clamps or heat-resistant gloves(Maintain joint alignment and protect hands)
- Safety gear (goggles, gloves, respirator as needed)(Protect from fumes and radiant heat)
- Rags and solvent container(Clean up flux and residue after joint completion)
- Fireproof mat or metal tray(Contain any flux drips and protect bench)
Steps
Estimated time: 60-120 minutes
- 1
Prepare workspace and safety gear
Set up in a well-ventilated area with a stable surface. Don PPE and ensure tools are within reach. Clear the zone of flammable materials.
Tip: Have a fire extinguisher accessible and work with minimal clutter. - 2
Degrease and clean the aluminum surfaces
Wipe both parts with degreaser or acetone. Ensure surfaces are dry and free of oils and fingerprints to promote good bonding.
Tip: Use fresh towels and work one area at a time to prevent contamination. - 3
Remove the oxide layer
Scrub the joint faces with a stainless steel brush and light sanding to expose clean metal. Re-clean to remove oxide dust.
Tip: Don’t gouge the base metal; keep a smooth surface. - 4
Apply flux to the joint
Evenly coat the joint with flux to prevent re-oxidation during heating and to aid filler flow.
Tip: Avoid puddling flux; a thin, even coat works best. - 5
Position parts for a tight fit-up
Hold components in alignment with clamps or jigs. A good fit-up makes capillary action easier.
Tip: Check for gaps and fill with a small amount of filler metal before heating. - 6
Heat gradually and bring to brazing temperature
Apply heat evenly around the joint. Avoid direct flame on the filler if possible to prevent overheating.
Tip: Preheat to a gentle, consistent temperature; avoid overheating the thick areas. - 7
Feed the filler metal into the joint
Touch the filler to the joint and allow capillary action to draw it in. Maintain heat until the joint is fully filled.
Tip: Dip the filler into the molten zone softly—avoid dumping metal into one spot. - 8
Cool the joint gradually
Let the assembly cool slowly to minimize stress and distortion. Do not quench in water while hot.
Tip: Use a heat sink on thick areas to reduce run-away heating. - 9
Inspect and clean
Check for a continuous bead and good bonding. Remove flux residue and inspect for porosity or gaps.
Tip: If in doubt, rework with fresh flux and a controlled heat cycle. - 10
Evaluate alternatives if needed
If the joint is critical or fails, consider mechanical fasteners or a different method such as epoxy or riveting.
Tip: Always test joints with gentle load before final use.
Quick Answers
Can you solder aluminum with regular solder?
Regular solders struggle to wet aluminum due to the oxide layer; joints often fail. Aluminum brazing alloys with proper flux are the recommended route for reliable joints.
Regular solders don’t wet aluminum well; aluminum brazing alloys with proper flux are preferred.
Is brazing better than soldering for aluminum?
For most aluminum joints, brazing with aluminum-compatible filler provides stronger, more reliable bonds than conventional soldering. Soldering can work for very thin or non-structural parts but is less durable.
Brazing is usually the better choice for aluminum joints; soldering is limited to non-structural or thin parts.
What safety precautions should I observe when soldering aluminum?
Work in a well-ventilated area, wear eye protection and gloves, and use a respirator if fumes are excessive. Keep a fire extinguisher nearby and avoid overheating the metal.
Ventilate well, wear PPE, and keep a fire extinguisher handy. Avoid overheating aluminum.
Can I solder aluminum electronics?
Soldering aluminum electronics is generally not recommended due to oxide formation and heat sensitivity. Use compatible connectors, or consider mechanical interconnections or conductive adhesives designed for electronics.
For electronics, consider connectors or adhesives rather than direct aluminum soldering.
What surfaces are suitable for aluminum brazing?
Flat or moderately curved surfaces with a clean, oxide-free interface are best. Very thick or highly mismatched joints may require clamping and careful heat control to avoid distortion.
Clean, flat, or gently curved surfaces bond best; clamp and heat carefully for thicker joints.
Do I need special equipment to start brazing aluminum?
A capable propane or MAP-gas torch, aluminum brazing filler, recovery flux, and appropriate PPE are the core setup. You may also use a jig or clamps to keep parts aligned during heat application.
You’ll need a brazing torch, aluminum filler, flux, and PPE to start.
Watch Video
Top Takeaways
- Aluminum requires oxide control and proper prep.
- Use aluminum-specific brazing alloys and flux, not standard solders.
- For non-structural joints, alternatives like epoxy or mechanical fasteners may be suitable.
- Heat management and joint fit are critical for success.
- Inspect and clean joints thoroughly after brazing.