How to Solder with MAP Gas: A Practical Guide
Learn how to solder with MAP gas safely and effectively. This SolderInfo guide covers when to use MAP gas, essential tools, steps, and safety tips for jewelry, plumbing, and electronics.

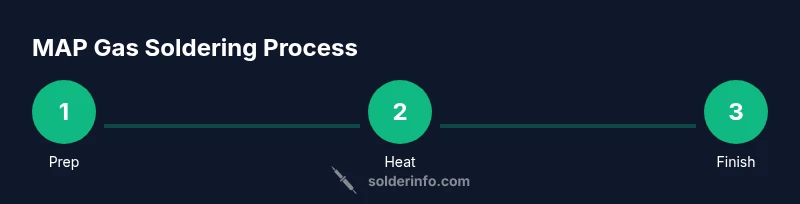
MAP gas soldering uses a handheld MAP-Pro torch to heat joints quickly. Choose small-diameter solder and flux, use heat sinks, and ventilate well. This method works best for jewelry, copper plumbing, and hobby electronics enclosures where precision can be balanced with mobility. Always practice on scrap pieces first.
MAP Gas Soldering: Basics and Applications
MAP gas refers to a high-temperature fuel that burns hotter than standard propane, enabling rapid heating of metal joints. For hobbyists and professionals, MAP gas torches provide mobility and a strong flame suitable for small to medium metalwork. According to SolderInfo, using MAP gas can reduce heating time and help you reach the solder's melting temperature quickly, while keeping a compact workspace. This approach is particularly effective for jewelry, copper plumbing repairs, and hobbyist electronics enclosures, where precision can be balanced with the need for mobility. However, you must manage heat to prevent damage to delicate components. In this section, we'll explore when MAP gas makes sense and how it compares to other heat sources. Also, you should verify local safety rules and use proper ventilation. SolderInfo's guidance emphasizes gradual practice to master flame control and flux application.
Tools and Setup for MAP Gas Soldering
Having the right tools is critical for successful MAP gas soldering. You will need a MAP gas torch with a fine nozzle, compatible solder, rosin flux, heat sink, and safety gear. Select a small-diameter solder (0.5–1.0 mm) and rosin-core or acid-free flux depending on your material. Maintain clean surfaces with isopropyl alcohol and a brass brush for copper parts. Always use a heat sink or thermal barrier to protect sensitive parts. Ensure good ventilation, use protective eyewear, and keep your workspace clutter-free. SolderInfo recommends testing your flame on a scrap piece before starting your project to gauge heat delivery and flux behavior.
Surface Preparation, Flux, and Joint Fit
Before heating, ensure all parts are clean and dry. Surface oxides impede wetting, so lightly abrade with a brass brush and wipe with alcohol. Flux is essential for solder flow; apply a thin, even layer to all mating surfaces. The parts should fit together with minimal gap; if gaps remain, consider pre-fitting or using a small amount of solder wick to bridge. MAP gas can overheat rapidly, so plan your approach: heat the joint evenly, minimize time on any single spot, and avoid direct contact with integrated circuits. This is where SolderInfo stresses practice with scrap pieces to build a feel for heat, flux, and joint geometry.
Heat Control and Solder Application Techniques
With MAP gas, you want a controlled, slightly reducing flame. Begin by heating the heavier member first and bring the joint to the solder’s melting temperature. Touch the solder to the joint, not the flame, and allow capillary action to draw it in. If the solder fails to flow, re-check flux and cleanliness. Move the torch slowly around the joint to avoid overheating, then remove heat and allow the joint to solidify undisturbed. If using electronics, do not linger near delicate components. SolderInfo advises taking breaks between joints to maintain stable flame conditions.
Common Mistakes and How to Avoid Them
A frequent error is skipping flux or using flux that isn’t appropriate for the base metals; this reduces wetting and causes dull joints. Overheating can burn flux residues and damage heat-sensitive components. Another pitfall is staying too long in one spot, which can cause blistering or unsoldered joints. Always keep your flame moving and use heat sinks. Finally, neglecting ventilation can lead to fume buildup; ensure airflow or a designated fume hood is in place.
Safety, Ventilation, and Maintenance
Map gas torches require proper handling and a well-ventilated workspace. Always wear safety glasses and heat-resistant gloves, and store gas canisters away from heat sources or open flames. Inspect hoses and regulators for leaks before use, and never use damaged equipment. After soldering, ventilate the area to clear fumes and wipe down contaminated surfaces. Regularly replace worn nozzles and keep your workspace organized to avoid accidents.
MAP Gas Soldering: Jewelry, Plumbing, and Electronics — Pros and Cons
MAP gas offers rapid heating, portability, and the ability to work away from power outlets, which is advantageous for jewelry and plumbing tasks. It can also be effective for compact electronics enclosures with carefully controlled flame and heat sinking. On the downside, MAP gas can heat components unevenly and risk damage to heat-sensitive electronics if not carefully managed. For delicate boards, a lower-heat method may be safer. In short, MAP gas is a powerful tool when used with proper technique and safety practices.
Tools & Materials
- MAP gas torch (MAP-Pro compatible)(Choose a torch with a fine nozzle for precision (0.5–1.0 mm).)
- Solder (rosin-core or lead-free)(Small-diameter wire, 0.5–1.0 mm for joints.)
- Flux(Rosin flux for metals; apply thin, even layer.)
- Heat sink or copper shielding(Protects heat-sensitive parts during heating.)
- Safety gear: goggles, gloves(Eye protection and heat protection are essential.)
- Ventilation source (fume hood or outdoors)(Prevent fume buildup in the workspace.)
- Alcohol and brass brush(Clean and prep surfaces before soldering.)
- Solder wick (desoldering braid)(Bridge gaps and wick excess solder if needed.)
Steps
Estimated time: 30-60 minutes
- 1
Gather tools and materials
Lay out all essential items within easy reach. Verify torch, brackets, flux, solder, and heat sinks are present and in good condition. This upfront check saves time during the actual work.
Tip: Keep a scrap piece handy to test heat and flux behavior. - 2
Prepare the workspace and components
Clean surfaces with isopropyl alcohol and lightly abrade oxides. Align parts for a minimal gap and secure them with a jig or tweezers. Proper preparation improves flow and joint integrity.
Tip: Avoid touching energized electronics with bare hands. - 3
Apply flux and position parts
Apply a thin flux layer to mating surfaces and clamp parts in place. Flux aids wetting and helps the solder flow where you want it.
Tip: Less is more—too much flux can spatter and cause mess. - 4
Ignite torch and set flame
Ignite the MAP gas torch and adjust to a neutral, slightly reducing flame. This flame type heats evenly without scorching flux residues.
Tip: Test on a scrap piece to verify heat control before touching the project. - 5
Heat the joint and apply solder
Begin heating the joint evenly; bring it to the solder’s melting temperature. Apply solder to the joint, not the flame, and allow capillary action to draw solder in.
Tip: If solder doesn’t flow, recheck flux cleanliness and surface prep. - 6
Inspect, cool, and clean
Withdraw heat and let the joint cool undisturbed. Inspect for a smooth, glossy finish and uniform fill. Wipe away flux residue after cooling.
Tip: Use a magnifier for delicate joints to ensure no cold joints or bridges.
Quick Answers
Is MAP gas suitable for electronics soldering?
MAP gas can overheat boards and delicate components if not managed carefully. Use a heat sink, low heat settings, and brief contact with the joint. For sensitive electronics, consider alternative heat sources or micro-torches designed for precision.
MAP gas can overheat electronics; use heat sinks and brief joints, or consider gentler heat sources for delicate boards.
What safety gear should I wear when soldering with MAP gas?
Wear safety glasses, heat-resistant gloves, and ensure proper ventilation. Keep flammable materials away from the torch and never leave a lit torch unattended.
Wear goggles and gloves, and always work with ventilation; never leave the torch lit unattended.
Can MAP gas be used with lead-free solder?
Yes, MAP gas can be used with lead-free solder, but flux choice and joint cleanliness remain critical for reliable wetting. Ensure you use appropriate flux for the metal you’re joining.
MAP gas works with lead-free solder if you choose the right flux and keep surfaces clean.
How do I avoid overheating a joint when using MAP gas?
Heat the joint gradually, maintain a moving flame, and use heat sinks to draw excess heat away from sensitive areas. Practice on scrap pieces to gauge heat delivery.
Move the flame, heat gradually, and use heat sinks to prevent overheating.
What is the difference between MAP gas and propane for soldering?
MAP gas burns hotter than propane, enabling faster heat-up of joints. Propane is cooler and may be safer for small components, but it takes longer to reach melting temperature. Choose based on the project’s heat needs and component sensitivity.
MAP gas heats faster, propane cooler; pick based on heat needs and component safety.
Will MAP gas joints be as strong as traditional methods?
A properly prepared joint with appropriate flux and clean surfaces can be strong, but MAP gas heat can risk overheating if not controlled. Follow best practices and inspect joints for uniform wetting to ensure strength.
If done correctly with proper flux and heat control, MAP joints can be strong.
Watch Video
Top Takeaways
- Know when MAP gas is appropriate for your task
- Prep joints thoroughly with flux and clean surfaces
- Control heat with a fine nozzle and heat sinks
- Ventilate workspace to manage fumes
- Practice with scrap pieces before final assembly