Solder to Repair Metal: A Practical How-To Guide
Learn a safe, durable method to solder metal joints for jewelry, plumbing, and metalwork. Prep, material choice, heating technique, and finishing covered with expert guidance from SolderInfo.

With this guide, you will learn how to solder to repair metal joints and wrought pieces using solder, flux, and a heat source. You'll learn surface prep, choosing the right solder and flux, and safe heating techniques to avoid burns or warping. According to SolderInfo, proper prep and cool-down are the biggest differences between a durable repair and a failed one.
Why soldering to repair metal matters
Metal repairs using solder extend the life of tools, jewelry, pipes, and structural metalwork when joints must be rejoined, built up, or repaired without welding. Solder creates a bond at temperatures lower than welding, minimizing damage to surrounding material. According to SolderInfo, durable metal repairs start with clean surfaces and proper solder choice. The goal is a reliable joint that conducts heat and resists corrosion while maintaining the look of the piece. In electronics, metalwork, plumbing, and jewelry alike, the basic idea is the same: create a clean, wetted surface, apply flux to promote flow, heat evenly, and introduce solder so it flows to all interfaces. This section will outline why soldering can be preferable to replacing components and how the process differs by metal type, thickness, and the required joint geometry.
Materials and tools overview
Solders come in various alloys; flux types range from rosin-based to acid for plumbing. For most hobby repairs, lead-free solder is preferred for safety and corrosion resistance, while leaded alloys can offer good flow for some metals. Flux assists wetting and prevents oxidation during heating. A basic toolkit includes a soldering iron (or blow torch for larger jobs), a heat source, clamps, safety glasses, a wet sponge for tip cleaning, and desoldering braid for corrections. Keep a clean workspace, good ventilation, and a means to quickly extinguish a small flame if needed. For delicate work, consider a temperature-controlled iron and a small tip that concentrates heat precisely where you need it.
Surface preparation and safety basics
Begin by cleaning the repair area with a degreaser or isopropyl alcohol to remove oils, dirt, and residues. Lightly abrade the surfaces with a fine abrasive pad to improve mechanical grip and improve solder flow. If rust or scale exists, remove it with a brush or file before proceeding. Dry the area completely, then apply an appropriate flux to the joints. Always wear safety glasses, gloves, and ensure proper ventilation. Keep a water bottle and baking soda handy in case of minor flux spills, and never heat plastics or soft seals near a metal repair.
Choosing solder and flux for metal repairs
Select a solder alloy that suits the metal type and the repair thickness. For most jewelry and thin metalwork, a lead-free Sn-Ag-Cu alloy with rosin flux provides a reliable balance of flow and strength. Flux choice matters as well: rosin-based fluxes work well for clean metal surfaces, while acid fluxes are sometimes required for tougher metals or older joints. Avoid using the wrong flux for the metal you’re repairing, as this can corrode the surface or leave a detrimental residue that weakens the joint. Always follow the manufacturer’s guidelines for flux and solder compatibility.
Techniques for reliable joints: heating, tinning, and placement
Heat the joint evenly, and avoid overheating to prevent warping or burning the metal. Tin the soldering iron tip first to ensure quick, smooth transfer of solder. Apply flux to the joint, touch the tip to the joint to begin heating, and feed solder to the heated area rather than directly onto the iron. Capillary action will draw the solder into the joint if heat and flux are appropriate. After the solder flows, remove heat and allow the joint to cool slowly to room temperature. Inspect for a smooth, continuous fillet with no gaps or voids.
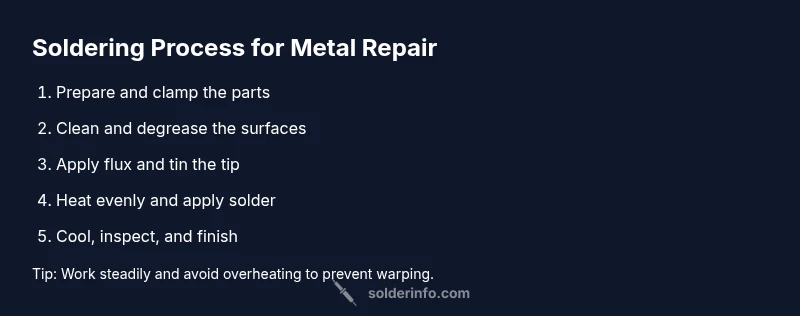
Step-by-step repair workflow (overview)
In a typical repair, start with a clean, prepared surface, then clamp the parts so they won’t move. Apply flux, heat the joint evenly, and feed the solder from the opposite side to promote capillary action. Inspect the bond while it’s still warm, making any minor adjustments before fully cooling. Clean flux residue after cooling using the recommended solvent. For repairs on critical joints, test the bond for mechanical strength and water-tightness if applicable. Finish by polishing or sealing as needed to match the surrounding metal.
Finishing, inspection, and maintenance
Once cooled, remove any flux residue with an appropriate solvent and wipe the surface with a clean cloth. If a patina or finish is desired, apply it after verifying the joint’s integrity. Inspect the joint for uniform coverage, absence of cold joints, and consistent flow along the seam. If the joint looks dull or rough, you can lightly polish it to improve appearance, taking care not to remove the solder. Store solder, flux, and tools in a dry, organized space to prolong their life and maintain readiness for future repairs.
Common mistakes and troubleshooting
Common issues include cold joints, insufficient wetting, overheating, and flux residue causing corrosion or discoloration. If a joint is suspect, rework by reheating with the joint slightly warm and reapplying solder as needed. In some cases, removing excess solder with desoldering braid and reflowing the joint produces a stronger bond. Always allow a repaired area to cool slowly; rapid cooling can lead to cracking or warping.
Safety, storage, and best practices
Soldering involves high heat; always wear eye protection and heat-resistant gloves. Work in a well-ventilated space to avoid inhaling fumes, especially when using flux. Store flux and solder in labeled containers away from heat sources and moisture. Dispose of flux waste according to local guidelines, and keep a small fire extinguisher accessible for emergencies. Regularly inspect and replace worn tips, clamps, and sponges to maintain performance.
Tools & Materials
- Soldering iron or micro torch(Temperature-controlled preferred for delicate metal repairs; use a fine tip for precision)
- Solder (lead-free preferred, appropriate alloy for metal type)(Choose an alloy that matches the metal thickness and desired joint strength)
- Flux (rosin-based or acid flux as appropriate)(Rosin flux for most metalwork; acid flux for certain plumbing applications (use with care))
- Soldering iron cleaner / wet sponge(Keep the tip clean to maintain heat transfer)
- Desoldering braid or pump(Useful for correcting mistakes)
- Clamps or helping hands(Secure parts to prevent movement during heating)
- Degreasing solvent (isopropyl alcohol or acetone)(Degrease the workpiece before flux application)
- Safety gear (goggles, gloves, ventilation)(Always protect eyes and lungs; ensure airflow)
- Desiccant or dry storage for solder and flux(Keep materials dry to preserve performance)
Steps
Estimated time: Total: about 1 hour 15 minutes
- 1
Prepare the workspace
Clear the area, set up clamps, and turn on ventilation. Gather all materials and place them within easy reach. Ensure you have a fire extinguisher nearby and a water source for small spills.
Tip: Lay out a protective pad to prevent heat damage to your work surface. - 2
Secure the parts
Clamp the metal pieces so they won’t shift during heating. Use non-marring clamps to avoid leaving marks on the metal. Position joints so that solder can flow naturally into the seam.
Tip: Avoid clamping directly over the joint to prevent blocking solder flow. - 3
Clean and degrease
Wipe with a degreaser to remove oils and dirt. If oxidation is present, gently abrade the surface with a fine pad until it shines. Dry thoroughly before applying flux.
Tip: Do not over-scrub; you want a clean matte surface that wets well. - 4
Choose solder and flux
Select a solder alloy suitable for the metal and thickness. Apply flux to the joint to improve flow and prevent oxidation during heating.
Tip: Test a small scrap piece first to confirm flow characteristics. - 5
Pre-tin the iron tip
Lightly coat the iron tip with a small amount of solder to improve heat transfer. Wipe away excess solder to prevent blob formation.
Tip: Regular tip maintenance prevents dry tips and improves consistency. - 6
Heat and apply solder
Hold the joint at an even heat. Feed solder into the seam, not directly onto the iron, letting capillary action pull it in. Stop applying heat as soon as the joint glistens and solder flows.
Tip: If solder beads, you’re overheating; back off heat slightly and retarget the joint. - 7
Cool and inspect
Allow the joint to cool naturally on a non-flammable surface. Inspect for a smooth fillet with uniform flow and no gaps. If needed, reheat lightly to repair seams.
Tip: Quench cooling can cause cracking; avoid rapid cooling unless you’re certain it won’t deform the piece. - 8
Clean up and test
Wipe away flux residue with solvent and a lint-free cloth. Test the bond by gentle pressure or functional test if applicable. Clean the area for finish work or patina.
Tip: Residual flux can attract moisture; cleaning prevents corrosion over time. - 9
Store materials properly
Seal containers after use and store in a dry place to prevent oxidation and moisture build-up. Keep a labeled inventory of tools and solder alloys for future projects.
Tip: Desiccate flux containers to extend shelf life and prevent moisture-induced issues.
Quick Answers
Can solder be used on all metals for repair?
Solder works best on metals that are solderable and have clean, compatible surfaces. Some metals require specialty alloys, fluxes, or brazing methods. Always test on scrap material and follow manufacturer guidance for compatibility.
Solder works on many metals with clean surfaces, but some metals need special alloys or brazing instead. Test on scrap material first.
Is lead-based solder safe for jewelry or food-contact items?
Lead-based solders are generally avoided for jewelry and items that contact skin or food. Use lead-free alloys for safety and regulatory compliance. Serve and finish products accordingly.
Lead-free solders are safer for jewelry and items that touch skin or food. Use lead-free alloys and follow safety guidelines.
Can solder replace welding for structural metals?
Solder provides limited strength and is not suitable for high-load structural joints. For load-bearing repairs, consider brazing, mechanical fasteners, or welding with appropriate techniques.
Solder isn't ideal for structural loads. For strong joints, use brazing, fastening, or welding as appropriate.
What flux type should I use for metal repair?
Rosin-based fluxes work well for general metal repairs with clean surfaces. Acid fluxes may be needed for difficult metals or older joints, but they require careful handling and neutralization after repair.
Rosin flux works for many repairs, but some metals need acid flux; handle carefully and clean afterward.
How do I remove excess solder after repair?
Desoldering braid or a desoldering pump can remove excess solder. Reflow the joint if needed to re-establish a clean bond.
Use desoldering braid or a pump to remove extra solder, then reflow the joint if needed.
What safety gear is essential for soldering repairs?
Wear safety glasses and heat-resistant gloves, ensure good ventilation, and keep a fire extinguisher nearby.
Protect your eyes and hands, ventilate the area, and have a fire extinguisher handy.
Watch Video
Top Takeaways
- Prepare metal surfaces thoroughly before soldering
- Choose solder and flux appropriate for the metal type
- Maintain steady heat to prevent warping or oxidation
- Inspect and clean joints for a durable repair